WINDSHIELD GLASS REMOVAL

-
REMOVE FRONT WIPER ARM HEAD CAP
-
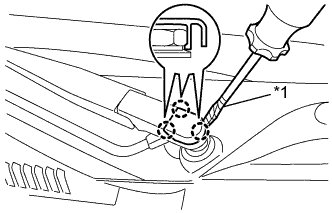
Text in Illustration *1 Protective Tape Using a screwdriver with its tip wrapped in protective tape disengage the 3 claws and, remove the front wiper arm head cap.
-
-
REMOVE FRONT WIPER ARM
-
Operate the wiper, then stop the windshield wiper motor assembly in the automatic stop position.
-
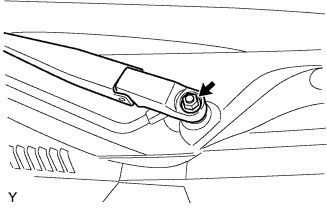
Remove the nut and front wiper main arm.
-
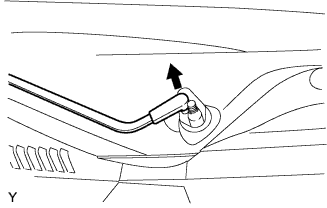
Remove the secondary arm.
Note
Do not bend the secondary arm when removing it.
-
-
REMOVE FRONT FENDER TO COWL SIDE SEAL LH
-
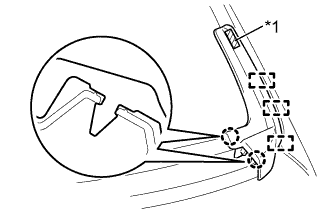
Text in Illustration *1 Double-sided Tape Disengage the 2 claws and 3 guides.
-
Peel off the double-sided tape and remove the front fender to cowl side seal LH.
-
-
REMOVE FRONT FENDER TO COWL SIDE SEAL RH
Tech Tips
Use the same procedure as for the LH side.
-
REMOVE HOOD TO COWL TOP SEAL
-
Remove the 5 clips and hood to cowl top seal.
-
-
REMOVE COWL TOP VENTILATOR LOUVER
-
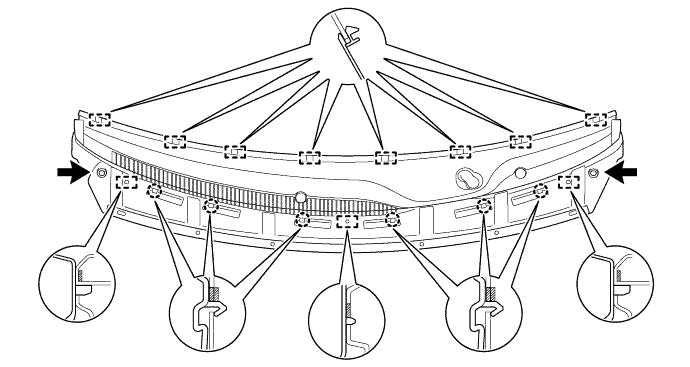
Remove the 2 clips.
-
Disengage the 6 claws, 11 guides and remove the cowl top ventilator louver.
-
Disconnect the washer hose.
-
-
REMOVE ROOF HEADLINING ASSEMBLY (5 DOOR)
-
REMOVE ROOF HEADLINING ASSEMBLY (3 DOOR)
-
REMOVE INNER REAR VIEW MIRROR ASSEMBLY
-
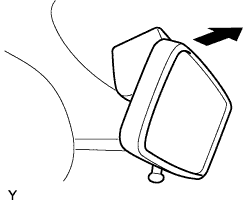
Remove the inner rear view mirror assembly, as shown in the illustration.
-
-
REMOVE WINDSHIELD GLASS
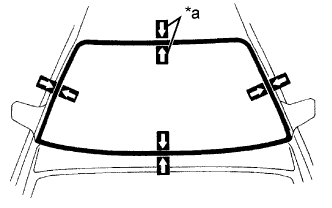
Text in Illustration *a Matchmarks
-
Place matchmarks on the windshield glass and vehicle body in the locations indicated in the illustration.
Tech Tips
Matchmarks do not need to be placed unless the windshield glass is going to be reused.
-
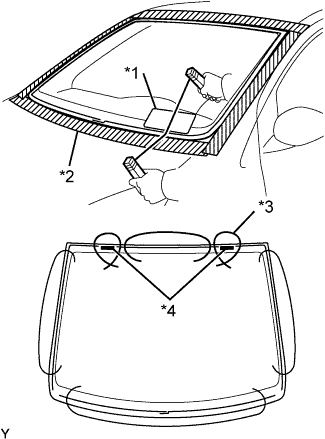
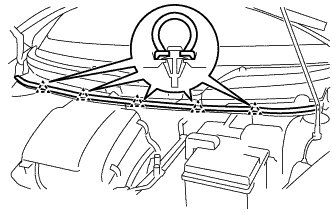
Text in Illustration *1 Plastic Sheet *2 Protective Tape *3 Piano Wire *4 Stopper Apply protective tape to the outer circumference of the windshield glass, as shown in the illustration.
-
From the interior, insert piano wires between the vehicle body and windshield glass, as shown in the illustration.
-
Tie objects that can serve as handles (for example, wooden blocks) to all wire ends.
Note
-
When separating the windshield glass from the vehicle, do not damage the vehicle's paintmark or exterior/interior ornaments.
-
To prevent the safety pad from being scratched when removing the windshield glass, place a plastic sheet between the piano wire and safety pad.
-
-
Cut through the adhesive by pulling the piano wire around the windshield glass.
-
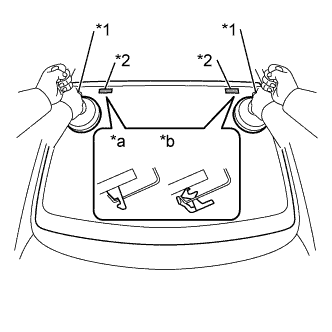
Text in Illustration *1 Suction Cup *2 Stopper *a 1 Piece Type *b 2 Piece Type Disengage the 2 stoppers.
-
Using suction cups, remove the windshield glass.
Note
Leave as much adhesive on the vehicle body as possible when removing the windshield glass.
-