BACK DOOR GLASS INSTALLATION

-
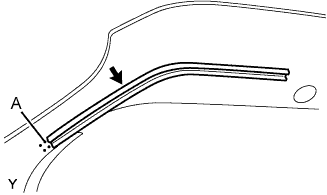
INSTALL BACK DOOR PROTECTOR BASE ASSEMBLY NO.2
-
Peel the release paper from 2-sided tape.
-
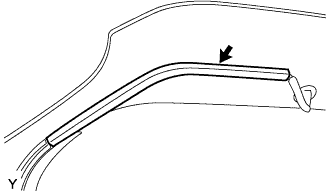
Install back door protector base assembly No. 2 onto the back door glass with one edge aligned with mark A, as shown in the illustration.
-
-
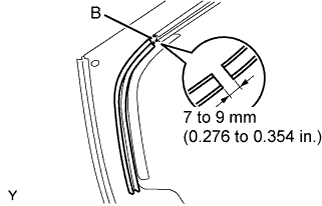
INSTALL BACK DOOR PROTECTOR BASE ASSEMBLY NO.1
-
Peel the release paper from 2-sided tape.
-
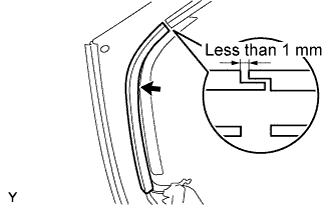
Install back door protector base assembly No. 1 onto the back door glass with one edge aligned with mark B, as shown in the illustration.
-
-
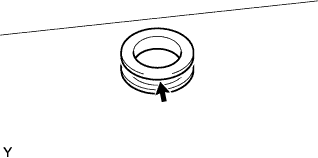
INSTALL REAR WIPER MOTOR GROMMET
-
Install the rear wiper motor grommet onto the back door glass sub-assembly.
-
-
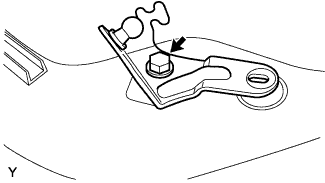
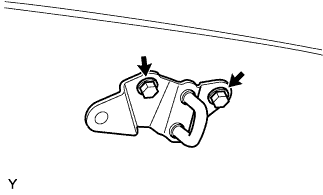
INSTALL BACK DOOR HINGE SUB-ASSEMBLY UPPER LH

-
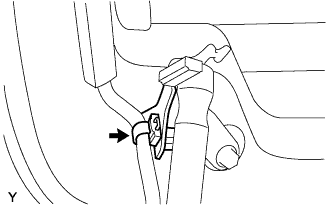
Install the back door hinge sub-assembly LH with the nut.
- Torque:
- 27 N*m { 275 kgf*cm, 20 ft.*lbf }
-
-
INSTALL BACK DOOR HINGE SUB-ASSEMBLY UPPER RH
Tech Tips
Use the same procedure as described for the LH side.
-
INSTALL BACK DOOR GLASS
-
Install the 2 back door upper hinge retainers onto the back door glass.
-
Provisionally install the back door damper stay bracket upper LH with the bolt.
-
Install the quarter window hinge retainer and bush onto the back door glass from outside the back door glass, then tighten the back door damper stay bracket upper LH with the bolt.
- Torque:
- 7.5 N*m { 76 kgf*cm, 66 in.*lbf }
-
Install the back door glass with the 2 bolts.
- Torque:
- 17 N*m { 168 kgf*cm, 12 in.*lbf }
-
-
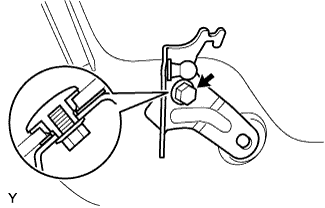
INSTALL BACK DOOR STAY ASSEMBLY
-
Install the back door stay bolt.
- Torque:
- 22 N*m { 224 kgf*cm, 16 ft.*lbf }
-
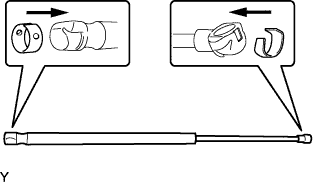
Install the 2 stop rings onto the back door stay assembly.
-
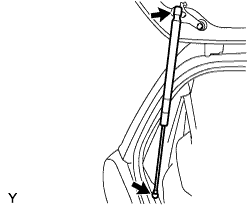
Install the back door stay assembly.
Note
Push in the back door stay assembly until it makes a click sound.
-
Install the screw and clip.
-
-
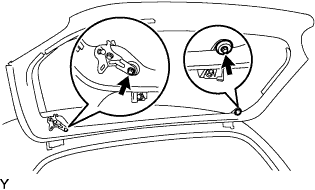
INSTALL BACK DOOR HANDLE ASSEMBLY OUTSIDE
-
Install the back door outside handle assembly onto the back door glass.
-
-
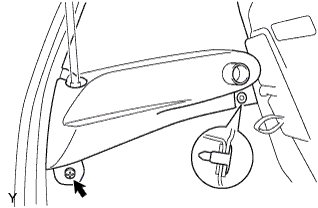
INSTALL BACK DOOR LOWER LOCK STRIKER ASSEMBLY
-
Install the back door lock striker assembly with the 2 bolts.
- Torque:
- 9.0 N*m { 92 kgf*cm, 80 in.*lbf }
-
-
CONNECT WIRE HARNESS
-
Fit the wire harness into the groove of the back door protector base No. 2, and install the back door protector cover No. 2.
-
Fit the wire harness into the groove of the back door protector base No. 1, and install the back door protector cover No. 1.
-
Connect the wire harness clamp.
-
Connect the 2 connectors.
-
-
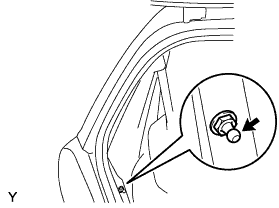
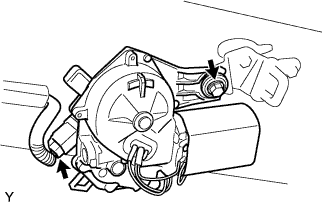
INSTALL REAR WIPER MOTOR ASSEMBLY
-
Install the rear wiper motor assembly with the bolt.
- Torque:
- 9.0 N*m { 92 kgf*cm, 80 in.*lbf }
-
Connect the connector.
-
-
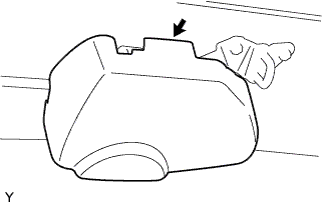
INSTALL REAR WIPER MOTOR COVER
-
Install the rear wiper motor cover.
-
-
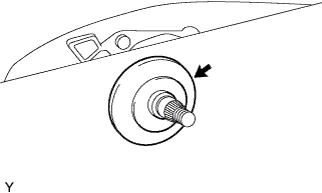
INSTALL REAR WIPER LINK CAP
-
Install the rear wiper link pivot washer No. 1.
-
Install the nut.
- Torque:
- 5.5 N*m { 56 kgf*cm, 49 in.*lbf }
-
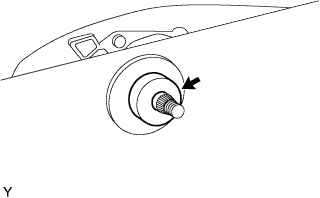
Install the rear wiper link cap.
-
-
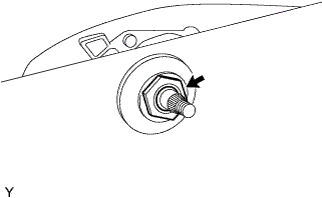
INSTALL REAR WIPER ARM
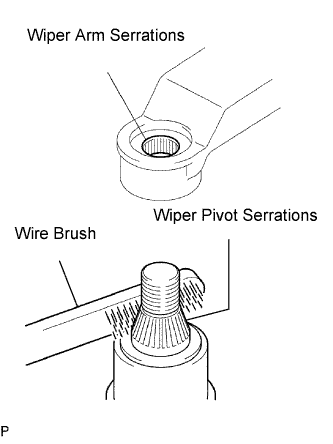
-
Scrape any metal powder off the serrated part of the wiper arm with a round file or equivalent (when reinstalling).
-
Clean the wiper pivot serrations with a wire brush.
-
Operate the wiper, then stop the windshield wiper motor assembly in the automatic stop position.
-
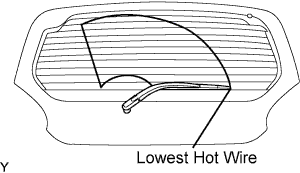
Install the rear wiper arm into position shown in the illustration with the nut.
- Torque:
- 14 N*m { 143 kgf*cm, 10 ft.*lbf }
Tech Tips
Hold down the arm hinge by hand while tightening the nut.
-
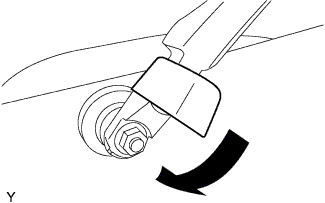
Close the rear wiper arm head cap.
-
-
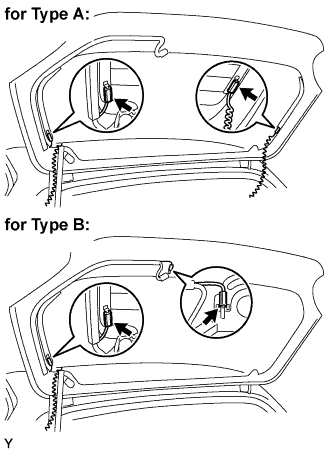
INSTALL BACK DOOR EMBLEM NO.1
-
Using an infrared light, heat the double sided tape remaining on the back door glass.
Heating Temperature Item Temperature Back Door Emblem No. 1 40 to 60°C (104 to 140°F) -
Using a piece of cloth, rub off the remaining double sided tape from the back door glass.
Note
Installing the name plate with any double sided tape remaining on the back door glass may cause adhesion failure.
So completely remove the double sided tape.
-
Clean the attachment surface on the back door glass using a non-residue solvent.
-
Apply Primer G to the attachment surface on the back door glass.
Note
-
Allow the primer to dry for 3 minutes or more.
-
Throw away any leftover Primer G.
-
Do not apply too much Primer G.
-
-
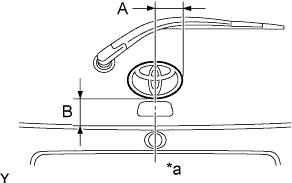
Text in Illustration *a Center Install a new back door emblem.
Specification Area Measurement A 59 to 61 mm (2.323 to 2.402 in.) B 64.2 to 66.2 mm (2.528 to 2.606 in.) Note
Do not expose the emblem to water within 24 hours of installation.
-
-
CONNECT CABLE TO NEGATIVE BATTERY TERMINAL
- Torque:
- 5.4 N*m { 55 kgf*cm, 48 in.*lbf }