FRONT DOOR LOCK REMOVAL

Tech Tips
-
Use the same procedure for both the RH and LH sides.
-
The procedure listed below is for the LH side.
-
DISCONNECT CABLE FROM NEGATIVE BATTERY TERMINAL
-
REMOVE DOOR ASSIST GRIP COVER
-
Using a screwdriver with its tip wrapped in protective tape, disengage the 2 claws and remove the door assist grip cover.
-
-
REMOVE ASSIST GRIP ASSEMBLY

-
Remove the 2 screws and disengage the 4 claws.
-
-
REMOVE FRONT ARMREST BASE PANEL UPPER
-
Using a screwdriver with its tip wrapped in protective tape, disengage the 3 claws and remove the front armrest base panel upper.
-
Disconnect the connector and remove the front armrest base panel upper.
-
-
REMOVE FRONT DOOR TRIM BOARD SUB-ASSEMBLY
-
Remove the screw.
-
Disengage the 15 clips and remove the front door trim board sub-assembly.
-
-
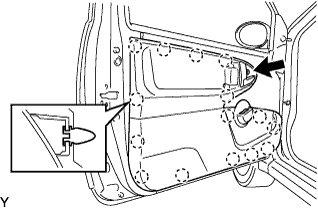
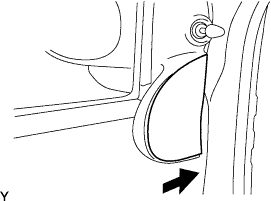
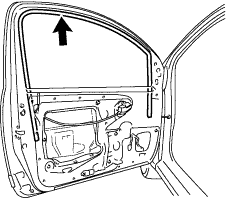
REMOVE FRONT DOOR FRONT LOWER FRAME COVER UPPER
-
Remove the front door front lower frame cover upper by sliding it in the direction indicated by the arrow in the illustration.
-
-
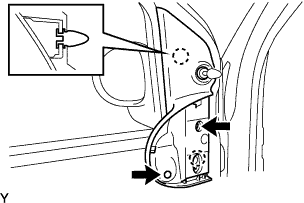
REMOVE FRONT DOOR LOWER FRAME BRACKET GARNISH
-
Remove the 2 screws and disengage the 2 clips.
-
-
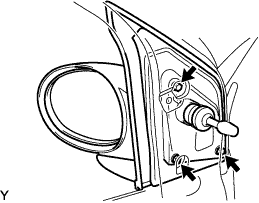
REMOVE OUTER REAR VIEW MIRROR ASSEMBLY
-
Remove the 3 screws and outer rear view mirror assembly LH.
-
-
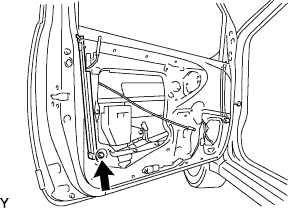
REMOVE FRONT DOOR SERVICE HOLE COVER

-
Remove the front door service hole cover.
Note
Remove any tape remaining on the door.
-
-
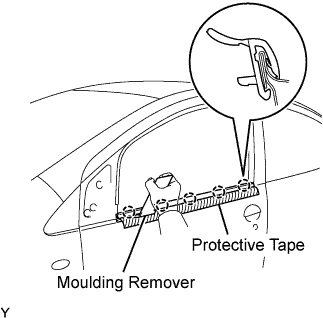
REMOVE FRONT DOOR GLASS WEATHERSTRIP ASSEMBLY OUTER
-
Apply protective tape to the outer circumference of the front door belt moulding, as shown in the illustration.
-
Using a moulding remover, disengage the 5 claws and remove the front door belt moulding.
-
-
REMOVE FRONT DOOR GLASS WEATHERSTRIP ASSEMBLY INNER
-
REMOVE FRONT DOOR GLASS RUN
-
Remove the front door glass run.
-
-
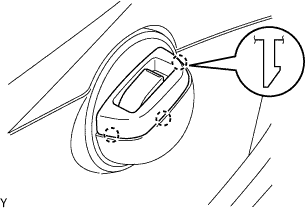
REMOVE FRONT DOOR GLASS SUB-ASSEMBLY
-
Connect the power window regulator switch.
-
Move the door glass until the 2 screws can be seen through the service holes.
-
Remove the 2 screws and front door glass sub-assembly.
Note
Do not allow the front door glass sub-assembly to fall or be damaged when removing the screw.
-
Disconnect the power window regulator switch.
-
-
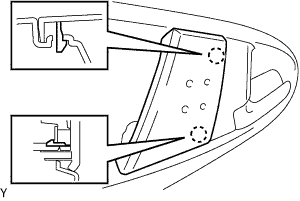
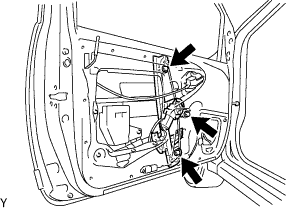
REMOVE FRONT DOOR WINDOW REGULATOR SUB-ASSEMBLY
-
Disconnect the connector.
-
Remove the 3 nuts and front door window regulator sub-assembly.
Note
Do not allow the front door window regulator sub-assembly to fall or be damaged when removing the nuts.
Tech Tips
Remove the front door window regulator sub-assembly through the service hole.
-
-
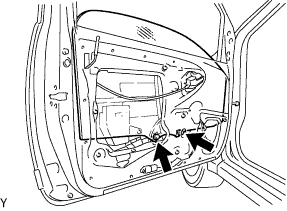
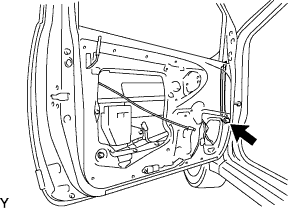
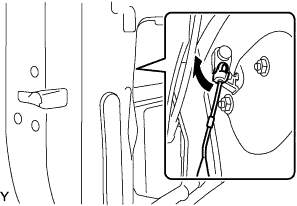
REMOVE FRONT DOOR FRAME SUB-ASSEMBLY FRONT LOWER
-
Remove the bolt and front door frame sub-assembly front lower.
-
-
REMOVE FRONT DOOR FRAME SUB-ASSEMBLY REAR LOWER
-
Remove the bolt and front door frame sub-assembly rear lower.
-
-
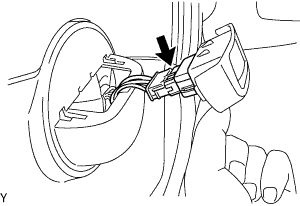
REMOVE FRONT DOOR INSIDE HANDLE SUB-ASSEMBLY
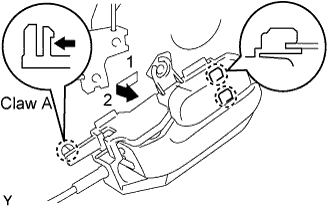
-
Disengage claw A.
-
Move the front door inside handle sub-assembly in the direction indicated by the arrow mark in the illustration. This will release the claws and allow the removal of the front door inside handle sub-assembly.
-
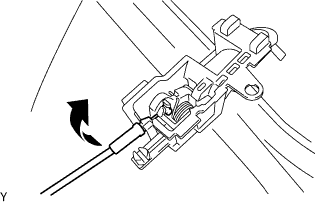
Disconnect the cable from the front door inside handle sub-assembly by pulling it in the direction indicated by the arrow in the illustration.
-
-
REMOVE FRONT DOOR LOCK ASSEMBLY
-
Disconnect the front door lock open rod, as shown in the illustration.
-
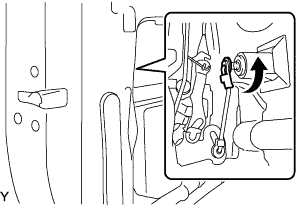
Disconnect the front outside locking link, as shown in the illustration.
-

Remove the bolt.
-
Using torx socket wrench T30, remove the 3 screws and front door lock assembly.
-
-
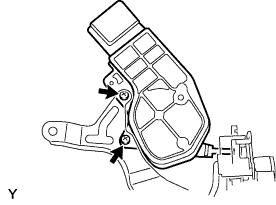
REMOVE FRONT DOOR LOCK ACTUATOR ASSEMBLY
-
Remove the 2 screws and front door lock actuator assembly.
-