COMPRESSOR AND MAGNETIC CLUTCH (for 2WZ-TV) REMOVAL

-
DISCHARGE REFRIGERANT FROM REFRIGERATION SYSTEM
-
Start up the engine.
-
Switch A/C ON.
-
Turn the blower switch to ON.
-
Operate the cooler compressor with an engine speed of approximately 1,000 rpm for 5 to 6 minutes to circulate the refrigerant and collect the compressor oil remaining in each component into the cooler compressor.
-
Stop the engine.
-
Remove the caps from the service valves on the refrigerant line.

-
Connect the Freon collection/recycling device to discharge the refrigerant gas remaining in the refrigeration system.
Note
Use the Freon collection/recycling device in accordance with the manufacturer's instruction manual.
-
-
DISCONNECT CABLE FROM NEGATIVE BATTERY TERMINAL
-
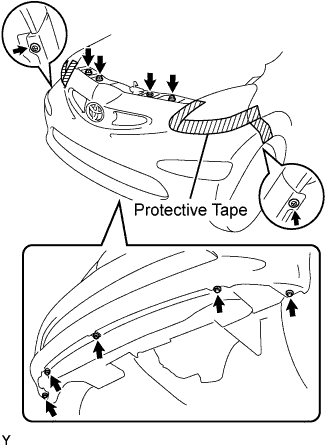
REMOVE FRONT BUMPER COVER
-
Apply protective tape to the outer circumference of the front bumper cover, as shown in the illustration.
-
Using a clip remover, remove the clip.
-
Remove the 3 bolts, 5 screws and 2 clips.
-
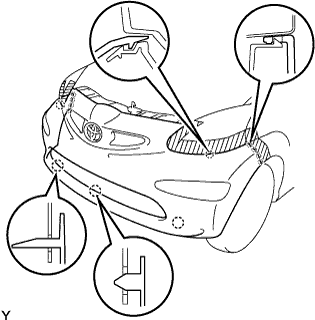
Disengage the 13 claws and remove the front bumper cover.
-
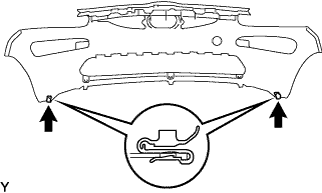
Remove the 2 clips.
-
-
REMOVE FAN & GENERATOR V BELT
-
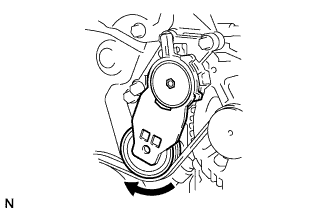
While releasing the belt tension by turning the belt tensioner clockwise, remove the V-ribbed belt from the belt tensioner.
-
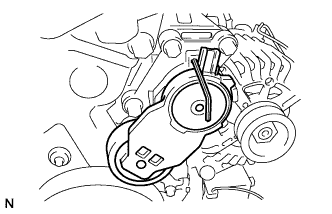
While turning the belt tensioner, align with its holes, and then insert the 3 mm (0.1181 in.) hexagon wrench into the holes to fix the V-ribbed belt tensioner.
-
-
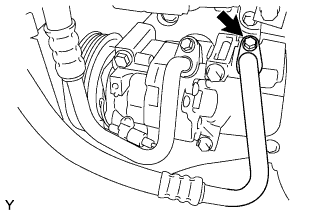
DISCONNECT SUCTION HOSE SUB-ASSEMBLY
-
Remove the bolt and disconnect the suction hose sub-assembly.
-
Remove the 2 O-rings from the suction hose sub-assembly.
Note
Seal the opening of the disconnected parts using vinyl tape to prevent moisture and foreign matter from entering.
-
-
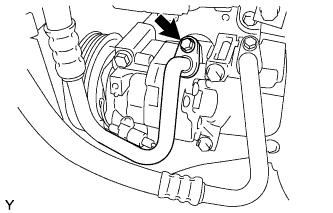
DISCONNECT DISCHARGE HOSE SUB-ASSEMBLY
-
Remove the bolt and disconnect the discharge hose sub-assembly.
-
Remove the 2 O-rings from the discharge hose sub-assembly.
Note
Seal the opening of the disconnected parts using vinyl tape to prevent moisture and foreign matter from entering.
-
-
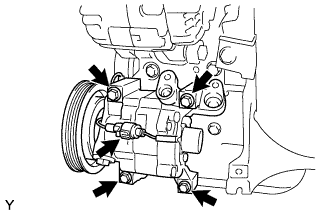
REMOVE COMPRESSOR AND MAGNETIC CLUTCH
-
Disconnect the connector.
-
Remove the bolt, nut and compressor stay No. 1.
-
Remove the 4 bolts and cooler compressor and magnetic clutch.
-