AIR CONDITIONING UNIT (for 1KR-FE) REMOVAL

-
PRECAUTION
-
RECOVER REFRIGERANT FROM REFRIGERATION SYSTEM
-
Start up the engine.
-
Switch A/C ON.
-
Turn the blower switch to ON.
-
Operate the cooler compressor with an engine speed of approximately 1,000 rpm for 5 to 6 minutes to circulate the refrigerant and collect the compressor oil remaining in each component into the cooler compressor.
-
Stop the engine.
-
Remove the caps from the service valves on the refrigerant line.

-
Connect the Freon collection/recycling device to discharge the refrigerant gas remaining in the refrigeration system.
Note
Use the Freon collection/recycling device in accordance with the manufacturer's instruction manual.
-
-
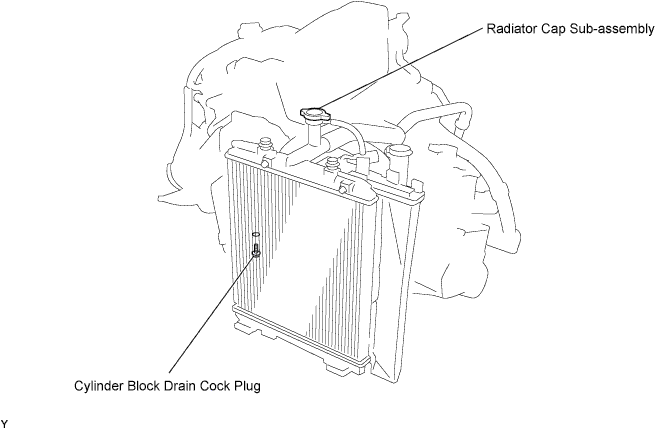
DRAIN ENGINE COOLANT
Note
To avoid the danger of being burned, do not remove the radiator cap sub-assembly while the engine and radiator assembly are still hot. Thermal expansion will cause hot engine coolant and steam to blow out from the radiator assembly.
-
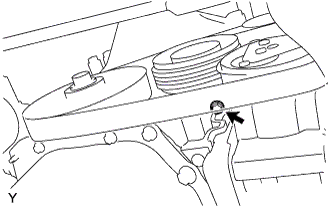
Loosen the cylinder block drain cock plug, then drain the engine coolant.
Tech Tips
The cylinder block drain cock plug is positioned on the bottom edge of the timing chain or belt cover sub-assembly.
-
Remove the radiator cap sub-assembly.
-
Disconnect the radiator outlet hose from the engine side, then drain the engine coolant by bending the hose.
-
-
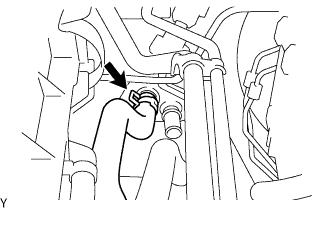
DISCONNECT SUCTION HOSE SUB-ASSEMBLY
-
Remove the bolt and disconnect the suction hose and air conditioning tube.
Note
Seal the openings of the disconnected parts using vinyl tape to prevent moisture and foreign matter from entering.
-
-
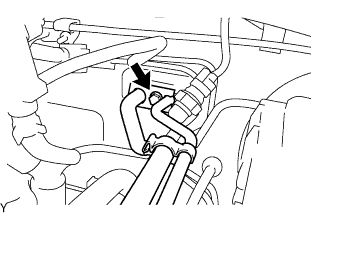
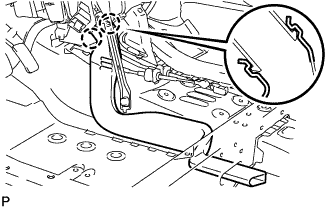
DISCONNECT HEATER WATER INLET HOSE
-
Using pliers, grip the claws of the clip, slide the clip and disconnect the heater water inlet hose from the heater unit.
-
-
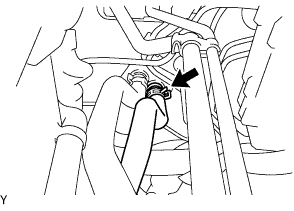
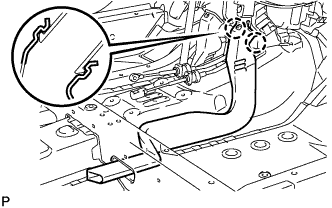
DISCONNECT HEATER WATER OUTLET HOSE
-
Using pliers, grip the claws of the clip, slide the clip and disconnect the heater water outlet hose from the heater unit.
-
-
REMOVE STEERING COLUMN ASSEMBLY
-
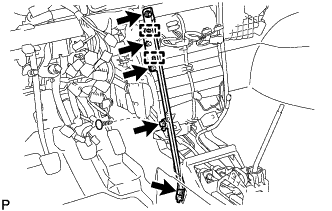
REMOVE INSTRUMENT PANEL BRACE SUB-ASSEMBLY NO. 1
-
Remove the clip and fold back the floor carpet.
-
Disengage the 2 clamps.
-
Remove the 2 wire harness clamp bolts.
-
Remove the bolt, screw, nut and instrument panel brace sub-assembly No. 1.
-
-
REMOVE AIR DUCT REAR NO. 2 (for Cold Area Specification Vehicles)
-
Fold back the floor carpet.
-
Disengage the 2 claws and remove the air duct rear No. 2.
-
-
REMOVE AIR DUCT REAR NO. 1 (for Cold Area Specification Vehicles)
-
Fold back the floor carpet.
-
Disengage the 2 claws and remove the air duct rear No. 1.
-
-
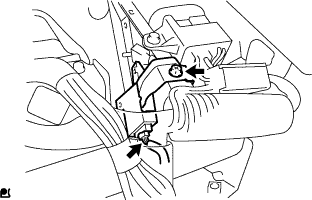
REMOVE TRANSPONDER KEY ECU ASSEMBLY
-
Remove the bolt.
-
Disconnect the connector and remove the transponder key ECU assembly.
-
-
REMOVE DOOR CONTROL WITH RECEIVER ECU ASSEMBLY

-
Disconnect the connector.
-
Remove the bolt and door control with receiver ECU assembly.
-
-
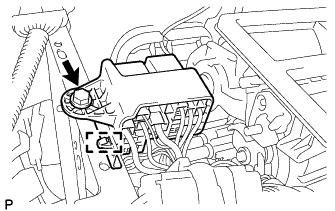
SEPARATE CONNECTOR HOLDER

-
Remove the screw and separate the connector holder.
-
-
SEPARATE RELAY BLOCK ASSEMBLY
-
Remove the screw.
-
Disengage the clamp and separate the relay block assembly.
-
-
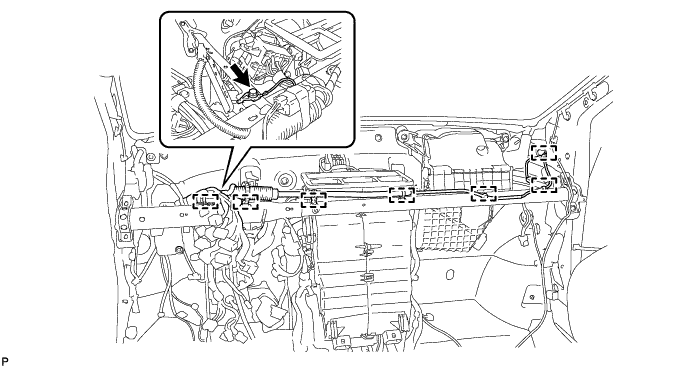
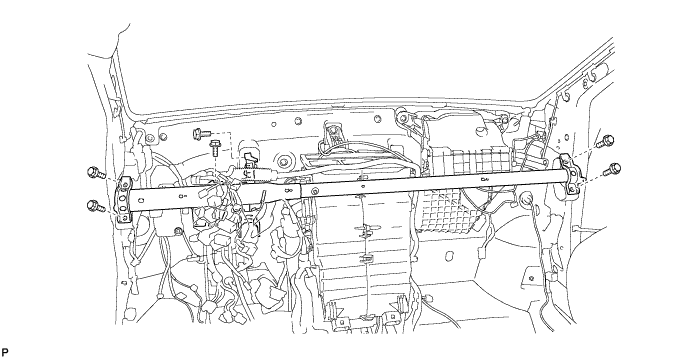
REMOVE INSTRUMENT PANEL REINFORCEMENT
-
Disengage the 7 clamps.
-
Remove the screw.
-
Remove the 6 bolts and instrument panel reinforcement.
-
-
REMOVE AIR CONDITIONER UNIT ASSEMBLY
-
Disconnect the 3 connectors and 2 clamps.
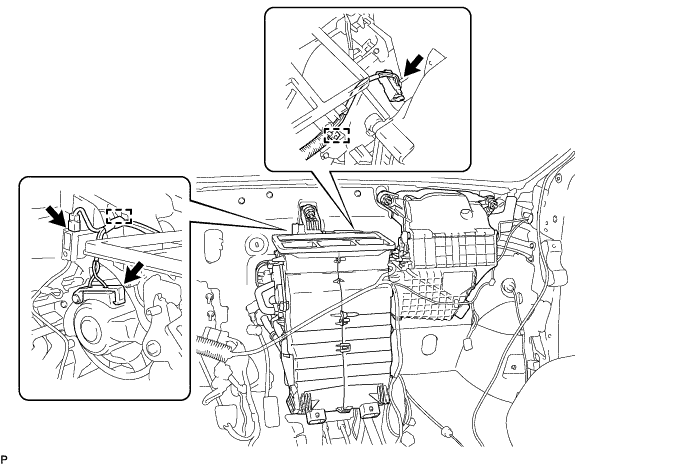
-
Remove the clip, 5 nuts and air conditioner unit sub-assembly.

-