POWER STEERING GEAR REASSEMBLY

-
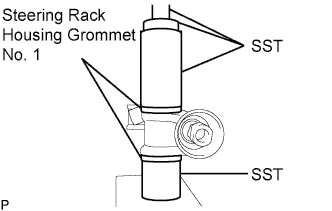
INSTALL STEERING RACK HOUSING GROMMET NO. 1
-
Using SST, install 4 No. 1 new steering rack housing grommets.
- SST
- 09950-70010 ( 09951-07100 )
- 09950-60010 ( 09951-00460 )
- 09631-20081
- 09309-60010
-
-
INSTALL STEERING RACK END SUB-ASSEMBLY
-
Fill the ball joints of the RH and LH rack ends with molybdenum disulfide lithium base grease.
-

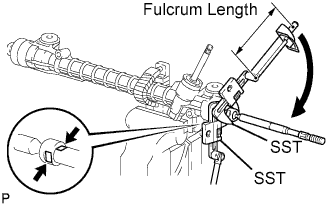
Using SST, hold the steering rack LH side and install the rack end sub-assembly.
- SST
- 09922-10010
- Torque:
- 60 N*m { 612 kgf*cm, 44 ft.*lbf, for use without SST }
- 43 N*m { 438 kgf*cm, 32 ft.*lbf, for use with SST }
Note
-
Use a torque wrench with a fulcrum length of 345 mm (13.58 in.).
-
Use SST in the correct direction, as shown in the illustration.
-
Securely hold the steering rack.
-
Using SST, install the rack end sub-assembly.
- SST
- 09922-10010
- Torque:
- 60 N*m { 612 kgf*cm, 44 ft.*lbf, for use without SST }
- 43 N*m { 438 kgf*cm, 32 ft.*lbf, for use with SST }
Note
-
Use a torque wrench with a fulcrum length of 345 mm (13.58 in.).
-
Use SST in the correct direction, as shown in the illustration.
-
Securely hold the steering rack.
-
-
INSTALL STEERING RACK BOOT LH
-
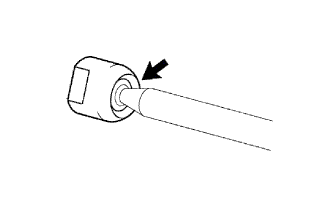
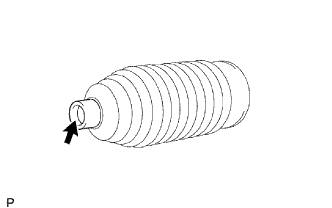
Apply silicon grease to the inside of the small opening of the rack boot LH.
-
Install the rack boot LH in the groove on the rack housing.
Note
Do not twist the rack boot LH.
-
-
INSTALL STEERING RACK BOOT RH
Tech Tips
Perform the same procedure as for the rack boot LH.
-
INSTALL STEERING RACK BOOT CLAMP LH

-
Install a new rack boot clamp LH onto the rack boot LH.
Note
Do not damage the rack boot LH.
-
Using SST, pinch the rack boot clamp LH so that the clearance is within the specifications.
- SST
- 09521-24010
Clearance 3.0 mm (0.12 in.) or less Note
Do not twist the rack boot LH.
-
-
INSTALL STEERING RACK BOOT CLAMP RH
Tech Tips
Perform the same procedure as for the rack boot clamp LH.
-
INSTALL STEERING RACK BOOT CLIP
-
Using pliers, install the 2 rack boot clips onto the RH and LH rack boots.
-
-
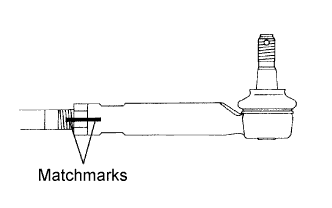
INSTALL TIE ROD END SUB-ASSEMBLY LH
-
Screw the lock nut and the tie rod end sub-assembly LH on the rack end sub-assembly until the matchmarks are aligned and provisionally tighten the lock nut.
Tech Tips
Fully tighten the lock nut after adjusting the toe-in.
-
-
INSTALL TIE ROD END SUB-ASSEMBLY RH
Tech Tips
Perform the same procedure as for the LH side.