REAR SPEED SENSOR INSTALLATION

-
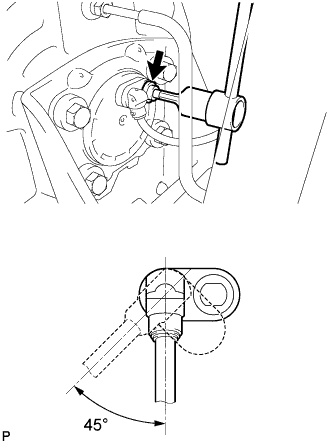
INSTALL REAR SPEED SENSOR
-
Using "TORX" socket wrench T30, install the speed sensor with the screw.
- Torque:
- 8.0 N*m { 82 kgf*cm, 71 in.*lbf }
Note
When turning the speed sensor to insert it, the turning angle should be less than 45° to avoid damaging the O-ring.
Tech Tips
If the installation portion of the sensor is dirty, clean it and reinstall the sensor.
-
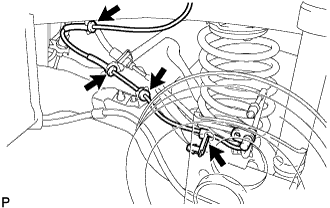
Install the 4 clamps.
-
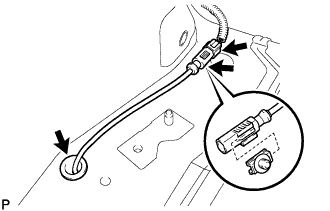
Pull the speed sensor to the inside of the vehicle, and install the grommet.
-
Install the wire harness clamp onto the speed sensor connector.
-
Connect the speed sensor connector.
-
Connect the wire harness clamp to the body.
-
-
INSTALL REAR WHEEL
- Torque:
- 103 N*m { 1,050 kgf*cm, 76 ft.*lbf }
-
INSTALL QUARTER INSIDE TRIM BOARD (for 3 Door)
Tech Tips
Use the same procedure for the LH side and RH side Click here.
-
INSTALL REAR SEAT SIDE GARNISH (for 5 Door)
Tech Tips
Use the same procedure for the LH side and RH side Click here.
-
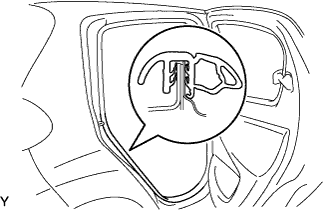
INSTALL FRONT DOOR OPENING TRIM WEATHERSTRIP (for 3 Door)
-
Install the front door opening trim weatherstrip.
-
-
INSTALL REAR DOOR OPENING TRIM WEATHERSTRIP (for 5 Door)
-
Install the rear door opening trim weatherstrip.
-
-
INSTALL REAR SEAT OUTER BELT ASSEMBLY (for 3 Door)
Tech Tips
Use the same procedure for the LH side and RH side Click here.
-
INSTALL REAR SEAT OUTER BELT ASSEMBLY (for 5 Door)
Tech Tips
Use the same procedure for the LH side and RH side Click here.
-
INSTALL PACKAGE TRAY TRIM PANEL ASSEMBLY (for 3 Door)
-
Install the package tray trim panel.
-
-
INSTALL PACKAGE TRAY TRIM PANEL ASSEMBLY (for 5 Door)
-
Install the package tray trim panel.
-
-
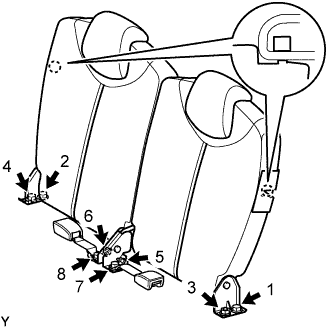
INSTALL REAR SEAT BACK ASSEMBLY (for Separate Seat Type)
-
Place the rear seat back in the cabin.
-
Using several steps, install and tighten the 4 nuts, 4 bolts and 2 rear seat inner belts uniformly in the sequence shown in the illustration.
- Torque:
- 22 N*m { 225 kgf*cm, 16 ft.*lbf, for 1, 2, 3 and 4 }
- 33.8 N*m { 345 kgf*cm, 25 ft.*lbf, for 5 and 6 }
- 42 N*m { 430 kgf*cm, 31 ft.*lbf, for 7 and 8 }
-
Lock the 2 hooks.
-
-
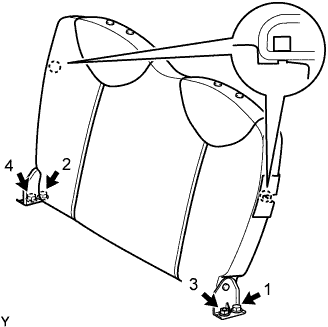
INSTALL REAR SEAT BACK ASSEMBLY (for Bench Seat Type)
-
Place the rear seat back in the cabin.
-
Using several steps, install and tighten the 2 nuts and 2 bolts uniformly in the sequence shown in the illustration.
- Torque:
- 22 N*m { 225 kgf*cm, 16 ft.*lbf }
-
Engage the 2 hooks.
-
-
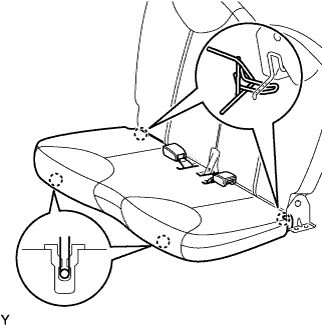
INSTALL REAR SEAT CUSHION ASSEMBLY (for Separate Seat Type)
-
Engage the 4 hooks and install the rear seat cushion.
-
-
INSTALL REAR SEAT CUSHION ASSEMBLY (for Bench Seat Type)
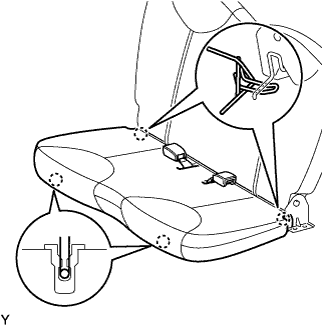
-
Engage the 4 hooks and install the rear seat cushion.
-
-
CONNECT CABLE TO NEGATIVE BATTERY TERMINAL
- Torque:
- 5.4 N*m { 55 kgf*cm, 48 in.*lbf }
-
CHECK ABS SENSOR SIGNAL (w/o VSC)
-
CHECK VSC SENSOR SIGNAL (w/ VSC)