CLUTCH UNIT (for C553) REMOVAL

-
REMOVE MANUAL TRANSAXLE ASSEMBLY
-
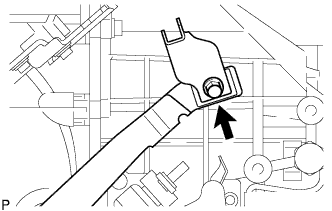
REMOVE RELEASE FORK RETRACTING SPRING HANGER
-
Remove the bolt and the release fork retracting spring hanger.
-
-
REMOVE CLUTCH RELEASE BEARING ASSEMBLY

-
Remove the clutch release bearing from the clutch release fork.
-
-
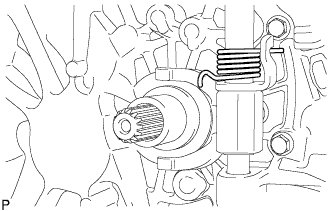
REMOVE CLUTCH RELEASE FORK LEVER
-
Separate the torsion spring from the clutch release fork.
-
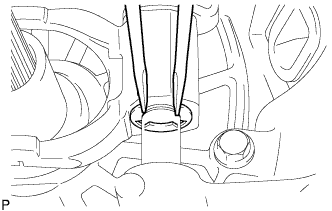
Using 2 screwdrivers and a hammer, tap the E-ring out.
-
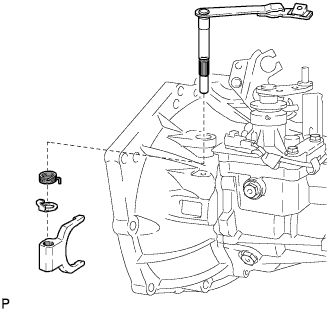
Pull the clutch release fork lever out of the transaxle case to remove the clutch release fork and then, release the fork torsion spring stopper and torsion spring from the clutch.
-
-
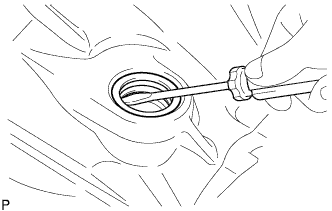
REMOVE CLUTCH RELEASE FORK LEVER SHAFT OIL SEAL
-
Using a screwdriver, remove the clutch release fork lever oil seal.
-
-
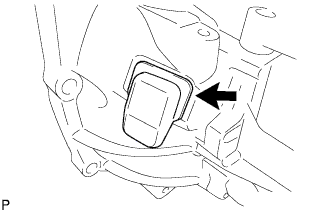
REMOVE NO. 1 CLUTCH HOUSING COVER
-
Remove the No. 1 clutch housing cover from the transaxle case.
-
-
REMOVE CLUTCH COVER ASSEMBLY
-
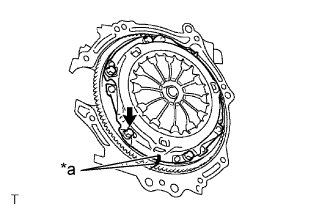
Text in Illustration *a Matchmark Align the matchmark on the clutch cover with the one on the flywheel.
-
Loosen each set bolt by one turn at a time until the spring tension is released.
-
Remove the set bolts and the clutch cover.
Note
Do not drop the clutch disc.
-
-
REMOVE CLUTCH DISC ASSEMBLY
Note
Do not attach any oil or foreign matter to the lining part of the clutch disk or the surfaces of the pressure plate and flywheel.