GENERATOR REMOVAL

-
DISCONNECT NEGATIVE BATTERY CABLE
-
REMOVE ENGINE COVER
-
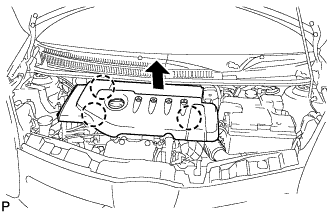
Disengage the 3 claws and remove the engine cover.
-
-
REMOVE ENGINE UNDER COVER
-
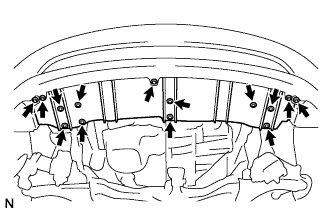
Remove the 9 bolts.
-
Remove the 5 screws and engine under cover.
-
-
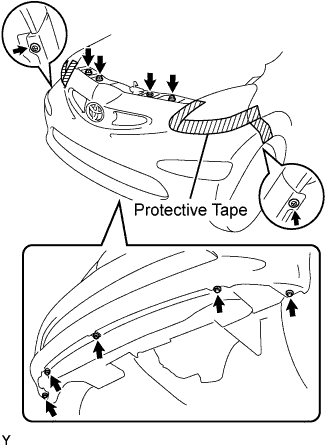
REMOVE FRONT BUMPER COVER
-
Apply protective tape to the outer circumference of the front bumper cover, as shown in the illustration.
-
Using a clip remover, remove the clip.
-
Remove the 3 bolts, 5 screws and 2 clips.
-
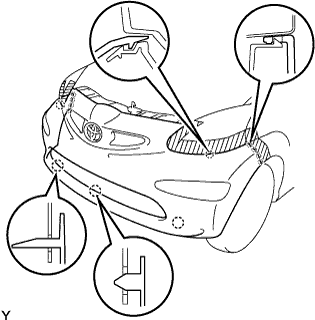
Disengage the 13 claws and remove the front bumper cover.
-
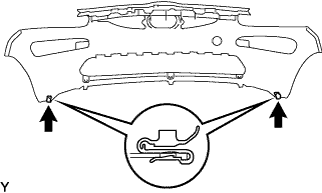
Remove the 2 clips.
-
-
DRAIN ENGINE COOLANT
Note
To avoid the danger of being burned, do not remove the reservoir tank cap sub-assembly while the engine and radiator assembly are still hot. Thermal expansion will cause hot engine coolant and steam to blow out from the radiator assembly.
-
Remove the drain plug and clip, then drain the engine coolant.
-
Disconnect the radiator by uncoupling the radiator hose No.2.
-
Remove the hose clamp, disconnect the water by-pass hose.
-
Remove the reservoir tank cap sub-assembly.
-
-
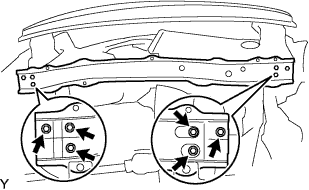
REMOVE SUPPORT RH SUB-ASSEMBLY
-
REMOVE SUPPORT LH SUB-ASSEMBLY
-
DISCONNECT COOLING FAN MOTOR CONNECTOR
-
Disconnect the cooling fan motor connector.
-
-
DISCONNECT RESISTOR CONNECTORS (w/ Air Conditioning System)
-
Disconnect the 2 resistor connectors.
-
-
DISCONNECT WATER BY-PASS HOSE
-
Remove the hose clip, and disconnect the water by-pass hose from the radiator assembly.
-
-
DISCONNECT RADIATOR HOSE
-
Disconnect the radiator hose and clamp from the radiator assembly.
-
-
DISCONNECT RADIATOR HOSE NO.2
-
Disconnect the radiator hose No.2 and clamp from the radiator assembly.
-
-
DISCONNECT CONDENSER ASSEMBLY (w/ Air Conditioning System)
-
Remove the 2 bolts, and disconnect the condenser assembly from the radiator assembly.
-
-
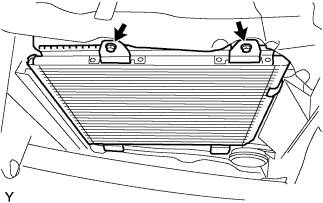
REMOVE FRONT CROSS MEMBER SUB-ASSEMBLY
-
Remove the 6 bolts and front cross member sub-assembly.
-
-
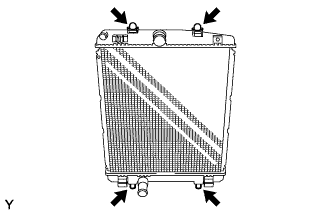
REMOVE RADIATOR ASSEMBLY
-
Remove the radiator assembly.
Note
Do not allow the cooler condenser assembly and radiator assembly to come into contact with each other.
-
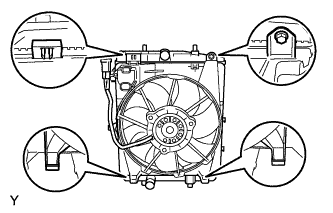
Remove the claws, bolt, and the fan assembly from the radiator assembly.
-
Remove the 2 radiator support cushions and 2 grommets from the radiator assembly.
-
-
REMOVE V-RIBBED BELT
-
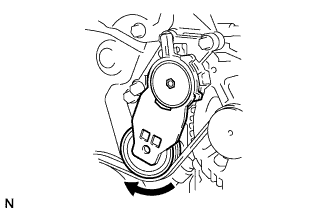
While releasing the belt tension by turning the belt tensioner clockwise, remove the V-ribbed belt from the belt tensioner.
-
While turning the belt tensioner, align with its holes, and then insert the 3 mm (0.1181 in.) hexagon wrench into the holes to fix the V-ribbed belt tensioner.
-
-
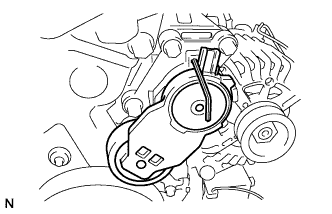
REMOVE V-RIBBED BELT TENSIONER SUB-ASSEMBLY
-
Remove the 3 bolts and V-ribbed belt tensioner sub-assembly.
-
-
REMOVE TURBO INSULATOR NO.1
-

Remove the 7 bolts and turbo insulator No.1.
-
-
REMOVE MANIFOLD HEAT SHIELD
-

Remove the 2 bolts and manifold heat shield.
-
-
REMOVE EXHAUST MANIFOLD CONVERTER SUB-ASSEMBLY
-
Remove the 2 nuts and 2 exhaust manifold converter clamps.
-
Remove the 2 nuts, exhaust manifold converter sub-assembly, catalytic converter support bracket, and converter separator insulator No.1.
-
-
REMOVE OIL LEVEL GAGE SUB-ASSEMBLY
-
REMOVE OIL LEVEL GAUGE GUIDE
-
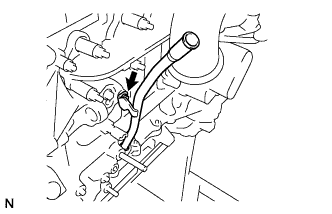
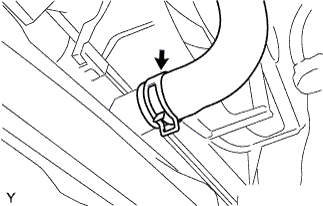
Remove the bolt and oil level gauge guide.
-
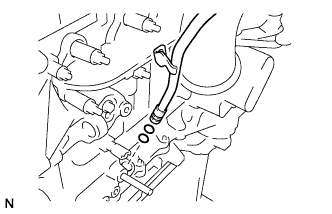
Remove the 2 O-rings from the oil level gauge guide.
-
-
REMOVE STUD BOLT
-
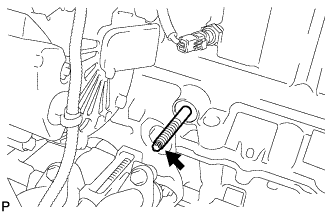
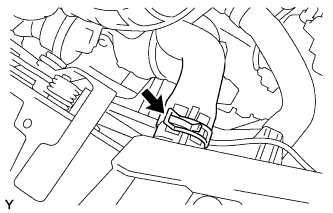
Using a "trox" socket wrench (E7), remove the stud bolt.
-
-
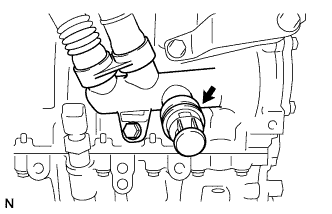
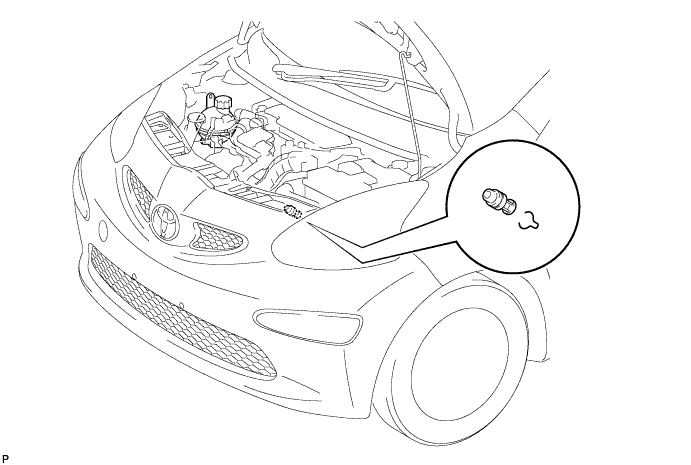
DISCONNECT WIRE HARNESS
-
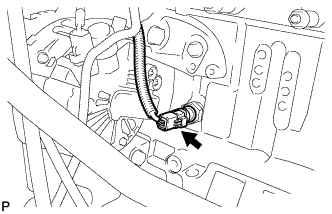
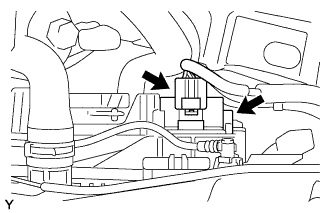
Disconnect the engine oil pressure switch connector.
-
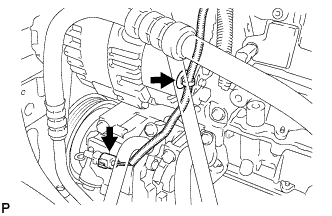
w/ Air Conditioning System:
-
Disconnect the wire harness from the generator assembly.
-
Disconnect the compressor connector.
-
-
-
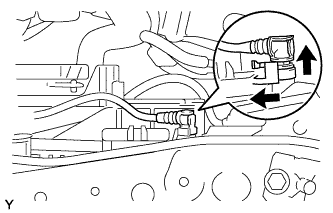
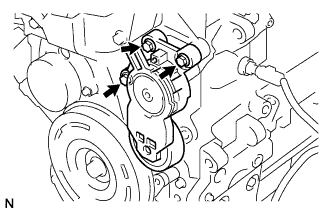
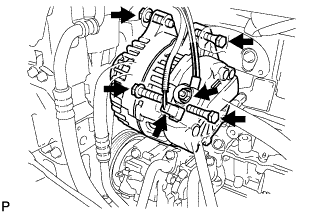
REMOVE GENERATOR ASSEMBLY (w/o Air Conditioning System)
-
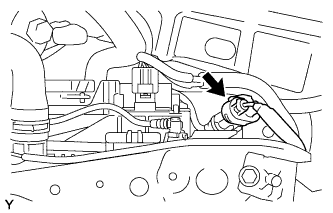
Disconnect the generator connector.
-
Remove the terminal cap.
-
Remove the nut and disconnect the wire harness from terminal B.
-
Remove the 4 bolts and generator assembly with generator bracket No.2.
-
Using a hexagon socket wrench, remove the bolt and V-ribbed belt idler assembly No.1 from the generator bracket No.2.
-
Remove the 2 bolts and generator bracket No.2 from the generator assembly.
-
-
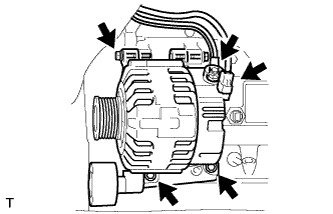
REMOVE GENERATOR ASSEMBLY (w/ Air Conditioning System)
-
Disconnect the generator connector.
-
Remove the terminal cap.
-
Remove the nut and disconnect the wire harness from terminal B.
-
Remove the 4 bolts and generator assembly.
-