CLUTCH RELEASE CABLE REMOVAL

-
REMOVE INSTRUMENT PANEL ASSEMBLY
-
REMOVE BATTERY
-
Loosen the nut and disconnect the battery positive terminal.
-
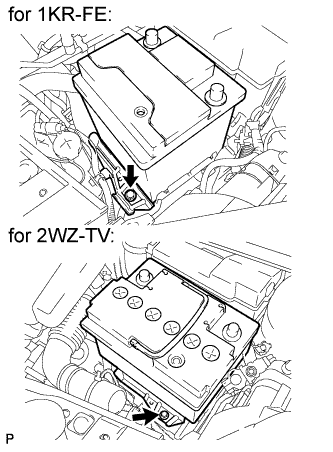
Remove the bolt and battery clamp.
-
Remove the battery.
-
-
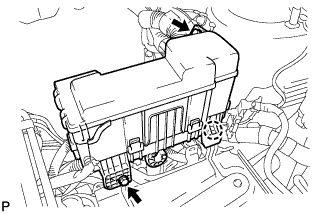
SEPARATE ENGINE ROOM RELAY BLOCK
-
Remove the 2 bolts.
-
Disengage the claw and separate the engine room relay block.
-
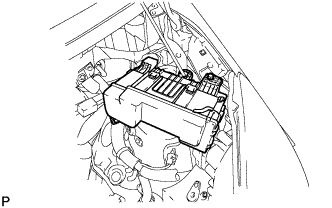
Provisionally set the relay block to the hood support rod.
-
-
REMOVE BATTERY CLAMP SUB-ASSEMBLY
-
Disengage the 2 wire harness clamps.
-
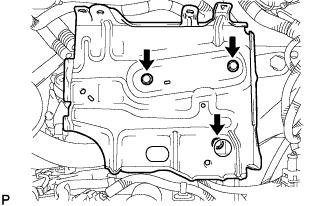
Remove the 3 bolts and battery clamp.
-
-
REMOVE FRONT WIPER ARM HEAD CAP
-
Using a screwdriver with its tip wrapped in protective tape, remove the front wiper arm head cap.
-
-
REMOVE FRONT WIPER ARM
-
Operate the wiper, then stop the windshield wiper motor assembly in the automatic stop position.
-
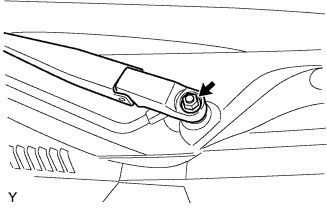
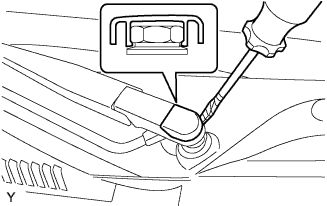
Remove the nut and front wiper main arm.
-
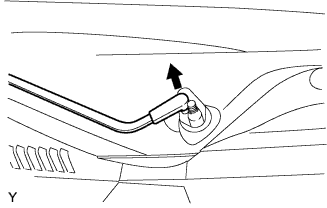
Disengage the meshing of the secondary arm from the front wiper motor and link assembly.
Note
Do not bend the secondary arm when removing it.
-
-
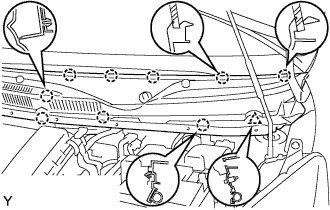
REMOVE HOOD TO COWL TOP SEAL
-
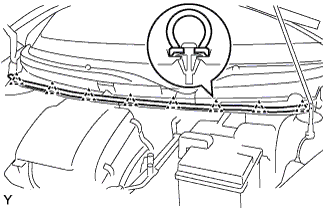
Disengage the 8 clips and remove the hood to cowl top seal.
-
-
REMOVE COWL TOP VENTILATOR LOUVER LH
-
Remove the clip.
-
Disengage the 9 claws and remove the cowl top ventilator louver LH.
-
Disconnect the washer hose.
-
-
REMOVE COWL TOP VENTILATOR LOUVER RH
-
Remove the clip.
-
Disengage the 8 claws and remove the cowl top ventilator louver RH.
-
Disconnect the washer hose.
-
-
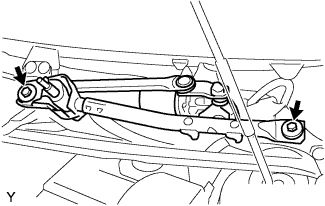
REMOVE FRONT WIPER MOTOR AND LINK ASSEMBLY
-
Remove the 2 bolts.
-
Disconnect the connector and remove the front wiper motor and link assembly.
-
-
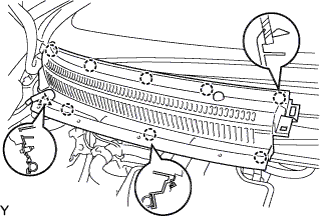
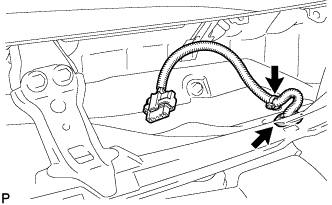
REMOVE COWL TOP PANEL OUTER
-
Remove the clamp of the wire harness.
-
Remove the grommet of the wire harness.
-
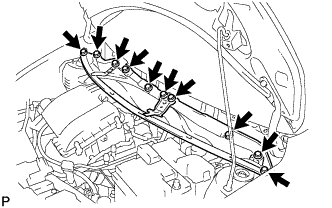
Remove the 10 bolts and cowl top panel.
-
-
REMOVE CLUTCH RELEASE FORK RETURN TENSION SPRING
-
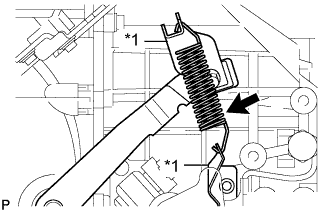
Text in Illustration *1 Spring Hanger Remove the clutch release fork return tension spring from the spring hanger.
Note
-
If there is any rust or deformation in the tension spring, replace it.
-
If there is any damage in the tension spring damper, replace it.
-
-
-
REMOVE CLUTCH RELEASE CABLE ASSEMBLY (for LHD)
-
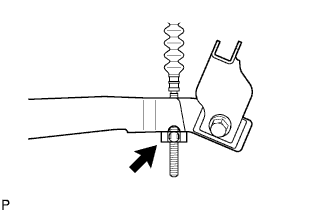
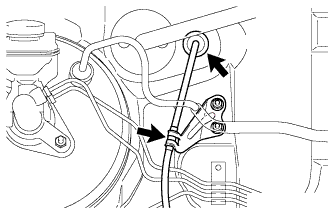
Turn and loosen the clamp of the cable end.
-
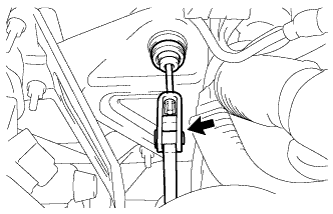
Separate the clutch release cable from the manual transaxle.
-
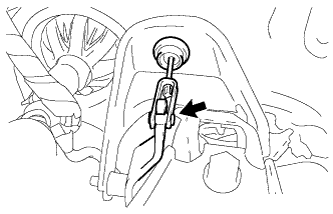
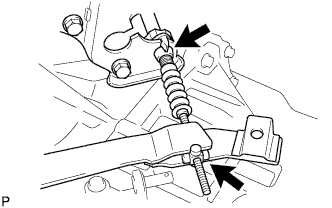
Separate the clutch release cable from the clutch pedal.
-
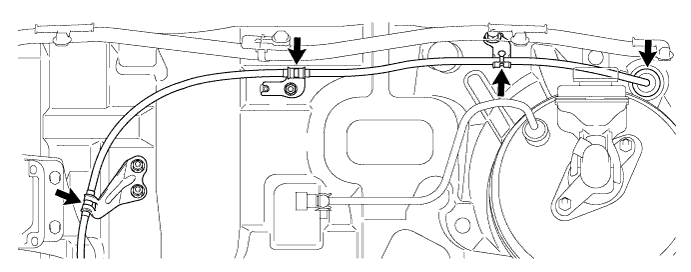
Disengage the 3 clamps and the grommet of the clutch release cable and remove the clutch release cable.
-
-
REMOVE CLUTCH RELEASE CABLE ASSEMBLY (for RHD)
-
Turn and loosen the clamp of the cable end.
-
Separate the clutch release cable from the manual transaxle.
-
Separate the clutch release cable from the clutch pedal.
-
Disengage the clamp and the grommet of the clutch release cable and remove the clutch release cable.
-