OIL PUMP REMOVAL

-
REMOVE ENGINE ASSEMBLY W/ TRANSAXLE
-
SEPARATE FRONT SUSPENSION CROSSMEMBER SUB-ASSEMBLY
-
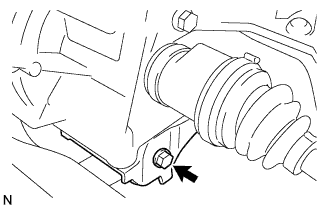
Remove the bolt, then separate the engine assembly with transaxle from the front suspension cross member assembly.
-
-
REMOVE STARTER ASSEMBLY (for Standard)
-
Open the terminal cap, remove the nut and disconnect the wire harness from terminal 50.
-
Open the terminal cap, remove the nut and disconnect the wire harness from terminal 30.
-
Remove the bolt, and wire harness clamp.
-
Remove the 2 bolts, and the starter.
-
-
REMOVE STARTER ASSEMBLY (for Cold Area)
-
Open the terminal cap, remove the nut and disconnect the wire harness from terminal 50.
-
Open the terminal cap, remove the nut and disconnect the wire harness from terminal 30.
-
Remove the bolt, and wire harness clamp.
-
Remove the 2 bolts, and the starter.
-
-
REMOVE MANUAL TRANSAXLE ASSEMBLY
-
Remove the manual transaxle assembly Click here.
-
-
REMOVE CLUTCH COVER ASSEMBLY
-
Remove the clutch cover assembly Click here.
-
-
REMOVE CLUTCH DISC ASSEMBLY
-
Remove the clutch disc assembly Click here.
-
-
REMOVE FLYWHEEL SUB-ASSEMBLY
-
Hold the crankshaft with SST.
- SST
- 09960-10010 ( 09962-01000, 09963-01000 )
-

Remove the 6 bolts and flywheel sub-assembly.
-
-
REMOVE IGNITION COIL NO.1
-
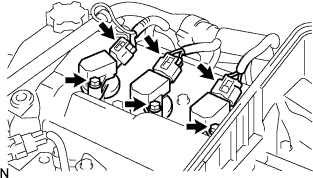
Disconnect the 3 connectors.
-
Remove the 3 bolts and 3 ignition coils.
-
-
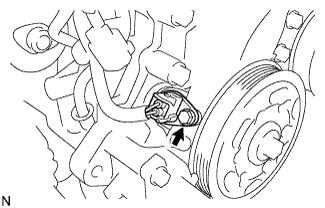
REMOVE GENERATOR ASSEMBLY
-
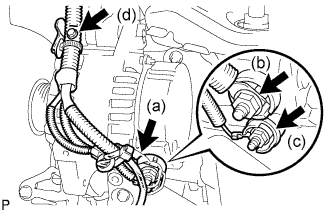
Remove the terminal cap.
-
Remove the nut and disconnect the wire harness from terminal B.
-
Remove the nut and disconnect the wire harness from terminal D.
-
Remove the bolt and disconnect the wire harness clamp from generator.
-
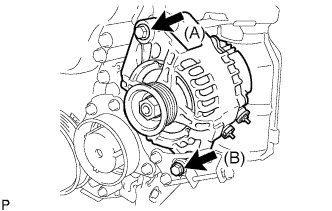
Remove the 2 bolts and generator.
-
-
REMOVE FAN BELT ADJUSTING BAR
-
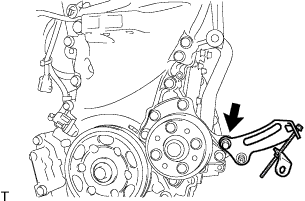
Remove the bolt and fan belt adjusting bar from the timing chain or belt cover.
-
-
REMOVE EXHAUST MANIFOLD
-
Disconnect the oxygen sensor connector.
-
Remove the 3 bolts, 2 nuts, and exhaust manifold.
-
Remove the exhaust manifold gasket.
-
-
REMOVE COMPRESSOR MOUNTING BRACKET NO.1
-
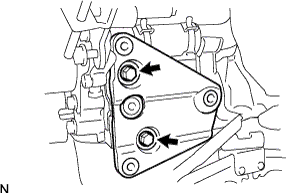
Remove the 2 bolts and compressor mounting bracket.
-
-
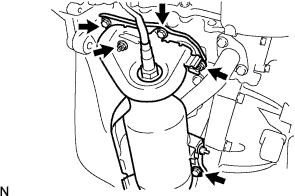
REMOVE WATER BY-PASS PIPE NO.1
-
Remove the bolt and 2 nuts.
-
Remove the bolt and clamp, then remove the water by-pass pipe No.1.
-
Remove the clamp, then remove the water by-pass hose from the water by-pass pipe No.1.
-
Remove the water by-pass pipe gasket.
-
-
REMOVE CYLINDER HEAD COVER SUB-ASSEMBLY
-
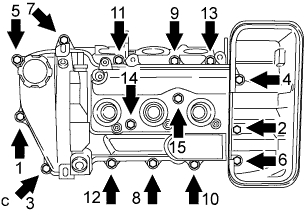
Remove the 13 bolts and 2 nuts in the order shown in the illustration.
-
Remove the cylinder head cover sub-assembly with cylinder head cover gasket.
-
Remove the cylinder head cover gasket from the cylinder head cover sub-assembly.
-
-
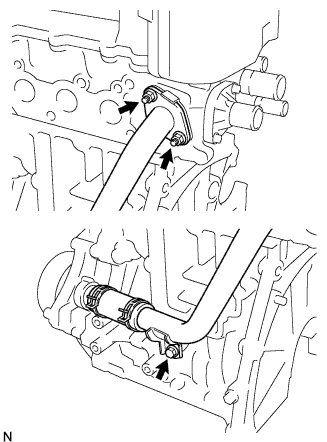
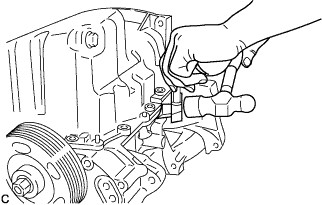
REMOVE CRANK POSITION SENSOR
-
Disconnect the crankshaft position sensor connector.
-
Remove the bolt and crankshaft position sensor.
-
-
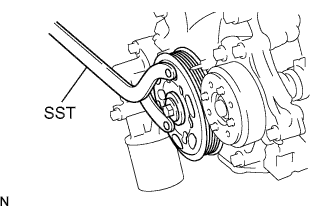
REMOVE CRANKSHAFT PULLEY
-
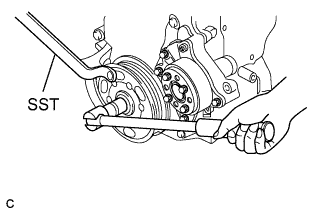
Using SST, remove the crankshaft pulley while holding it.
- SST
- 09960-10010 ( 09962-01000, 09963-01000 )
-
-
REMOVE OIL FILTER BRACKET
-

Remove the 3 bolts, oil filter bracket and oil filter bracket gasket.
-
-
REMOVE WATER PUMP ASSEMBLY
-

Remove the 5 bolts, water pump assembly and water pump gasket.
- SST
- 09043-88010
-
-
REMOVE OIL PAN SUB-ASSEMBLY
-
Remove the installation 13 bolts and 2 nuts of the oil pan sub-assembly.
-
Using an oil pan seal cutter, remove the oil pan sub-assembly from the cylinder block assembly.
Note
Do not damage the flange of the oil pan sub-assembly.
-
-
REMOVE TIMING CHAIN OR BELT COVER SUB-ASSEMBLY
-
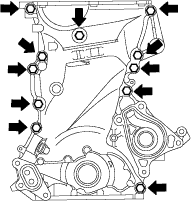
Remove the 11 bolts.
-
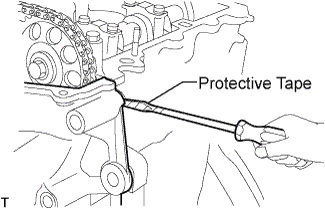
Remove the timing chain or belt cover by prying between the timing chain or belt cover and cylinder head or cylinder block with a screwdriver.
Note
Be careful not to damage the contact surfaces of the cylinder head, cylinder block and timing chain cover.
Tech Tips
Tape the screwdriver tip before use.
-
-
REMOVE OIL PUMP GASKET
-
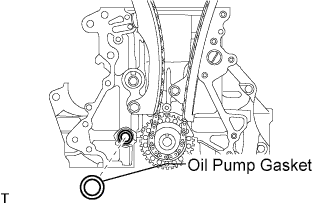
Remove the oil pump gasket.
-
-
REMOVE TIMING CHAIN OR BELT COVER OIL SEAL
-
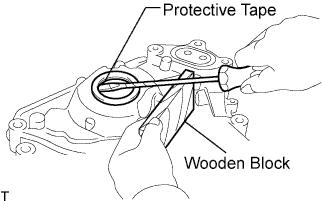
Using a screwdriver with its tip taped, pry out the oil seal.
Tech Tips
Tape the screwdriver tip before use.
-