FUEL TANK REMOVAL

-
DISCONNECT CABLE FROM NEGATIVE BATTERY TERMINAL
-
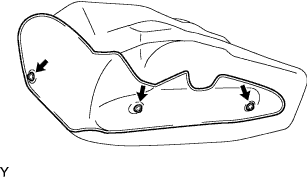
REMOVE REAR SEAT CUSHION ASSEMBLY
-
Separate seat type Click here
-
Bench seat type Click here
-
-
REMOVE REAR FLOOR SERVICE HOLE COVER
-
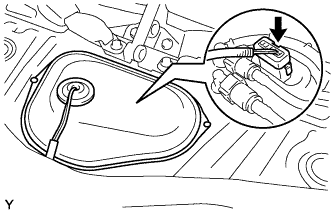
Remove the rear floor service hole cover.
-
Disconnect the connector.
-
-
REMOVE FUEL PUMP GAUGE RETAINER
-
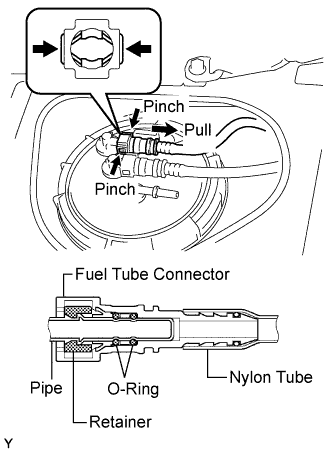
Disconnect the fuel tank return tube sub-assembly.
-
Pinch the tube connector and then pull out the fuel tank return tube.
Note
-
Check if there is any dirt around the connector before this operation and remove the dirt as necessary.
-
It is necessary to prevent mud or dirt from entering the quick connector. If mud enters the connector, the O-rings may not seal properly.
-
Remove the quick connector by hand.
-
Do not damage the disconnected pipe and connector. Prevent intrusion of foreign objects by covering them with plastic bags.
-
If the pipe and the connector are stuck, try wiggling or pushing and pulling the connector to release it. Pull the connector off of the pipe carefully.
-
-
-
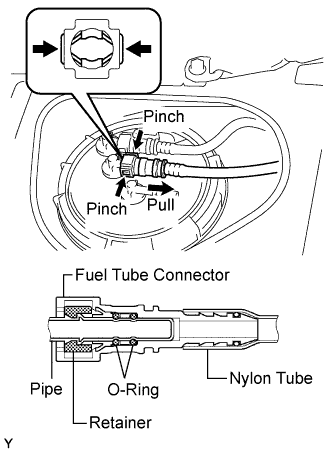
Disconnect the fuel tank main tube sub-assembly.
-
Pinch the tube connector and then pull out the fuel tank main tube.
Note
-
Check if there is any dirt around the connector before this operation and remove the dirt as necessary.
-
It is necessary to prevent mud or dirt from entering the quick connector. If mud enters the connector, the O-rings may not seal properly.
-
Remove the quick connector by hand.
-
Do not damage the disconnected pipe and connector. Prevent intrusion of foreign objects by covering them with plastic bags.
-
If the pipe and the connector are stuck, try wiggling or pushing and pulling the connector to release it. Pull the connector off of the pipe carefully.
-
-
-
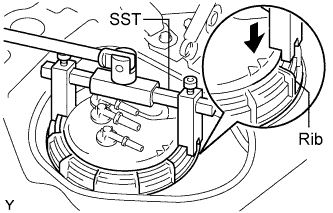
Remove the fuel pump gauge retainer.
-
Using a socket wrench (6 mm), set SST to the fuel pump gauge retainer.
- SST
- 09808-14020 ( 09808-01410, 09808-01420, 09808-01430 )
-
Using SST, loosen the fuel pump gauge retainer.
Note
Use only SST. Do not use any other tools such as a screwdriver.
Tech Tips
Fit the rib on the fuel pump gauge retainer into the cutout of the SST.
-
-
REMOVE FUEL SENDER GAUGE ASSEMBLY
-
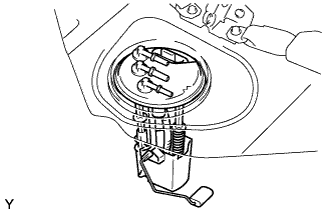
Pull out the fuel sender gauge assembly.
Note
The sender gauge arm should not be bent.
-
Remove the gasket from the fuel tank.
-
-
DRAIN FUEL
-
REMOVE EXHAUST FRONT PIPE ASSEMBLY
-
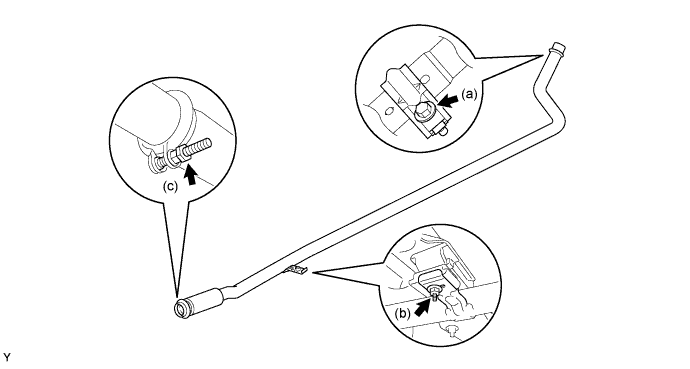
Remove the bolt and clamp.
-
Remove the exhaust front pipe stay nut and exhaust pipe support No.4.
-
Remove the nut, clamp and the exhaust front pipe assembly.
-
-
DISCONNECT FUEL TANK MAIN TUBE SUB-ASSEMBLY
-
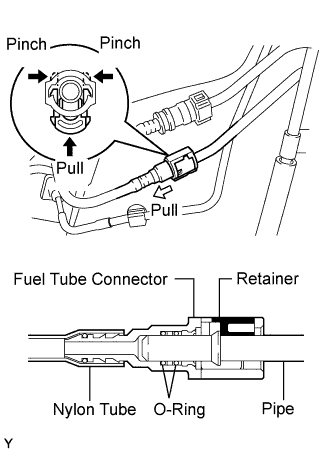
Disconnect the fuel tank main tube sub-assembly.
-
Pinch the tabs of the retainer to disengage the lock claws and pull it down as shown in the illustration.
-
Pull out the fuel tank main tube.
Note
-
Check if there is any dirt or other foreign objects around the connector before this operation and clean the connector as necessary.
-
It is necessary to prevent mud or dirt from entering the quick connector. If mud enters the connector, the O-rings may not seal properly.
-
Remove the quick connector by hand.
-
Do not bend or twist the nylon tube. Protect the connector by covering it with a plastic bag.
-
If the pipe and connector are stuck, try wiggling or pushing and pulling the connector to release it and pull the connector off of the pipe carefully.
-
-
-
-
DISCONNECT FUEL TANK RETURN TUBE SUB-ASSEMBLY
-
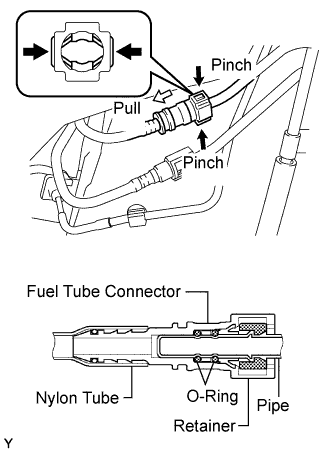
Disconnect the fuel tank return tube sub-assembly.
-
Pinch the tube connector and then pull out the fuel tank return tube.
Note
-
Check if there is any dirt or other foreign objects around the connector before this operation and clean the connector as necessary.
-
It is necessary to prevent mud or dirt from entering the quick connector. If mud enters the connector, the O-rings may not seal properly.
-
Remove the quick connector by hand.
-
Do not bend or twist the nylon tube. Protect the connector by covering it with a plastic bag.
-
If the pipe and connector are stuck, try wiggling or pushing and pulling the connector to release it and pull the connector off of the pipe carefully.
-
-
-
-
SEPARATE FUEL TANK FILLER PIPE SUB-ASSEMBLY
-
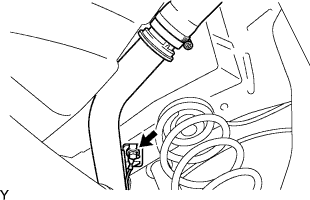
Remove the bolt and separate the fuel tank filler pipe.
-
-
REMOVE FUEL TANK ASSEMBLY
-
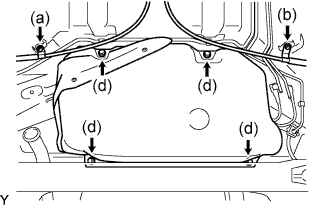
Remove the bolt and separate the parking brake cable No.2.
-
Remove the bolt and separate the parking brake cable No.3.
-
Place a transmission jack under the fuel tank.
-
Remove the 4 bolts and fuel tank.
-
-
REMOVE FUEL TANK MAIN TUBE SUB-ASSEMBLY
-
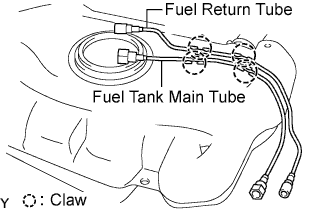
Disengage the 4 claws on the fuel tank and remove the fuel tank main tube and fuel return tube.
-
-
REMOVE FUEL TANK TO FILLER PIPE HOSE
-
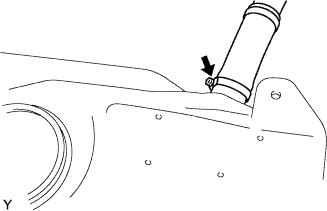
Loosen the hose clamp bolt and disconnect the fuel tank to filler pipe hose.
-
-
REMOVE FUEL TANK PROTECTOR LOWER CENTER
-
Remove the 3 screws and fuel tank protector lower center.
-