REAR STABILIZER BAR (for 4WD) INSTALLATION
-
TEMPORARILY INSTALL REAR STABILIZER BAR
-

Temporarily install the rear stabilizer bar with the identification mark positioned on the left side of the vehicle.
-
-
TEMPORARILY INSTALL REAR STABILIZER BAR BRACKET LH (for Front Side)
-
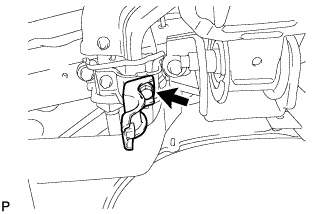
Temporarily install the rear stabilizer bar bracket LH (front side) with the bolt.
Tech Tips
Loosely tighten the bolt so that the bracket can be moved by hand.
-
-
TEMPORARILY INSTALL REAR STABILIZER BAR BRACKET RH (for Front Side)
-
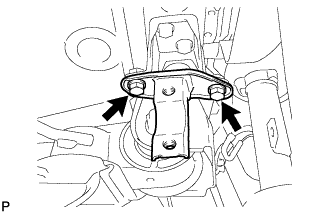
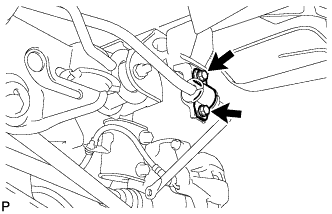
Temporarily install the rear stabilizer bar bracket RH (front side) with the 2 bolts.
Tech Tips
Loosely tighten the bolts so that the bracket can be moved by hand.
-
-
INSTALL REAR STABILIZER BUSHING (for LH Side)
-
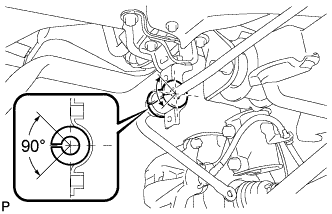
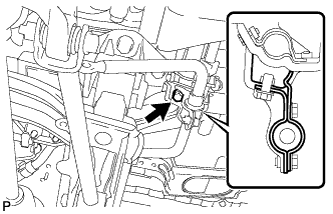
Install the rear stabilizer bushing (LH side) to the rear stabilizer bar.
Note
Make sure that the cutout of the rear stabilizer bushing is positioned within the range shown in the illustration.
-
-
INSTALL REAR STABILIZER BUSHING (for RH Side)
-
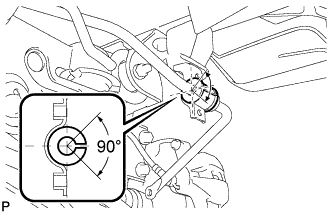
Install the rear stabilizer bushing (RH side) to the rear stabilizer bar.
Note
Make sure that the cutout of the rear stabilizer bushing is positioned within the range shown in the illustration.
-
-
INSTALL REAR STABILIZER BAR BRACKET LH (for Rear Side)
-

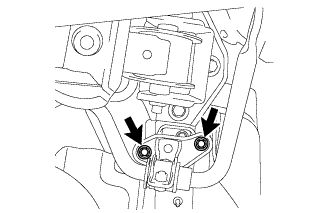
Install the rear stabilizer bar bracket LH (rear side) with the 2 bolts.
- Torque:
- 19 N*m { 194 kgf*cm, 14 ft.*lbf }
-
-
INSTALL REAR STABILIZER BAR BRACKET RH (for Rear Side)
-
Install the rear stabilizer bar bracket RH (rear side) with the 2 bolts.
- Torque:
- 19 N*m { 194 kgf*cm, 14 ft.*lbf }
-
-
FULLY TIGHTEN REAR STABILIZER BAR BRACKET LH (for Front Side)
-
Fully tighten the bolt.
- Torque:
- 54 N*m { 550 kgf*cm, 40 ft.*lbf }
-
-
FULLY TIGHTEN REAR STABILIZER BAR BRACKET RH (for Front Side)
-
Fully tighten the 2 bolts.
- Torque:
- 19 N*m { 194 kgf*cm, 14 ft.*lbf }
-
-
INSTALL REAR STABILIZER LINK ASSEMBLY LH
-
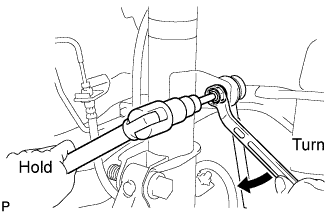
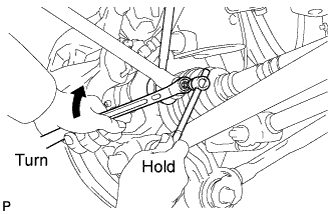
Install the rear stabilizer link assembly LH to the rear shock absorber with coil spring LH with the nut.
- Torque:
- 39 N*m { 400 kgf*cm, 29 ft.*lbf }
Tech Tips
If the ball joint turns together with the nut, use a hexagon wrench (5 mm) to hold the stud bolt.
-
Install the rear stabilizer link assembly LH to the rear stabilizer bar with the nut.
- Torque:
- 39 N*m { 400 kgf*cm, 29 ft.*lbf }
Tech Tips
If the ball joint turns together with the nut, use a hexagon wrench (5 mm) to hold the stud bolt.
-
-
INSTALL REAR STABILIZER LINK ASSEMBLY RH
Tech Tips
Perform the same procedure as the LH side.
-
INSTALL TAIL EXHAUST PIPE ASSEMBLY
-
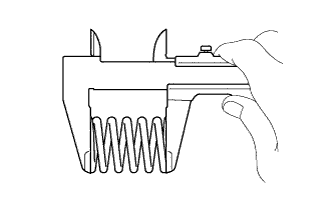
Using vernier calipers, measure the free length of the compression spring.
Minimum 40.5 mm (1.59 in.) Tech Tips
If the length is less than the minimum, replace the compression spring.
-
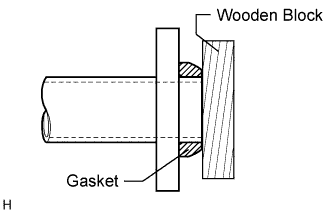
Using a plastic-faced hammer and wooden block, tap in a new gasket until its surface is flush with the center exhaust pipe assembly.
Note
-
Tap in the gasket in the correct direction.
-
Do not reuse the removed gasket.
-
Do not push in the gasket while installing the tail exhaust pipe assembly.
-
-
Connect the exhaust pipe support, and install the tail exhaust pipe assembly.
-
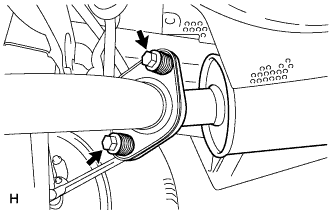
Install the 2 compression springs and 2 bolts.
- Torque:
- 48 N*m { 489 kgf*cm, 35 ft.*lbf }
-
-
INSPECT FOR EXHAUST GAS LEAK
If exhaust gas is leaking, repair the leak. Replace damaged or worn parts as necessary.
-
INSTALL REAR WHEELS
- Torque:
- 103 N*m { 1050 kgf*cm, 76 ft.*lbf }
-
INSTALL SPARE WHEEL CARRIER LOCK COVER
-
INSTALL SPARE TIRE
-
INSTALL LOWER SPARE WHEEL CARRIER HINGE COVER
-
INSTALL DECK TRIM SERVICE HOLE COVER
-
INSTALL REAR MAT
-
Install the rear mat.
-
-
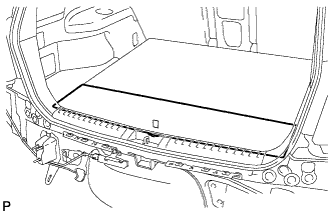
INSTALL TONNEAU COVER ASSEMBLY (w/ Tonneau Cover)
-
Install the tonneau cover assembly.
-
-
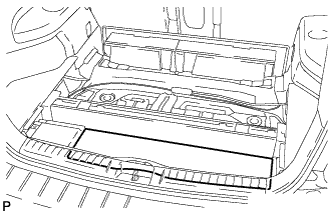
INSTALL NO. 2 DECK BOARD SUB-ASSEMBLY (w/ Tonneau Cover)
-
Engage the 2 guides and install the No. 2 deck board sub-assembly.
-
-
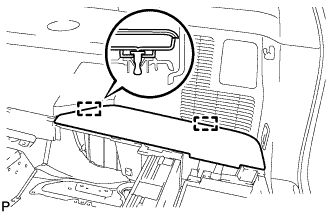
INSTALL NO. 3 DECK BOARD SUB-ASSEMBLY (w/ Tonneau Cover)
-
Engage the 2 guides and install the No. 3 deck board sub-assembly.
-
-
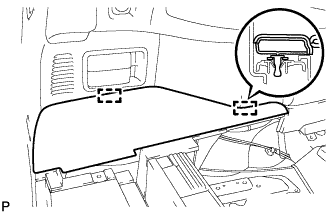
INSTALL DECK BOARD ASSEMBLY
-
Install the deck board sub-assembly.
-