FRONT LOWER SUSPENSION ARM REMOVAL
-
REMOVE ENGINE ASSEMBLY WITH TRANSAXLE
Tech Tips
Remove engine assembly with transaxle Click here.
-
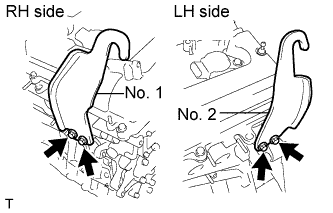
REMOVE NO. 1 FRONT STABILIZER BRACKET LH
-
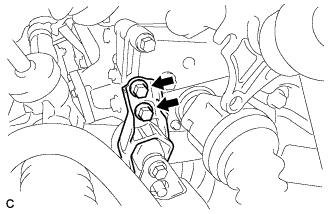
Remove the 2 bolts and the No. 1 front stabilizer bracket LH from the front frame assembly.
-
-
REMOVE NO. 1 FRONT STABILIZER BRACKET RH
Tech Tips
Perform the same procedure as the LH side.
-
REMOVE FRONT STABILIZER BAR WITH FRONT STABILIZER LINK ASSEMBLY
-
REMOVE POWER STEERING LINK ASSEMBLY
-
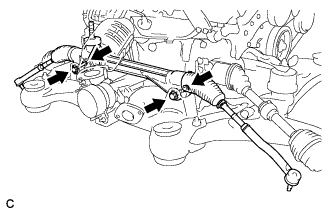
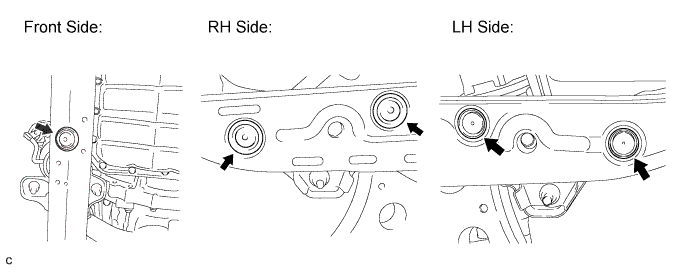
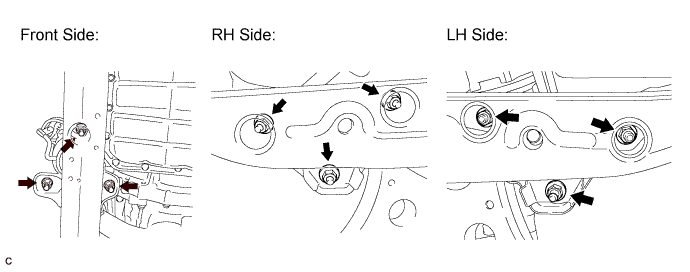
Remove the 2 bolts, 2 nuts, and power steering link assembly.
Note
Because the nut has its own stopper, do not turn the nut. Loosen the bolt with the nut fixed.
-
-
INSTALL ENGINE HANGERS
-
Install the 2 engine hangers with the 4 bolts as shown in the illustration.
Part No. No. 1 engine hanger 12281-31120 No. 2 engine hanger 12282-31100 Bolts 91671-10825 - Torque:
- 33 N*m { 337 kgf*cm, 24 ft.*lbf }
-
Attach the engine sling device and hang the engine with the chain block.
-
-
SEPARATE FRONT FRAME ASSEMBLY
-
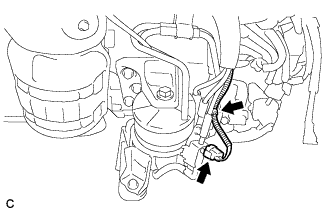
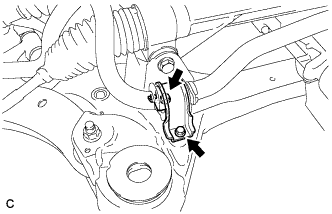
Disconnect the active mount VSV connector and harness clamp.
-
Loosen the bolt and 2 nuts.

-
Remove the 5 hole plugs.
-
Remove the 9 nuts.
-
Remove the 2 bolts and separate the engine with transaxle from the front frame assembly.
-
-
REMOVE FRONT LOWER SUSPENSION ARM
-
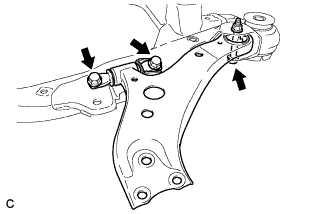
Remove the 3 bolts, nut, and the front lower suspension arm from the front frame assembly.
-
Remove the front lower arm bushing stopper from the front lower suspension arm.
-