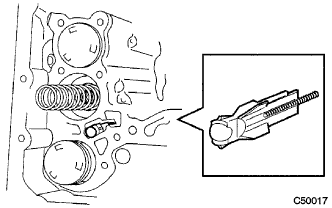
SHIFT SOLENOID VALVE INSTALLATION
-
INSTALL TRANSMISSION VALVE BODY ASSEMBLY
-
Install the spring and check ball body.
-
Align the groove of the manual valve with the pin of the lever.
-
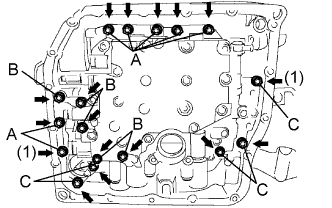
Install the 17 bolts.
- Torque:
- 11 N*m { 110 kgf*cm, 8 ft.*lbf }
Note
-
Push the valve body against the accumulator piston springs and check ball body to install the valve body.
-
First, temporarily tighten the bolts marked (1) in the illustration because they are positioning bolts.
Bolt length Bolt A 25 mm (0.98 in.) Bolt B 57 mm (2.24 in.) Bolt C 41 mm (1.61 in.)
-
-
INSTALL VALVE BODY OIL STRAINER ASSEMBLY
-
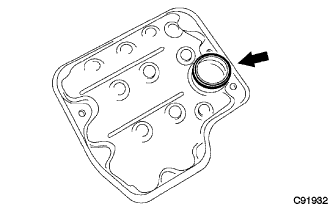
Coat a new O-ring with ATF.
-
Install the O-ring to the oil strainer.
-
Install the oil strainer with the 3 bolts.
- Torque:
- 11 N*m { 110 kgf*cm, 8 ft.*lbf }
-
-
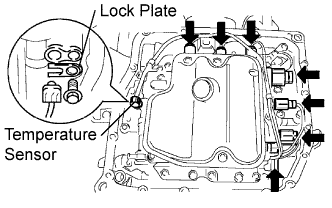
INSTALL TRANSMISSION WIRE
-
Coat a new O-ring with ATF.
-
Install the ATF temperature sensor with the lock plate and bolt.
- Torque:
- 6.6 N*m { 67 kgf*cm, 58 in.*lbf }
-
Connect the 7 shift solenoid valve connectors.
-
-
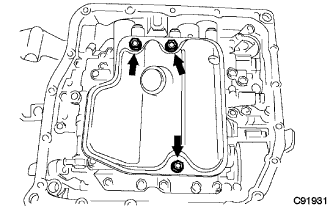
INSTALL AUTOMATIC TRANSAXLE OIL PAN SUB-ASSEMBLY
-
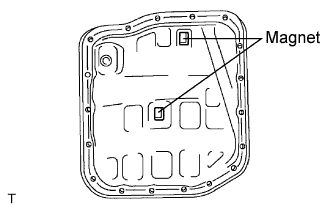
Install the 2 magnets in the oil pan.
-
Apply adhesive to the 18 bolts.
Adhesive Toyota Genuine Adhesive 1344, Three Bond 1344 or equivalent -
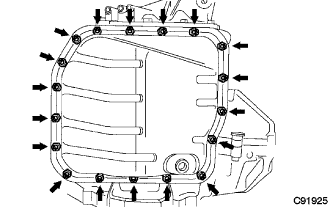
Install the oil pan and a new gasket to the transaxle case with the 18 bolts.
- Torque:
- 7.8 N*m { 80 kgf*cm, 69 in.*lbf }
Note
Apply adhesive to the bolts and tighten them within 10 minutes of application.
-
-
INSTALL AUTOMATIC TRANSAXLE ASSEMBLY
-
CONNECT CABLE TO NEGATIVE BATTERY TERMINAL
Note
When disconnecting the cable, some systems need to be initialized after the cable is reconnected Click here.