TRANSMISSION CONTROL CABLE ASSEMBLY REMOVAL
-
DISCONNECT CABLE FROM NEGATIVE BATTERY TERMINAL
CAUTION:
Wait at least 90 seconds after disconnecting the cable from the negative (-) battery terminal to prevent airbag and seat belt pretensioner activation.
Note
When disconnecting the cable, some systems need to be initialized after the cable is reconnected Click here.
-
REMOVE BATTERY
-
Loosen the nut, and disconnect the negative battery terminal.
CAUTION:
Wait for 90 seconds after disconnecting the cable to prevent the airbag working.
Note
When disconnecting the cable, some systems need to be initialized after the cable is reconnected Click here.
-
Remove the nut, and separate the positive battery terminal cable.
-
Loosen the nut, and remove the bolt and battery clamp.
-
Remove the battery and battery tray.
-
-
REMOVE COOL AIR INTAKE DUCT SEAL
-
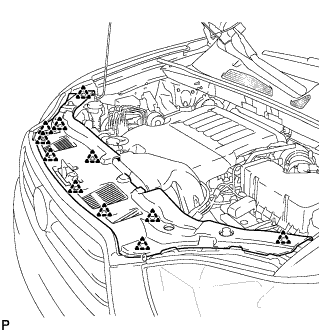
Remove the 11 clips and cool air intake duct seal.
-
-
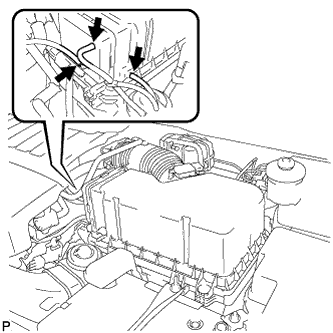
REMOVE NO. 2 AIR CLEANER INLET
-
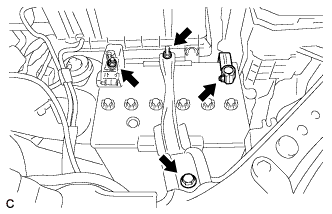
Disconnect the 2 vacuum switching valve clamps.
-
Disconnect the 2 vacuum hoses.
-
Remove the 2 bolts and No. 2 air cleaner inlet.
-
-
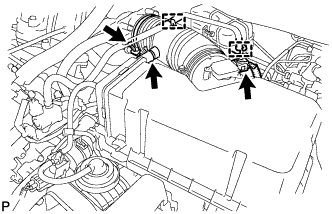
REMOVE NO. 1 AIR CLEANER INLET
-
Disconnect the 2 vacuum hoses, and remove the 2 bolts and No. 1 air cleaner inlet.
-
-
REMOVE AIR CLEANER CAP SUB-ASSEMBLY
-
Disconnect the 3 vacuum hoses.
-
Loosen the No. 1 air cleaner hose clamp.
-
Disconnect the hose clamps and No. 2 ventilation hose.
-
Disconnect the mass air flow meter connector.
-
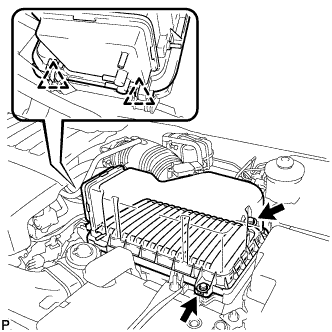
Release the 2 clips, and remove the 2 bolts.
-
Remove the air cleaner cap sub-assembly and air cleaner filter element.
-
-
REMOVE AIR CLEANER FILTER ELEMENT SUB-ASSEMBLY
-
REMOVE AIR CLEANER CASE SUB-ASSEMBLY
-
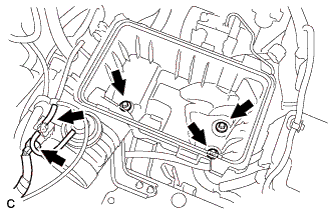
Remove the 3 bolts, disconnect the hose and the connector, and remove the air cleaner case sub-assembly.
-
-
REMOVE AIR CLEANER BRACKET
-
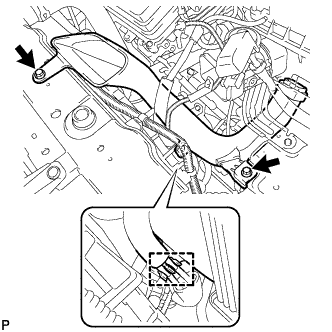
Remove the 2 bolts and air cleaner bracket.
-
-
REMOVE AIR CONDITIONING UNIT
Tech Tips
-
REMOVE TRANSMISSION CONTROL CABLE ASSEMBLY
-
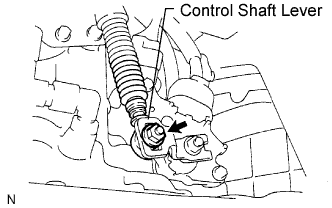
Remove the nut from the control shaft lever.
-
Disconnect the transmission control cable assembly from the control shaft lever.
-
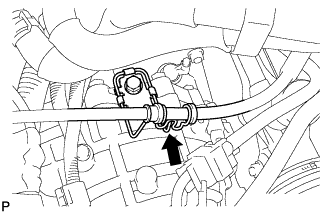
Remove the clip and disconnect the transmission control cable assembly from the control cable bracket.
-
Disconnect the transmission control cable assembly from the No. 2 transmission control cable bracket.
-
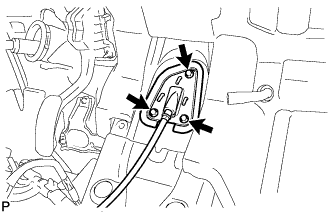
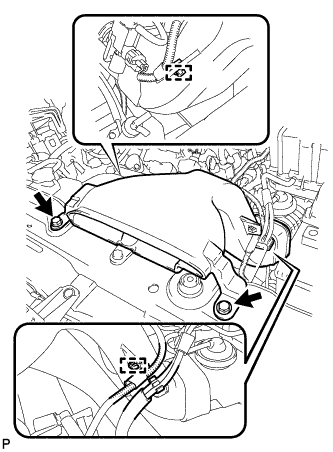
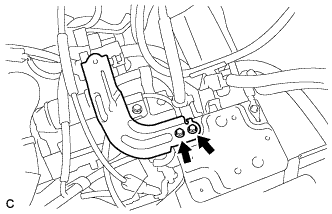
Remove the 3 bolts and disconnect the transmission control cable assembly from the vehicle.
-
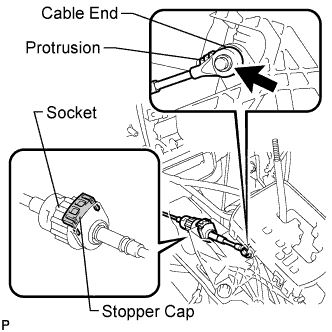
Using a screwdriver, disconnect the cable end from the shift lever assembly.
-
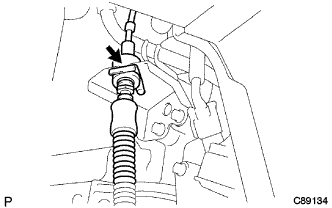
Turn the socket of the transmission control cable assembly counterclockwise and remove the stopper cap.
-
Disconnect the transmission control cable assembly from the shift lever assembly.
-