VALVE BODY ASSEMBLY REMOVAL
-
DISCONNECT CABLE FROM NEGATIVE BATTERY TERMINAL
CAUTION:
Wait at least 90 seconds after disconnecting the cable from the negative (-) battery terminal to prevent airbag and seat belt pretensioner activation.
Note
When disconnecting the cable, some systems need to be initialized after the cable is reconnected Click here.
-
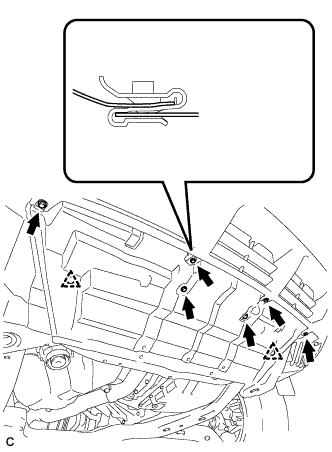
REMOVE ENGINE UNDER COVER ASSEMBLY
-

Remove the 2 bolts and engine under cover assembly RR.
-

Remove the 2 bolts, 2 screws, 5 clips and engine under cover assembly.
-
-
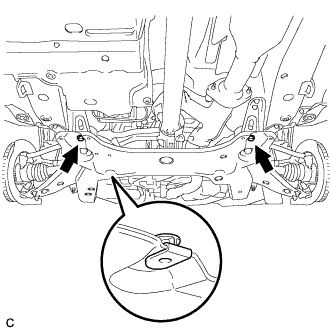
REMOVE NO. 1 ENGINE UNDER COVER
-
Remove the 6 bolts, 2 clips and No. 1 engine under cover.
-
-
REMOVE NO. 2 ENGINE UNDER COVER
-
Remove the 2 bolts and No. 2 engine under cover.
-
-
DRAIN AUTOMATIC TRANSAXLE FLUID
-
Remove the drain plug and gasket, and drain ATF.
-
Install a new gasket and the drain plug.
- Torque:
- 49 N*m { 500 kgf*cm, 36 ft.*lbf }
-
-
REMOVE AUTOMATIC TRANSAXLE ASSEMBLY
Tech Tips
-
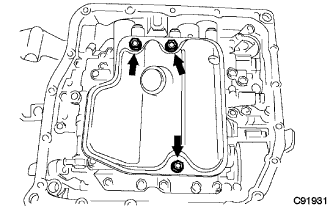
REMOVE AUTOMATIC TRANSAXLE OIL PAN SUB-ASSEMBLY
-
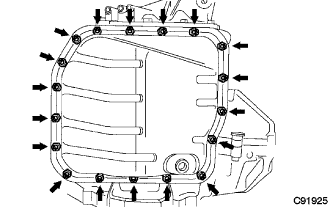
Remove the 18 bolts, oil pan, and gasket.
Note
Some fluid will remain in the oil pan. Carefully remove the oil pan so that the fluid remaining in the pan does not spill out.
-
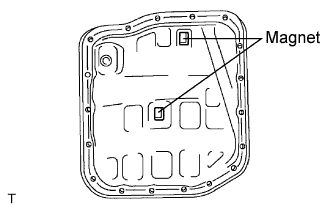
Remove the 2 magnets from the oil pan.
-
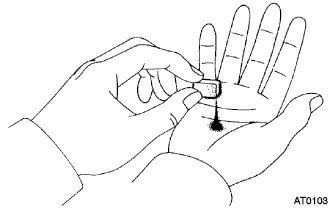
Examine particles in the pan.
-
Collect any steel chips using the removed magnets. Look carefully at the chips and particles in the pan and on the magnets to see the type of wear which might be found in the transaxle.
Result Steel (magnetic) Wear of the bearing, gear, or plate Brass (non-magnetic) Wear of the bushing
-
-
-
DISCONNECT TRANSMISSION WIRE
-
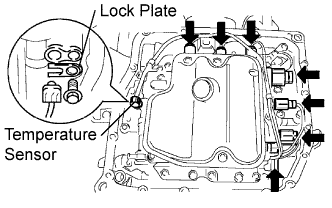
Disconnect the 7 shift solenoid valve connectors.
-
Remove the bolt and lock plate, and disconnect the ATF temperature sensor.
-
-
REMOVE VALVE BODY OIL STRAINER ASSEMBLY
-
Remove the 3 bolts and oil strainer.
Note
Be careful when removing the oil strainer as fluid will come out.
-
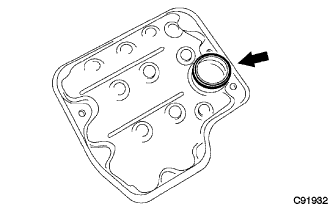
Remove the O-ring from the valve body oil strainer assembly.
-
-
REMOVE TRANSMISSION VALVE BODY ASSEMBLY
-
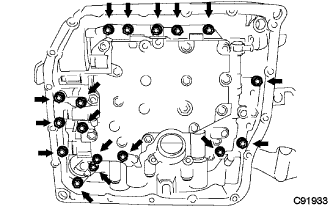
Support the valve body assembly and remove the 17 bolts and the transmission valve body assembly.
-
Remove the check ball body and the spring.
-
-
REMOVE MANUAL VALVE
-
Remove the manual valve from the valve body assembly.
-