OIL PRESSURE SWITCH INSTALLATION
-
INSTALL ENGINE OIL PRESSURE SWITCH ASSEMBLY
-
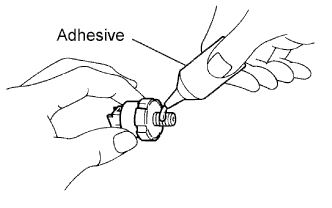
Apply adhesive to 2 or 3 threads of the oil pressure switch assembly.
Adhesive Toyota Genuine Adhesive 1344, Three Bond 1344 or equivalent -
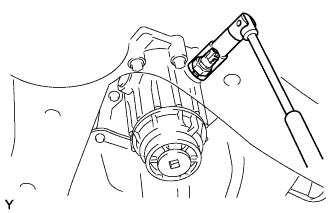
Using a 24 mm deep socket wrench, install the oil pressure switch assembly. (w/o oil cooler)
- Torque:
- 15 N*m { 153 kgf*cm, 11 ft.*lbf }
Note
Do not start the engine for at least 1 hour after installation.
-
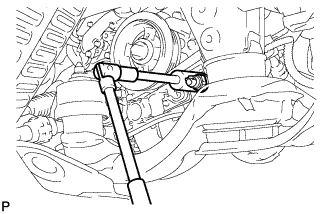
Using a 24 mm deep socket wrench, install the oil pressure switch assembly. (w/ oil cooler)
- Torque:
- 15 N*m { 153 kgf*cm, 11 ft.*lbf }
Note
Do not start the engine for at least 1 hour after installation.
-
Connect the oil pressure switch assembly connector.
-
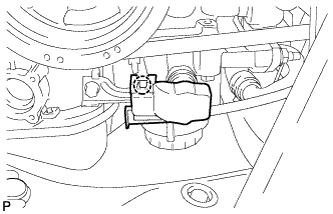
Connect the wiring harness protector. (w/ oil cooler)
-
-
INSPECT FOR OIL LEAK
-
Start the engine.
-
Check for engine oil leaks from the oil pressure switch assembly.
-
-
INSTALL FRONT FENDER APRON SEAL RH (for 4WD)
-
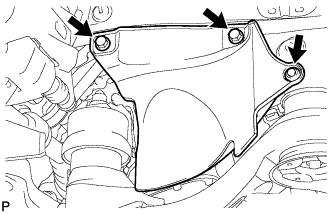
Install the front fender apron seal RH with the 2 bolts and clip.
-
-
INSTALL FRONT FENDER LINER RH (for 4WD)
-
INSTALL ENGINE UNDER COVER ASSEMBLY (for 2WD)
-

Install the engine under cover assembly with the 2 bolts, 2 screws and 5 clips.
-

Install the engine under cover assembly RR with the 2 bolts.
-
-
INSTALL FRONT WHEEL RH (for 4WD)
- Torque:
- 103 N*m { 1050 kgf*cm, 76 ft.*lbf }