- Click here
INSTALL TIMING CHAIN CASE OIL SEAL
-
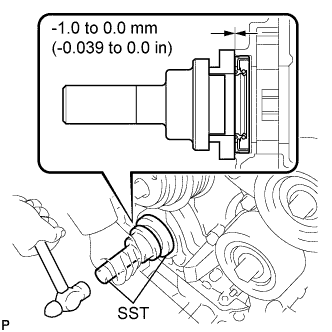
Apply MP grease to a new oil seal lip.
-
Using SST and a hammer, tap in the oil seal until its surface is flush with the timing chain cover edge.
09223-22010 09506-35010 Note:
-
Keep the lip free of foreign matter.
-
Do not tap the oil seal at an angle.
-
-
- Click here
INSTALL CRANKSHAFT PULLEY
-
Align the pulley set key with the key groove of the pulley, and slide on the pulley.
-
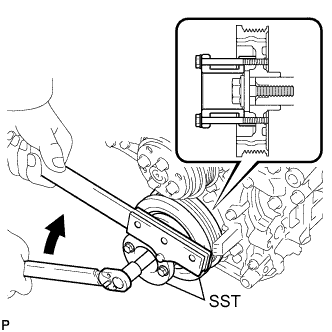
Using SST, install the pulley bolt.
09213-70011 09213-70020 09330-00021 250 N*m 2550 kgf*cm 184 ft.*lbf
-
- Click here
INSTALL V-RIBBED BELT
-
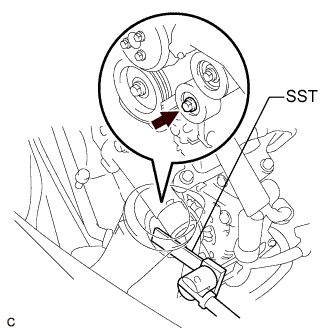
Install the V-ribbed belt.
-
Using SST, turn the V-ribbed belt tensioner assembly counterclockwise and remove the bar.
09961-00950 -
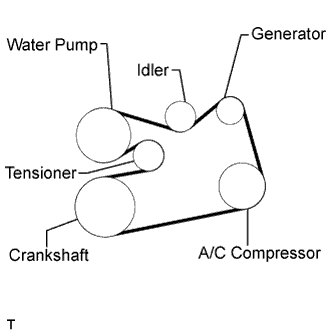
If it is difficult to install the V-ribbed belt, perform the following procedure:
-
Put the V-ribbed belt on every pulley except the tensioner pulley as shown in the illustration.
-
Release the V-ribbed belt tension by turning the V-ribbed belt tensioner assembly counterclockwise, and put the V-ribbed belt on the V-ribbed belt tensioner assembly pulley.
Note:
-
Put the backside of the V-ribbed belt on the V-ribbed belt tensioner assembly pulley and No. 2 idler pulley sub-assembly.
-
Check that the V-ribbed belt is properly set to each pulley.
-
-
After installing the V-ribbed belt, check that it fits properly in the ribbed grooves. Confirm that the V-ribbed belt has not slipped out of the grooves on the bottom of the crankshaft pulley by hand.
-
-
- Click here
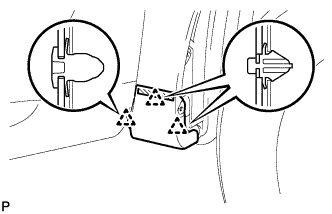
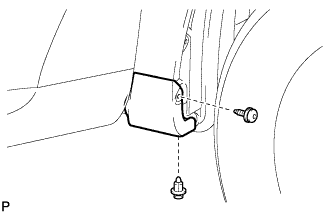
INSTALL FRONT FENDER APRON SEAL RH
-
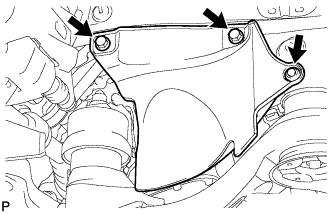
Install the front fender apron seal RH with the 2 bolts and clip.
-
- Click here
INSTALL FRONT FENDER LINER RH
-
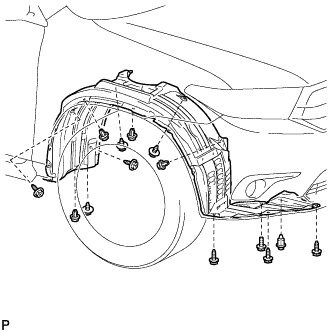
Install the front fender liner RH with the 5 clips and 8 screws.
-
Install the bolt.
-
Install 3 new grommets.
-
Using a 4 mm hexagon wrench, install the 2 screws.
-
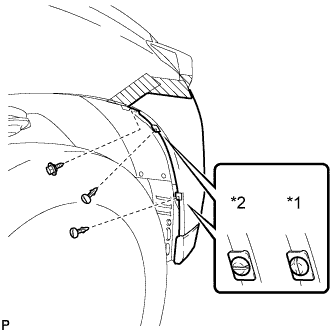
Install the screw and 2 pin hold clips.
Table 1. Text in Illustration *1 Correct *2 Incorrect Note:Insert the pin hold clip with the slot aligned vertically. Do not rotate the clip after inserting it. After installation, confirm that the slot is aligned vertically.
-
- Click here
INSTALL FRONT FENDER MOULDING SUB-ASSEMBLY RH
-
Clean the vehicle body surface.
-
Using a heat light, heat the vehicle body surface.
-
Remove the front fender side protector from the vehicle body.
-
Wipe off any tape adhesive residue with cleaner.
-
-

Clean the front fender moulding sub-assembly RH. (If reusing the front fender moulding sub-assembly RH)
-
Using a heat light, heat the front fender moulding sub-assembly RH.
-
Remove the front fender side protector from the front fender moulding sub-assembly RH.
-
Wipe off any tape adhesive residue with cleaner.
-
Install a new front fender side protector to the the front fender moulding sub-assembly RH.
-
-
Install the front fender moulding sub-assembly RH.
-
Using a heat light, heat the vehicle body and the front fender moulding sub-assembly RH.
-
Remove the release paper from the front fender moulding sub-assembly RH.
Tip:After removing the release paper, keep the exposed adhesive free from foreign matter.
-
Engage the 3 clips and install the front fender moulding sub-assembly RH.
-
-
Using a 4 mm hexagon wrench, install the screw.
-
Install the clip.
-
- Click here
INSTALL NO. 1 ENGINE UNDER COVER
-
Install the No. 1 engine under cover with the 6 bolts and 2 clips.
-
- Click here
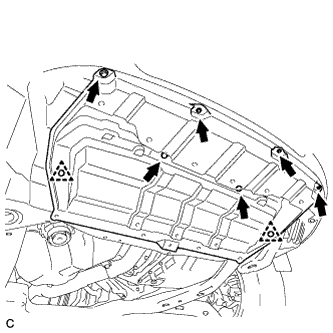
INSTALL ENGINE UNDER COVER ASSEMBLY
-

Install the engine under cover assembly with the 2 bolts, 2 screws and 5 clips.
-

Install the engine under cover assembly RR with the 2 bolts.
-
- Click here
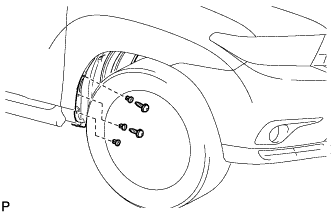
INSTALL FRONT WHEEL RH
103 N*m 1050 kgf*cm 76 ft.*lbf