FRONT CRANKSHAFT OIL SEAL REMOVAL
-
REMOVE FRONT WHEEL RH
-
REMOVE ENGINE UNDER COVER ASSEMBLY
-

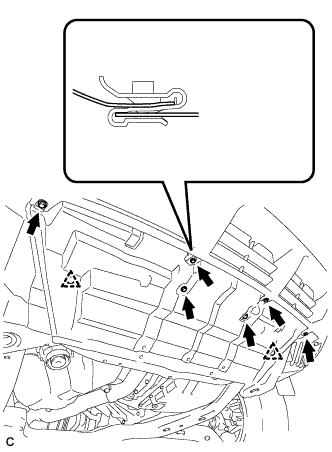
Remove the 2 bolts and engine under cover assembly RR.
-

Remove the 2 bolts, 2 screws, 5 clips and engine under cover assembly.
-
-
REMOVE NO. 1 ENGINE UNDER COVER
-
Remove the 6 bolts, 2 clips and No. 1 engine under cover.
-
-
REMOVE FRONT FENDER MOULDING SUB-ASSEMBLY RH
-
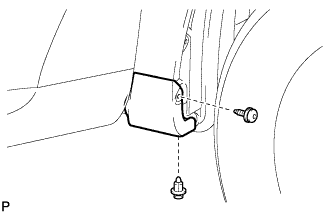
Remove the clip.
-
Using a 4 mm hexagon wrench, remove the screw.
-
Peel off the front fender side protector and disengage the 3 clips, and then remove the front fender moulding sub-assembly RH.
-
Remove the pad from the front fender moulding sub-assembly RH.
-
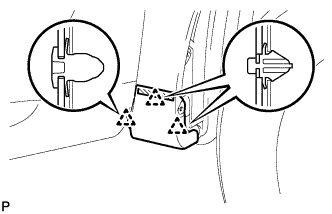
Remove the 2 clips No. 4 from the front fender moulding sub-assembly RH.
-

Remove the front fender side protector from the front fender moulding sub-assembly RH.
-
-
REMOVE FRONT FENDER LINER RH
-
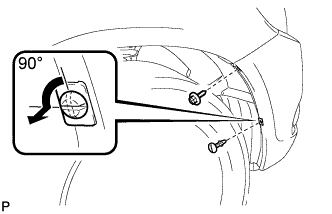
Remove the screw.
-
Using a screwdriver, turn the pin 90 degrees and remove the pin hold clip.
-
Using a 4 mm hexagon wrench, remove the 2 screws.
-
Remove the 2 grommets.
Tech Tips
The grommets need to be replaced with new ones because they will break when they are removed.
-
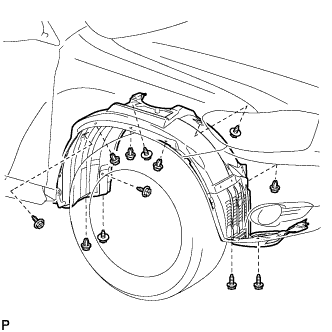
Remove the 5 clips, 7 screws and front fender liner RH.
-
-
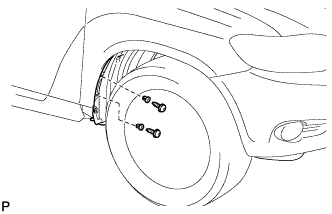
REMOVE FRONT FENDER APRON SEAL RH
-
Remove the 2 bolts, clip and front fender apron seal RH.
-
-
REMOVE V-RIBBED BELT
-
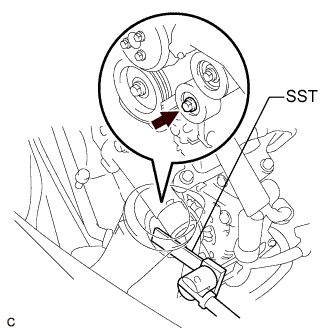
Using SST, release the V-ribbed belt tension by turning the V-ribbed belt tensioner assembly counterclockwise, and remove the V-ribbed belt from the V-ribbed belt tensioner assembly.
- SST
- 09961-00950
-
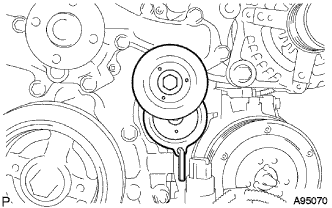
While turning the V-ribbed belt tensioner assembly counterclockwise, align with its holes, and then insert the 5 mm bi-hexagon wrench into the holes to fix the V-ribbed belt tensioner assembly.
-
-
REMOVE CRANKSHAFT PULLEY
-
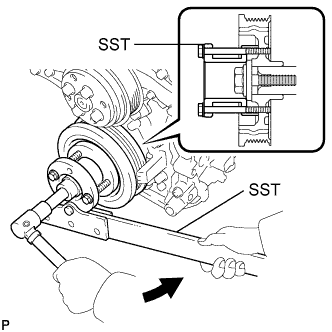
Using SST, loosen the crankshaft pulley bolt.
- SST
- 09213-70011 ( 09213-70020 )
- 09330-00021
-
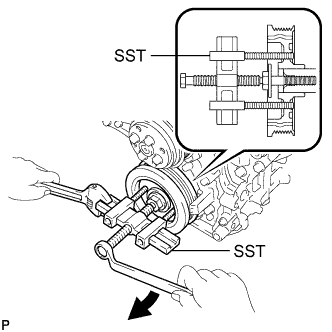
Using SST, remove the crankshaft pulley bolt and crankshaft pulley.
- SST
- 09950-50013 ( 09951-05010, 09952-05010, 09953-05020, 09954-05021 )
-
-
REMOVE TIMING CHAIN CASE OIL SEAL
-
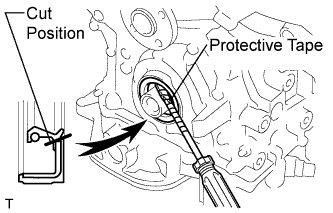
Using a screwdriver, pry out the oil seal.
Tech Tips
Tape the screwdriver tip before use.
Note
After the removal, check the crankshaft for damage. If it is damaged, smooth the surface with 400-grit sandpaper.
-