ECM INSTALLATION
-
INSTALL NO. 2 ECM BRACKET
-
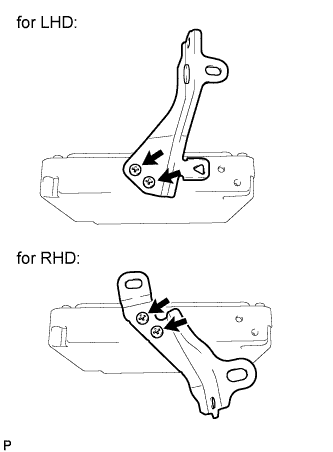
Install the 2 screws and No. 2 ECM bracket.
-
-
INSTALL NO. 1 ECM BRACKET
-
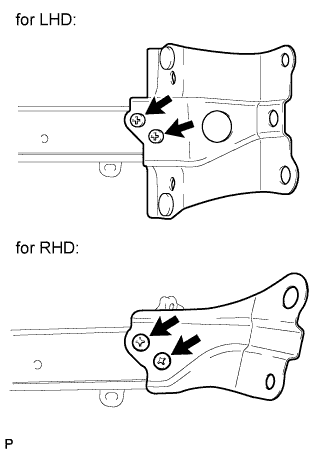
Install the 2 screws and No. 1 ECM bracket.
-
-
INSTALL ECM
-
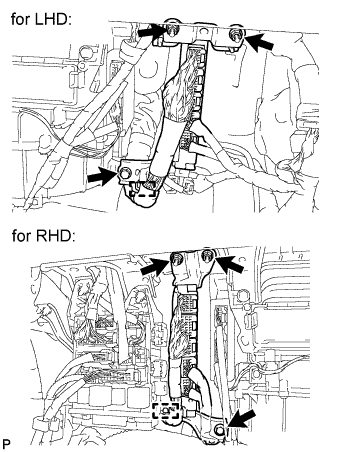
Install the 2 nuts, bolt and ECM.
- Torque:
- 8.0 N*m { 82 kgf*cm, 71 in.*lbf }
-
Install the wire harness clamp.
-
Connect the 5 ECM connectors.
-
Connect the harness connector (LHD).
-
-
INSTALL LOWER INSTRUMENT PANEL SUB-ASSEMBLY
-
Connect each connector and clamp.
-
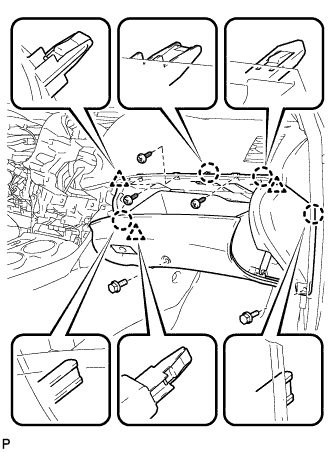
Engage the 4 claws and 3 clips.
-
Install the lower instrument panel sub-assembly with the 2 bolts <B> and 3 screws <F>.
-
-
INSTALL NO. 2 INSTRUMENT PANEL UNDER COVER SUB-ASSEMBLY
-
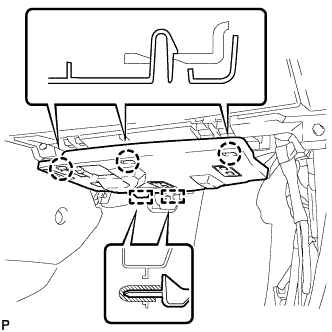
Engage the 2 guides.
-
Engage the 3 claws and install the No. 2 instrument panel under cover sub-assembly.
-
-
INSTALL COWL SIDE TRIM SUB-ASSEMBLY RH
Tech Tips
Use the same procedure for the RH side and the LH side Click here.
-
INSTALL FRONT DOOR SCUFF PLATE RH
Tech Tips
Use the same procedure for the RH side and the LH side Click here.
-
REGISTER IMMOBILISER COMMUNICATION ID
Note
If the ECM is replaced, register the ECM communication ID for the immobiliser system (Refer to the Service Bulletin for Registration).
-
PERFORM INITIALIZATION
Note
If the ECM is replaced, perform RESET MEMORY (AT initialization) Click here.