ACTIVE CONTROL ENGINE MOUNT REMOVAL
-
REMOVE V-BANK COVER SUB-ASSEMBLY
-
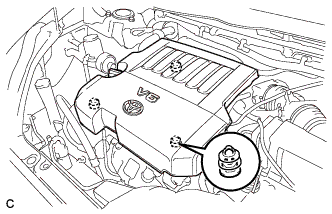
Hold the front of the V-bank cover sub-assembly and raise it to disengage the 2 clips on the front of the V-bank cover sub-assembly. Continue rising the V-bank cover sub-assembly to disengage the clip on the rear of the V-bank cover sub-assembly and remove the V-bank cover sub-assembly.
Note
Attempting to disengage both front and rear clips at the same time may cause the V-bank cover sub-assembly to break.
-
-
REMOVE ENGINE UNDER COVER ASSEMBLY
-

Remove the 2 bolts and engine under cover assembly RR.
-

Remove the 2 bolts, 2 screws, 5 clips and engine under cover assembly.
-
-
REMOVE NO. 1 ENGINE UNDER COVER
-
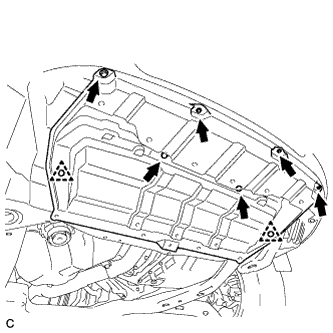
Remove the 6 bolts, 2 clips and No. 1 engine under cover.
-
-
DRAIN ENGINE COOLANT
Note
Do not remove the radiator cap sub-assembly, cylinder block drain cock plugs or radiator drain cock plug while the engine and radiator assembly are still hot. Pressurized, hot engine coolant and steam may be released and cause serious burns.
-
Loosen the radiator drain cock plug.
-
Loosen the cylinder block drain cock plug. (for Bank 1)
-
Loosen the cylinder block drain cock plug. (for Bank 2, w/ Cylinder Block Drain Cock Plug)
-
Remove the radiator cap sub-assembly.
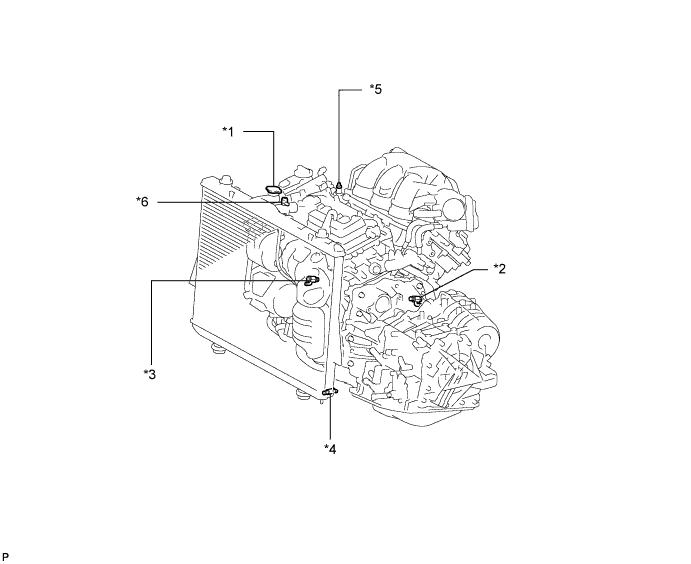
Text in Illustration *1 Radiator Cap Sub-assembly *2 Cylinder Block Drain Cock Plug (for Bank 1) *3 Cylinder Block Drain Cock Plug (for Bank 2, w/ Cylinder Block Drain Cock Plug) *4 Radiator Drain Cock Plug *5 Air Drain Cock Plug *6 Air Drain Plug Tech Tips
Collect the engine coolant in a container and dispose of it according to the regulations in your area.
-
-
REMOVE COOL AIR INTAKE DUCT SEAL
-
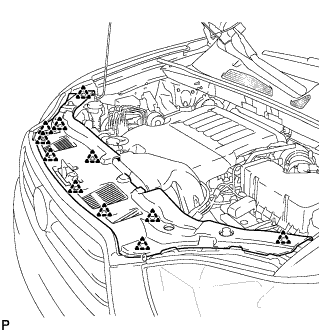
Remove the 11 clips and cool air intake duct seal.
-
-
REMOVE BATTERY
CAUTION:
Wait at least 90 seconds after disconnecting the cable from the negative (-) battery terminal to prevent airbag and seat belt pretensioner activation.
Note
When disconnecting the cable, some systems need to be initialized after the cable is reconnected Click here.
-
Loosen the nut, and disconnect the negative battery terminal.
-
Loosen the nut, and disconnect the positive battery terminal.
-
Loosen the nut, and remove the bolt and battery clamp.
-
Remove the battery and battery tray.
-
-
REMOVE NO. 2 AIR CLEANER INLET
-
Disconnect the 2 vacuum switching valve clamps.
-
Disconnect the 2 vacuum hoses.
-
Remove the 2 bolts and No. 2 air cleaner inlet.
-
-
REMOVE NO. 1 AIR CLEANER INLET
-
Disconnect the 2 vacuum hoses, and remove the 2 bolts and No. 1 air cleaner inlet.
-
-
DISCONNECT NO. 1 RADIATOR HOSE
-
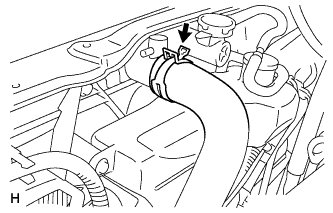
Disconnect the No. 1 radiator hose from the radiator.
-
-
DISCONNECT NO. 2 RADIATOR HOSE
-
Disconnect the No. 2 radiator hose from the radiator.
-
-
DISCONNECT OIL COOLER HOSE
-
Disconnect the oil cooler hoses from the radiator.
-
-
DISCONNECT COOLING FAN ECU CONNECTOR
-
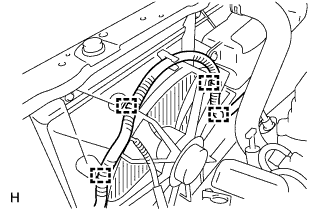
Detach the wire harness clamps from the fan shroud LH side.
-
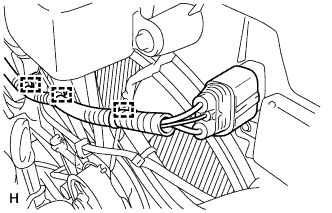
Detach the wire harness clamps from the fan shroud RH side and disconnect the cooling fan ECU connector.
-
-
REMOVE RADIATOR GRILLE SUB-ASSEMBLY
-
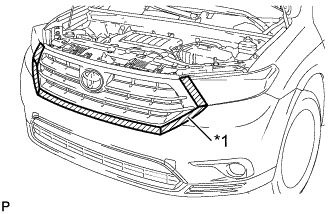
Text in Illustration *1 Protective Tape Put protective tape around the radiator grille sub-assembly.
-
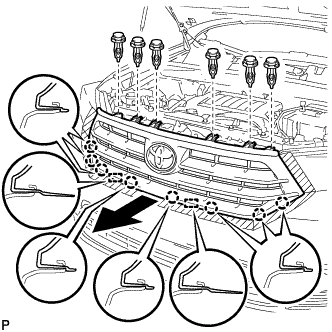
Remove the 6 clips.
-
Disengage the 8 claws and 2 guides, and remove the radiator grille sub-assembly.
-
-
REMOVE HOOD LOCK ASSEMBLY (w/o Engine Hood Courtesy Switch)
-
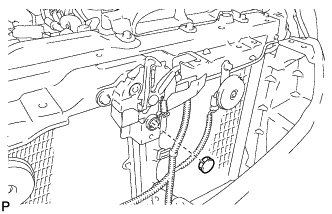
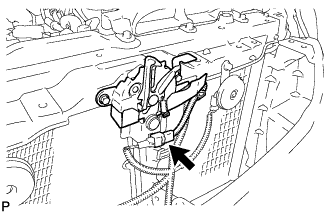
Remove the hood lock nut cap.
-
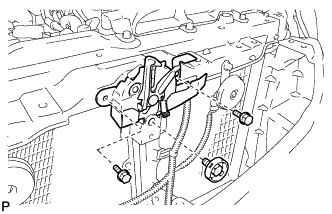
Remove the 3 bolts.
-
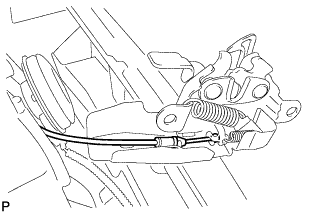
Disconnect the hood lock control cable and remove the hood lock assembly.
-
-
REMOVE HOOD LOCK ASSEMBLY (w/ Engine Hood Courtesy Switch)
-
Disconnect the connector.
-

Remove the hood lock nut cap.
-
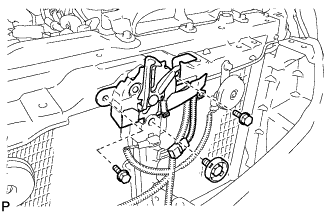
Remove the 3 bolts.
-
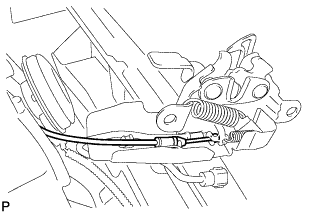
Disconnect the hood lock control cable and remove the hood lock assembly.
-
-
REMOVE UPPER RADIATOR SUPPORT SUB-ASSEMBLY (for LHD)
-

Disconnect the low pitched horn and high pitched horn connectors.
-
Detach the hood lock control cable clamp and remove the 6 bolts and upper radiator support sub-assembly.
-
-
REMOVE UPPER RADIATOR SUPPORT SUB-ASSEMBLY (for RHD)
-
Disconnect the low pitched horn and high pitched horn connectors.
-
Detach the hood lock control cable clamp and remove the 6 bolts and upper radiator support sub-assembly.
-
-
SEPARATE COOLER CONDENSER ASSEMBLY
-
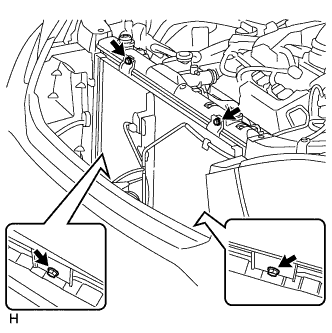
Remove the 4 bolts and move the cooler condenser assembly to remove the radiator assembly and fan assembly with motor.
-
-
REMOVE RADIATOR ASSEMBLY AND FAN ASSEMBLY WITH MOTOR
-
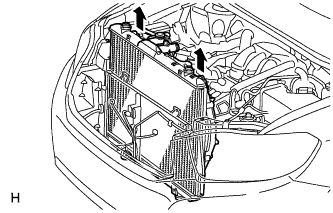
Remove the radiator assembly and fan assembly with motor.
-
-
REMOVE TRANSVERSE ENGINE MOUNTING BRACKET
Tech Tips
Securely support the automatic transaxle using a jack.
-
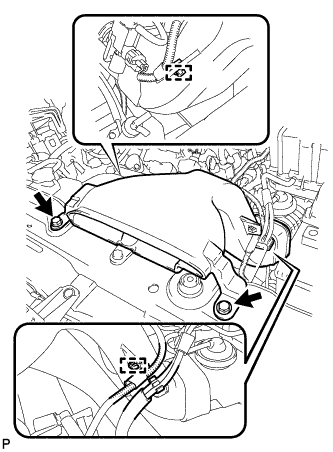
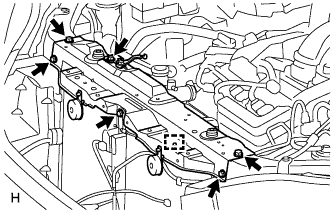
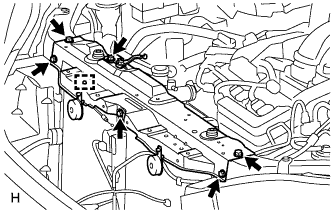
Remove the 4 bolts and transverse engine mounting bracket.
-
-
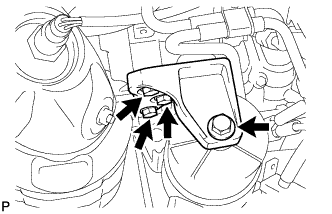
REMOVE FRONT ENGINE MOUNTING INSULATOR ASSEMBLY
-
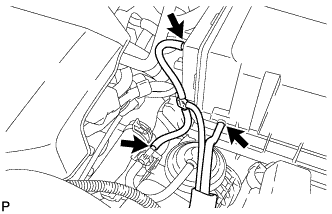
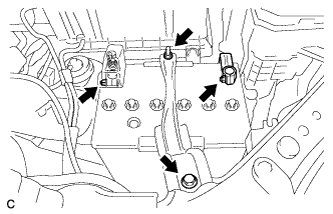
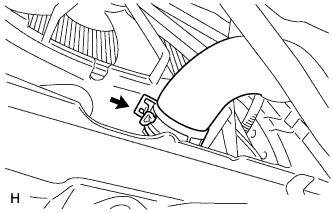
Disconnect the vacuum hose sub-assembly from the air cleaner cap sub-assembly and vacuum switching valve.
-
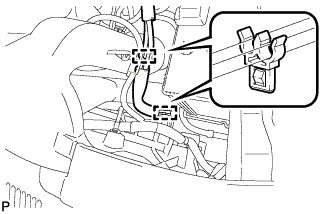
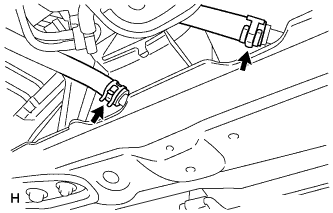
Disengage the 2 clamps.
-
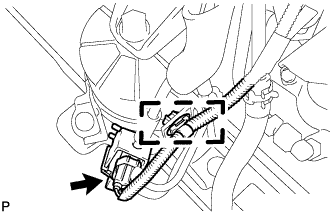
Disconnect the duty vacuum switching valve connector and disengage the clamp.
-
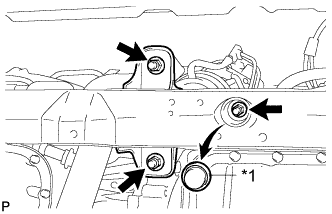
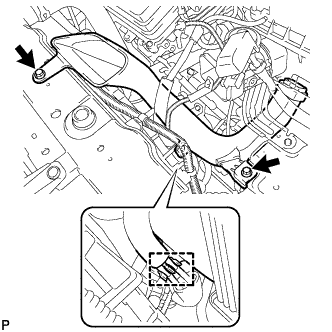
Text in Illustration *1 Hole Plug Remove the hole plug, 3 nuts and front engine mounting insulator assembly.
-