ROOF HEADLINING (for Semi-trim) REMOVAL

-
DISCONNECT BATTERY NEGATIVE CABLE
-
REMOVE FRONT DOOR SCUFF PLATE LH
-
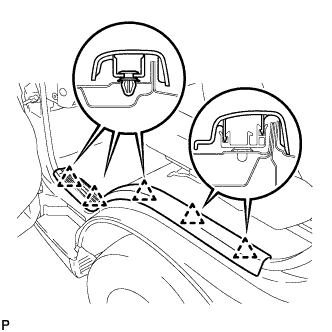
Remove the 5 clips and front door scuff plate LH.
-
-
REMOVE FRONT DOOR SCUFF PLATE RH
-
REMOVE FRONT DOOR OPENING TRIM LH
-
REMOVE FRONT DOOR OPENING TRIM RH
-
REMOVE SLIDE DOOR WEATHERSTRIP NO.1 RH
-
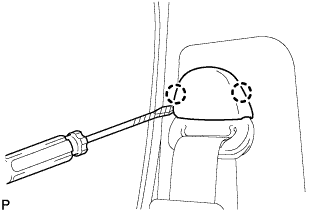
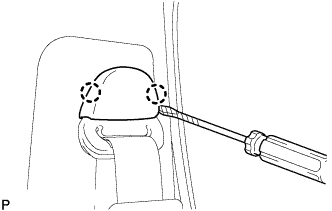
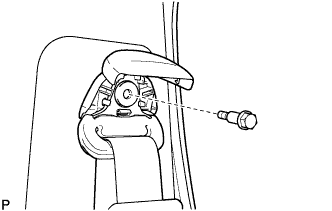
REMOVE FRONT ASSIST GRIP NO.1 PLUG
-
Using a screwdriver, disengage the assist grip plug No.1.
Tech Tips
-
Tape the screwdriver tip before use.
-
Use the same procedures described for the RH side.
-
-
-
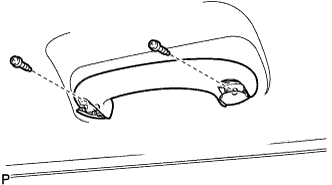
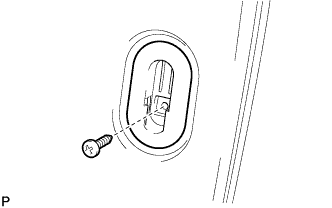
REMOVE ASSIST GRIP ASSEMBLY
-
Remove the 2 screws and assist grip.
Tech Tips
Use the same procedures described for the RH side.
-
-
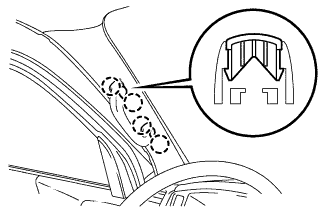
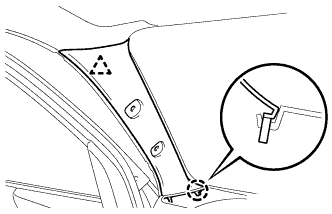
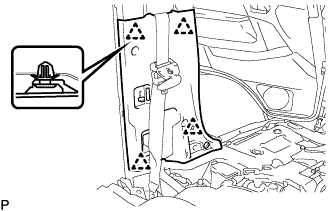
REMOVE FRONT PILLAR GARNISH LH (w/o Rear Cooler)
-
Remove the 2 clips.
-
Using a screwdriver, disengage the 3 clips and remove the front pillar garnish LH.
-
-
REMOVE FRONT PILLAR GARNISH RH (w/o Rear Cooler)
-
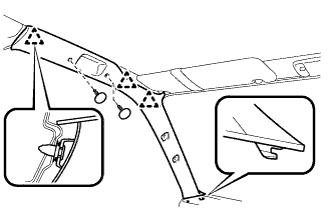
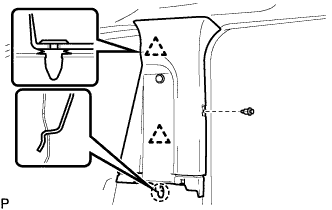
REMOVE FRONT PILLAR GARNISH LH (w/ Rear Cooler)
-
Using a screwdriver, disengage the clip and claw and remove the front pillar garnish LH.
-
-
REMOVE FRONT PILLAR GARNISH RH (w/ Rear Cooler)
-
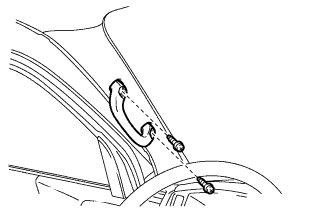
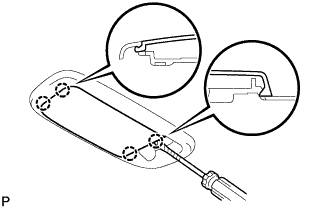
REMOVE ASSIST GRIP
-
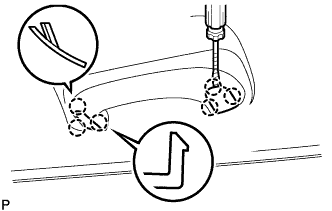
Using a screwdriver, disengage the assist grip plugs.
Tech Tips
Tape the screwdriver tip before use.
-
Remove the 2 screws and assist grip.
-
-
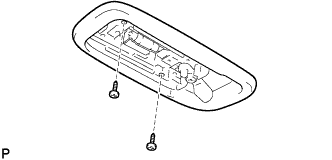
REMOVE VISOR HOLDER
-
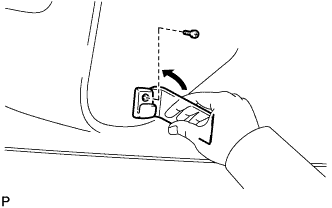
Remove the screw.
-
Using a moulding remover, disengage the claw and remove the visor holder.
Tech Tips
Use the same procedures described for the RH side.
-
-
REMOVE VISOR ASSEMBLY LH
-
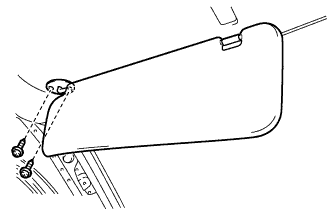
Remove the 2 screws and visor assembly LH.
-
-
REMOVE VISOR ASSEMBLY RH
Tech Tips
Use the same procedures described for the LH side.
-
REMOVE ROOM LIGHT NO.1 ASSEMBLY
-
Using a screwdriver, disengage the 4 claws and remove the light cover.
Tech Tips
Tape the screwdriver tip before use.
-
Remove the 2 screws.
-
Disconnect the connector and remove the room light No.1 assembly.
-
-
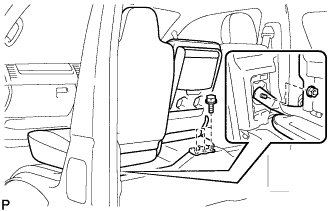
DISCONNECT FRONT SEAT OUTER BELT ASSEMBLY RH (w/ Rear Cooler)
-
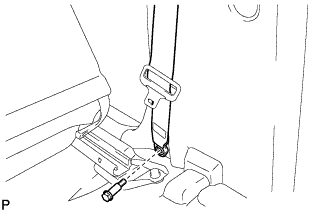
Remove the bolt and disconnect front seat outer belt assembly RH.
-
Using a screwdriver, disengage the 2 claws and cover.
Tech Tips
Tape the screwdriver tip before use.
-

Remove the bolt and disconnect front seat outer belt assembly RH.
-
-
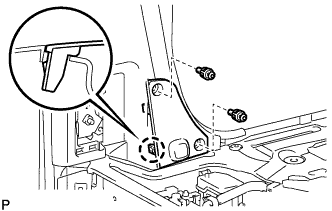
REMOVE SEPARATOR BAR BRACKET LOWER (w/ Rear Cooler)
-
Remove the screw and separator bar bracket lower.
-
-
REMOVE CENTER PILLAR GARNISH LOWER RH (w/ Rear Cooler)
-
Remove the clip.
-
Using a screwdriver, disengage the 4 clamps and remove the center pillar garnish lower RH.
Tech Tips
Tape the screwdriver tip before use.
-
-
REMOVE CENTER PILLAR GARNISH COVER LOWER LH (w/ Rear Cooler)
-
Using a screwdriver, disengage the 4 claws and remove the center pillar garnish cover lower LH.
Tech Tips
Tape the screwdriver tip before use.
-
-
REMOVE SEAT ASSEMBLY LH (w/ Rear Cooler)
-
Disconnect connector.
-
Remove the nut and 3 bolts.
-
Remove the seat assembly LH.
-
-
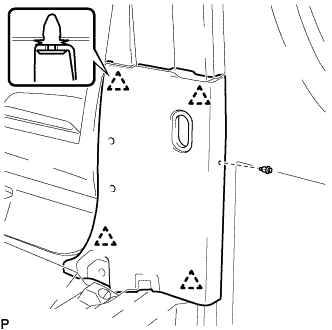
REMOVE SEAT BELT ANCHOR COVER (w/ Rear Cooler)
-
Remove the 2 clips.
-
Disengage the claw and then remove the seat belt anchor cover.
-
-
DISCONNECT FRONT SEAT OUTER BELT ASSEMBLY LH (w/ Rear Cooler)
-
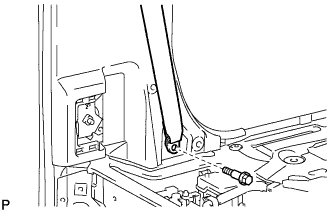
Remove the bolt and disconnect the front seat outer belt assembly LH.
-
Using a screwdriver, disengage the 2 claws and cover.
Tech Tips
Tape the screwdriver tip before use.
-
Remove the bolt and disconnect the front seat outer belt assembly LH.
-
-
REMOVE CENTER PILLAR GARNISH LOWER LH (w/ Rear Cooler)
-
Using a screwdriver, disengage the 4 clips and remove the center pillar garnish lower LH.
-
-
REMOVE CENTER PILLAR GARNISH RH (w/ Rear Cooler)
-
Remove the clip.
-
Using a screwdriver, disengage the 2 clamps and claw, and remove the center pillar garnish RH.
Tech Tips
Tape the screwdriver tip before use.
-
-
REMOVE ENGINE SERVICE HOLE COVER HOOK NO.2 LH
-

Remove the screw and the engine service hole cover hook No.2 LH.
-
-
REMOVE CENTER PILLAR GARNISH LH (w/ Rear Cooler)
-

Using a screwdriver, disengage the 3 clips and claw, and remove the center pillar garnish LH.
-
-
REMOVE ROOM LIGHT ASSEMBLY NO.2
-

Using a screwdriver, disengage the 4 claws and remove the room light assembly No.2.
Tech Tips
Tape the screwdriver tip before use.
-
Remove the 2 screws.
-
Disconnect the connector and remove the room light assembly No.2.
-
-
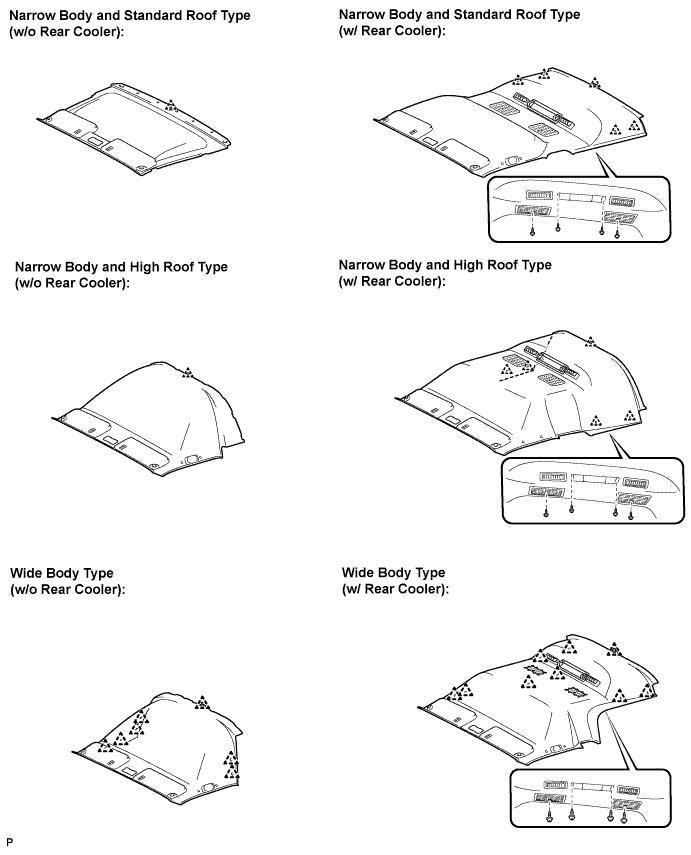
INSTALL ROOF HEADLINING MOULDING (Narrow Type)
-
Release the 7 clips and remove the roof headlining moulding.
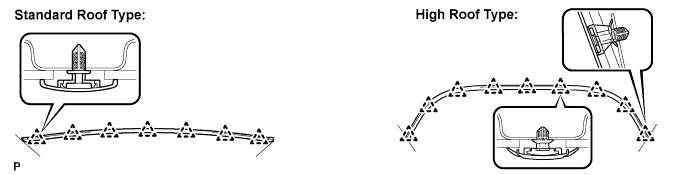
Tech Tips
-
If any clip remains on the body side, use a clip remover.
-
Remove the other headlining mouldings by following the same procedure.
-
-
-
REMOVE ROOF HEADLINING MOULDING (Wide Type)
-
Release the 9 clips and remove the roof headlining moulding.
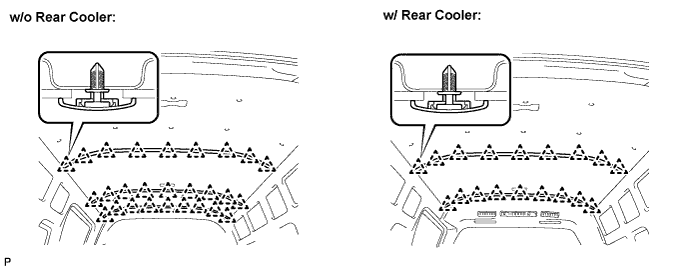
Tech Tips
-
If any clip remains on the body side, use a clip remover.
-
Remove the other headlining mouldings by following the same procedure.
-
-
-
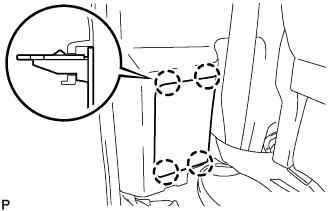
REMOVE ROOF CLIP
-
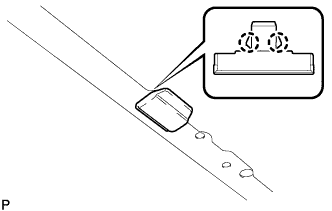
Using a screwdriver, disengage the 2 claws and remove the roof clip.
Tech Tips
Tape the screwdriver tip before use.
-
-
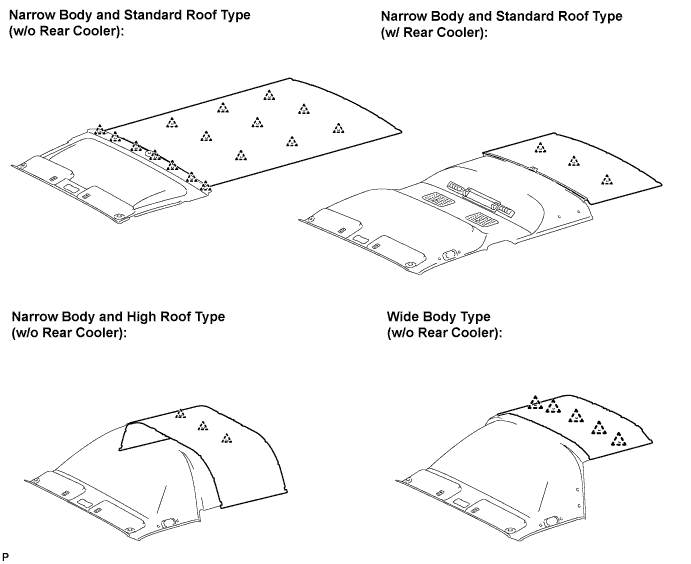
REMOVE ROOF HEADLINING NO.4
-
Release each clip and remove the roof headlining No.4.

-
-
REMOVE ROOF HEADLINING NO.3
-
Release each clip and remove the roof headlining No.3.

-
-
REMOVE ROOF HEADLINING NO.2
-
Release each clip and remove the roof headlining No.2.
-
-
REMOVE REAR COOLER CONTROL PANEL (w/ Rear Cooler)
-
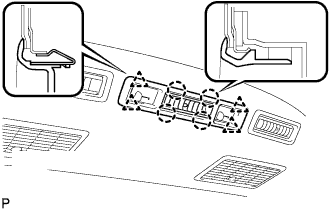
Release the 4 clips and 4 claws, and disconnect the rear cooler control panel.
-
Disconnect the connector and remove the rear cooler control panel.
-
-
REMOVE ROOF HEADLINING NO.1
-
w/ Rear Cooler:
Remove the 4 screws.
-
Release each clip and remove the roof headlining No.1.
-