FRONT DOOR GLASS WEATHERSTRIP REMOVAL

-
REMOVE FRONT DOOR LOWER FRAME BRACKET GARNISH
-
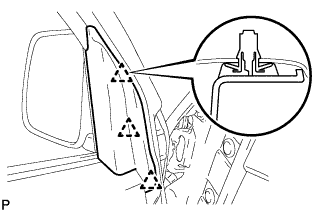
Disengage the 3 clips and remove the front door lower frame bracket garnish.
-
Remove the 3 remaining clips on the body, and reinstall them to the front door lower frame bracket garnish.
-
-
REMOVE OUTER REAR VIEW MIRROR ASSEMBLY (w/o Electric Mirror)
-
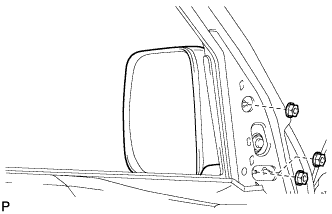
Remove the 3 nuts and the outer rear view mirror assembly.
-
-
REMOVE FRONT DOOR TRIM BOARD SUB-ASSEMBLY (w/ Electric Mirror)
Tech Tips
Refer to the instruction for removal of the front door trim board sub-assembly. (w/o Power Window: Click here w/ Power Window: Click here
-
REMOVE OUTER REAR VIEW MIRROR ASSEMBLY (w/ Electric Mirror)
-
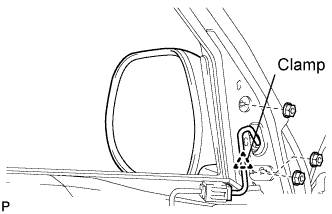
Disconnect the connector.
-
Remove the clamp.
-
Remove the 3 nuts and the outer rear view mirror assembly.
-
-
REMOVE FRONT DOOR GLASS WEATHERSTRIP ASSEMBLY OUTER
-
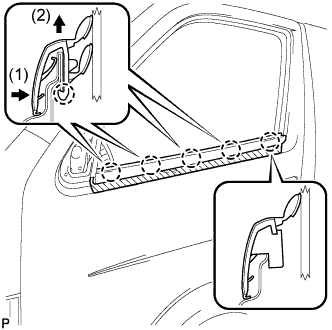
Put protective tape under the weatherstrip assembly.
-
Push the front door glass weatherstrip assembly outer in direction (1) shown in the illustration to release the claws. then, push the weatherstrip in direction (2) shown in the illustration and remove it.
-