ROOF HEADLINING (w/ Roof Window Glass) REMOVAL

-
DISCONNECT CABLE FROM NEGATIVE BATTERY TERMINAL
-
REMOVE FRONT DOOR SCUFF PLATE LH
-
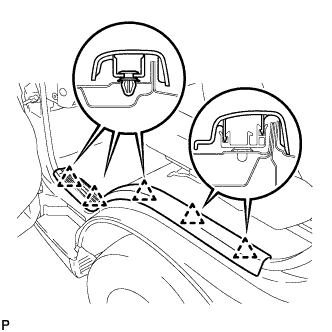
Disengage the 5 clips and remove the front door scuff plate LH.
-
-
REMOVE FRONT DOOR SCUFF PLATE RH
Tech Tips
Use the same procedure as for the LH side.
-
REMOVE FRONT DOOR OPENING TRIM RH
-
REMOVE FRONT DOOR OPENING TRIM LH
-
REMOVE ASSIST GRIP PLUG
-
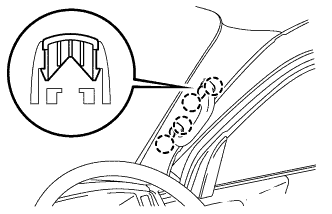
Using a screwdriver, disengage the 2 assist grip plugs.
Tech Tips
-
Tape the screwdriver tip before use.
-
Use the same procedure for RH and LH sides.
-
-
-
REMOVE ASSIST GRIP ASSEMBLY
-
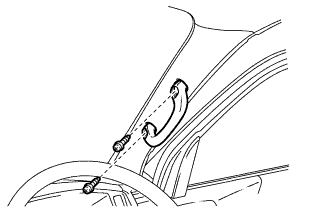
Remove the 2 screws and assist grip.
Tech Tips
Use the same procedure for RH and LH sides.
-
-
REMOVE FRONT PILLAR GARNISH RH
-
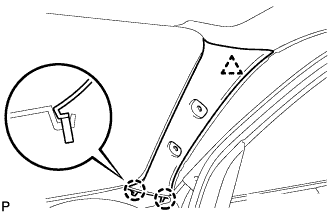
Using a screwdriver, disengage the clip and 2 claws and remove the front pillar garnish RH.
-
-
REMOVE FRONT PILLAR GARNISH LH
Tech Tips
Use the same procedure as for the RH side.
-
REMOVE VISOR HOLDER
-
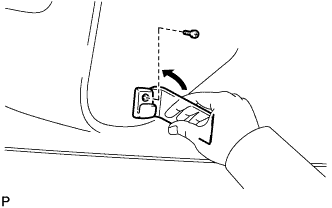
Remove the screw.
-
Using a moulding remover, disengage the claw and remove the visor holder.
Tech Tips
Use the same procedure for RH and LH sides.
-
-
REMOVE VISOR ASSEMBLY LH
-
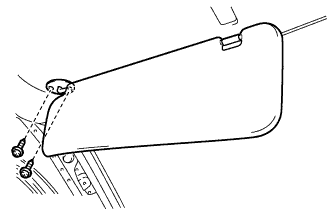
Remove the 2 screws and visor assembly LH.
-
-
REMOVE VISOR ASSEMBLY RH
Tech Tips
Use the same procedures described for the LH side.
-
REMOVE ASSIST GRIP
-
Using a screwdriver, disengage the 2 assist grip plugs.
Tech Tips
Tape the screwdriver tip before use.
-
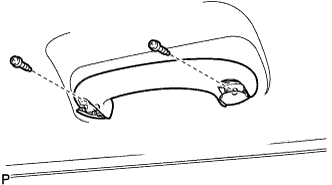
Remove the 2 screws and assist grip.
-
-
REMOVE NO. 1 ROOM LIGHT ASSEMBLY
-
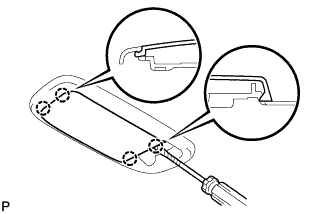
Using a screwdriver, disengage the 4 claws and remove the light cover.
Tech Tips
Tape the screwdriver tip before use.
-
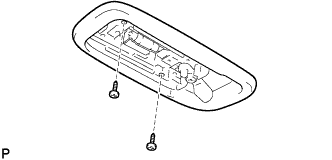
Remove the 2 screws.
-
Disconnect the connector and remove the No. 1 room light assembly.
-
-
REMOVE NO. 2 ROOM LIGHT ASSEMBLY
-
Using a screwdriver, disengage the 4 claws and remove the No. 2 room light assembly.
Tech Tips
Tape the screwdriver tip before use.
-
Remove the 2 screws.
-
Disconnect the connector and remove the No. 2 room light assembly.
-
-
REMOVE ROOF HEADLINING GARNISH
-
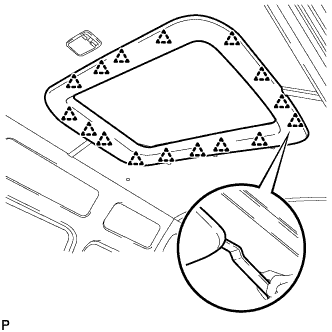
Using a moulding remover, disengage the 16 clips and remove the roof headlining garnish.
-
-
REMOVE ROOF HEADLINING MOULDING
-
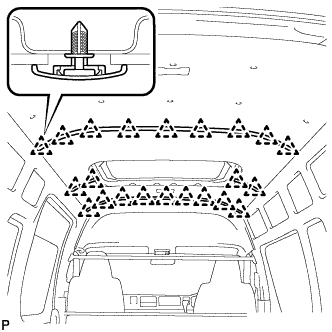
Remove the 22 clips and 4 roof headlining mouldings.
Tech Tips
-
If any clip remains on the body side, use a clip remover.
-
-
-
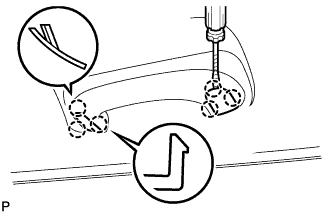
REMOVE ROOF CLIP
-
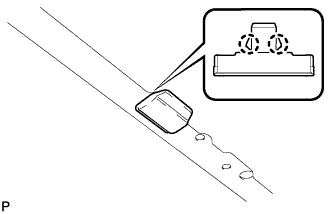
Using a screwdriver, disengage the 2 claws and remove the roof clip.
Tech Tips
Tape the screwdriver tip before use.
-
-
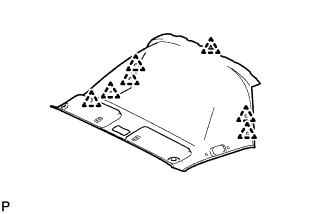
REMOVE NO. 4 ROOF HEADLINING
-
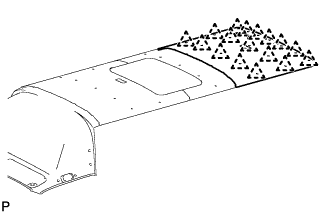
Remove the 17 clips and No. 4 roof headlining.
-
-
REMOVE NO. 3 ROOF HEADLINING
-
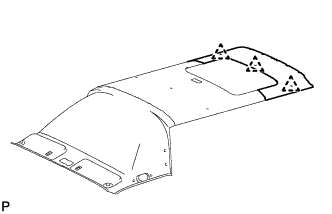
Remove the 3 clips and No. 3 roof headlining.
-
-
REMOVE NO. 2 ROOF HEADLINING
-
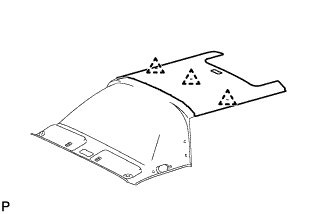
Remove the 3 clips and No. 2 roof headlining.
-
-
REMOVE NO. 1 ROOF HEADLINING
-
Remove the 7 clips and No. 1 roof headlining.
-