SLIDE DOOR LOCK RELEASE MOTOR INSTALLATION

-
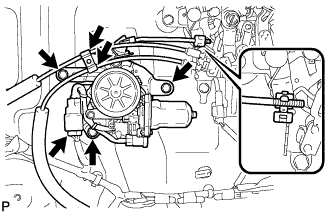
INSTALL SLIDE DOOR LOCK RELEASE MOTOR
-
Install the slide door lock release motor with the 3 bolts.
- Torque:
- 5.5 N*m { 56 kgf*cm, 49 in.*lbf }
-
Connect the link.
-
Connect the connector and cable.
-
-
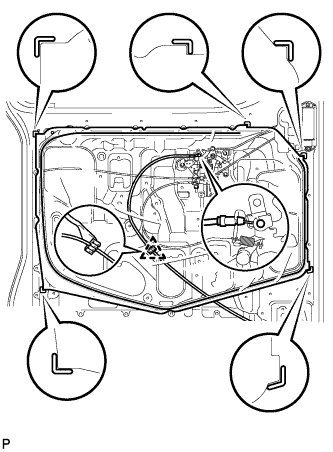
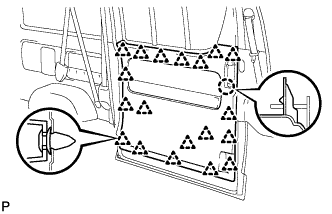
INSTALL SLIDE DOOR SERVICE HOLE COVER LH
-
Apply butyl tape to the door panel, then install a new slide door service hole cover as shown in the illustration.
Tech Tips
-
When installing the service hole cover, pull the links and connectors out through the service hole.
-
There should be no wrinkles or folds after attaching the service hole cover.
-
After attaching the service hole cover, check the quality of the seal.
-
-
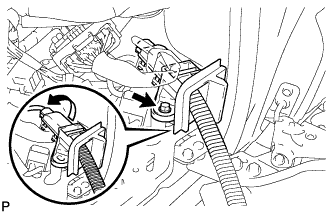
Connect the cable to the slide door lock remote control.
-
Engage the clamp.
-
-
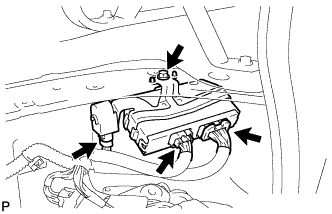
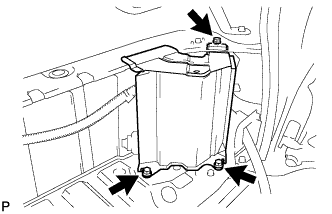
INSTALL REAR NO. 2 DOOR WIRE
-

Engage the 4 clips and install the rear No. 2 door wire.
Note
Engage the clips by directly pushing them in by hand, not by tapping on the case surface.
-
Tighten the 4 bolts.
Note
Do not tighten the bolts with any wire harness or cable wedged under the case as it may cause the case to deform or malfunction.
-
Make sure that the wire harness is not twisted, and tighten the bolts after the clamp is fully secured by turning it in the direction indicated by the arrow mark.
-
Connect the connector.
-
-
INSTALL DOOR CONTROL RELAY ASSEMBLY
-
Install the door control relay with the bolt.
-
Connect the connectors.
-
-
INSTALL SIDE STEP REAR SUPPORT LH
-
Install the side step rear support with the 3 bolts.
- Torque:
- 7.8 N*m { 80 kgf*cm, 69 in.*lbf }
-
-
INSTALL REAR DOOR SCUFF PLATE LH
-

Connect the connector.
-
Engage the claw and 12 clips and install the rear door scuff plate.
-
-
INSTALL REAR DOOR TRIM BOARD SUB-ASSEMBLY LH
-
Engage the claw and 19 clips, and install the rear door trim board.
-

Using "TORX" socket wrench T25, tighten the 2 screws.
-
-
INSTALL SLIDE DOOR WINDOW GARNISH LH
-
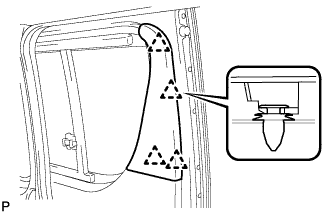
Engage the 4 clips and install the slide door window garnish.
-
-
CONNECT CABLE TO NEGATIVE BATTERY TERMINAL
- Torque:
- 5.4 N*m { 55 kgf*cm, 48 in.*lbf }