FRONT DOOR DISASSEMBLY

-
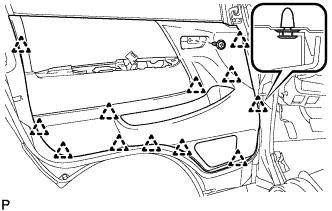
REMOVE FRONT DOOR LOWER FRAME BRACKET GARNISH
-
Disengage the 3 clips and remove the front door lower frame bracket garnish.
-
Remove the 3 remaining clips on the body, and reinstall them to the front door lower frame bracket garnish.
-
-
REMOVE FRONT DOOR WINDOW REGULATOR HANDLE ASSEMBLY (w/o Power Window)
-
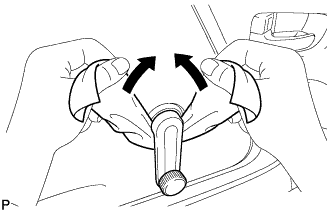
Remove the front door window regulator handle shaft snap ring and the front door window regulator handle assembly.
-
-
REMOVE POWER WINDOW REGULATOR MASTER SWITCH ASSEMBLY (w/ Power Window)
-
Remove the 2 screws.
-
Using a screwdriver, disengage the 3 clips and 4 claws.
Tech Tips
Tape the screwdriver tip before use.
-
Disconnect the switch connector and remove the front door trim board sub-assembly.
-
-
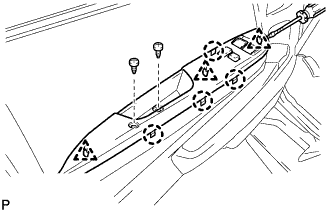
REMOVE FRONT DOOR TRIM BOARD SUB-ASSEMBLY (w/o Power Window)
-
Remove the 3 screws.
-
Disengage the 12 clips and remove the front door trim board sub-assembly.
-
-
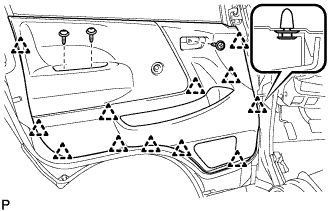
REMOVE FRONT DOOR TRIM BOARD SUB-ASSEMBLY (w/ Power Window)
-
Remove the screw.
-
Using a clip remover, disengage the 12 clips and remove the front door trim board sub-assembly.
Tech Tips
If a clip cannot be reached with the clip remover, pull on the lower trim to remove it.
-
-
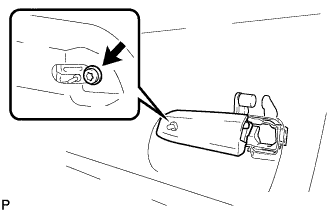
REMOVE OUTER REAR VIEW MIRROR ASSEMBLY (w/o Electric Mirror)
-
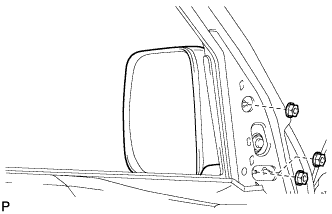
Remove the 3 nuts and the outer rear view mirror assembly.
-
-
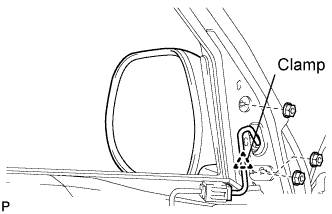
REMOVE OUTER REAR VIEW MIRROR ASSEMBLY (w/ Electric Mirror)
-
Install the outer rear view mirror with the 3 nuts.
- Torque:
- 8.0 N*m { 82 kgf*cm, 71 in.*lbf }
-
Install the clamp.
-
Connect the connector.
-
-
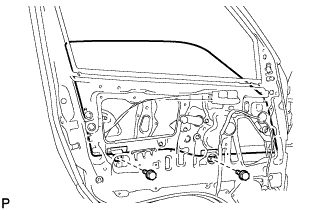
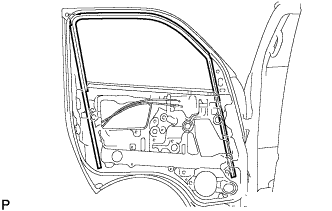
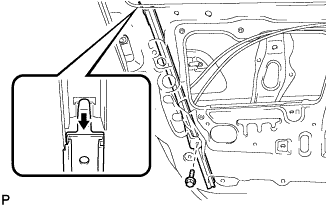
REMOVE FRONT DOOR GLASS WEATHER STRIP ASSEMBLY OUTER
-
REMOVE FRONT DOOR SERVICE HOLE COVER
-
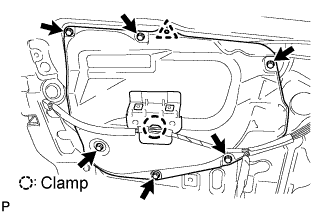
Disconnect the connector and disengage the clamp.
-
Remove the 6 bolts and the front door glass weather strip.
-
-
REMOVE FRONT DOOR GLASS SUB-ASSEMBLY (w/o Power Window)
-
Remove the plug hole.
-
Install the front door window regulator handle assembly, and move the front door glass RH to the position shown in the illustration (where the mounting bolt can be seen).
-
Remove the 2 bolts and the front door glass sub-assembly.
-
-
REMOVE FRONT DOOR GLASS SUB-ASSEMBLY (w/ Power Window)
-
Remove the plug hole.
-

Connect the power window regulator master switch assembly, and move the front door glass LH to the position shown in the illustration (where the mounting bolt can be seen).
-
Remove the 2 bolts and the front door glass sub-assembly.
-
-
REMOVE FRONT DOOR WINDOW REGULATOR ASSEMBLY (w/o Power Window)
-
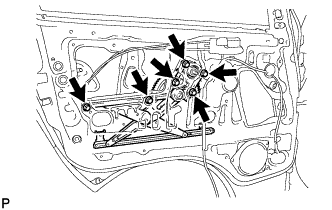
Remove the 6 bolts and the front door window regulator assembly.
-
-
REMOVE FRONT DOOR WINDOW REGULATOR ASSEMBLY (w/ Power Window)
-
Disconnect the connector.
-
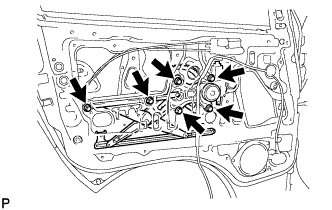
Remove the 6 bolts and the front door window regulator assembly.
-
-
REMOVE POWER WINDOW REGULATOR MOTOR ASSEMBLY (w/ Power Window)
-
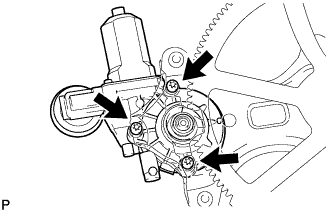
Using a "torx" socket wrench (T25), remove the 3 "torx" screws and the power window regulator motor assembly.
Note
Perform this procedure only when replacing the power window regulator motor assembly LH or the front door window regulator assembly LH.
-
-
REMOVE FRONT DOOR GLASS RUN
-
Remove the front door glass run.
-
-
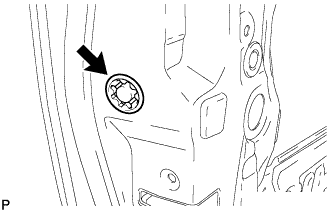
REMOVE FRONT DOOR FRAME SUB-ASSEMBLY REAR LOWER
-
Remove the bolt and the front door frame sub-assembly rear lower.
-
-
REMOVE FRONT DOOR OUTSIDE HANDLE COVER
-
Remove the plug hole.
-

Using a "torx" socket wrench (T30), loosen the "torx" screw and remove the front door outside handle cover with the door lock key cylinder installed.
-
-
REMOVE FRONT DOOR HANDLE ASSEMBLY OUTSIDE
-
Using a "torx" socket wrench (T30), loosen the "torx" screw.
-
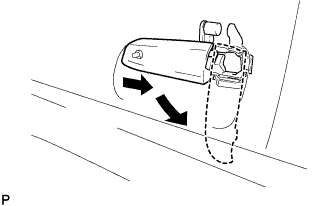
Slide the front door outside handle assembly LH to the rear of the vehicle, and turn it downward to remove.
-
-
REMOVE FRONT DOOR INSIDE HANDLE SUB-ASSEMBLY
-
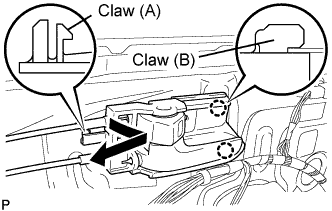
Disengage the claw (A).
-
Disengage the claws (B).
-
-
REMOVE FRONT DOOR LOCK ASSEMBLY
-
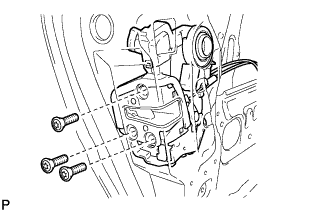
Using a "torx" socket wrench (T30), remove the 3 "torx" screws.
-
Remove the front door lock assembly with the front door inside handle sub-assembly installed.
-
-
REMOVE FRONT DOOR SERVICE HOLE NO.2 COVER
-
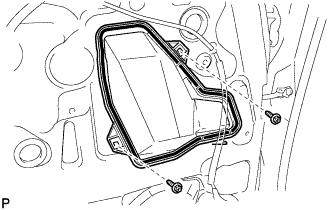
Remove the 2 screws and the front door service hole No.2 cover.
-
-
REMOVE SPEAKER COVER FRONT (w/o Speaker)
-
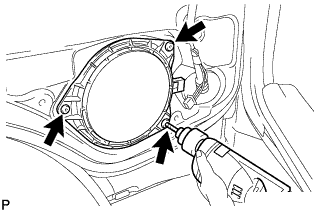
Using a drill, drill out the 3 rivet heads and remove the speaker cover front.
Note
Do not drill the rivet at an angle as this will cause damage to the drill and drill hole. Line up the drill and rivet, and carefully drill out the rivet head.
-
Even if the flange is taken off, continue drilling and push out the remaining fragments using the drill.
-
Using a vacuum cleaner, remove the rivet fragments and shavings from the inside of the door.
-
-
REMOVE FRONT NO.1 SPEAKER ASSEMBLY (w/ Speaker)
-
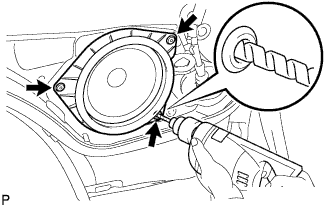
Disconnect the connector.
-
Drill out the 3 rivet heads using a drill with a bit diameter of less than 4 mm (0.16 in.), and remove the front No.1 speaker assembly from the front door panel.
-
Operate the drill along the rivet head circumference and cut out the flange.
CAUTION:
Be careful. The cut rivet is very hot.
Note
-
Do not drill the rivet at an angle as this will cause damage to the drill and drill hole. Line up the drill and rivet, and carefully drill out the rivet head.
-
Be careful as the cut rivet will be very hot.
-
-
After drilling out the flange, continue drilling to push out the shards on the drill.
-
Using a vacuum cleaner, remove the rivet fragments and shavings from the inside of the door.
-
-
REMOVE FRONT DOOR CHECK ASSEMBLY
-
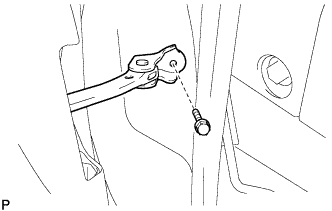
Remove the bolts.
-
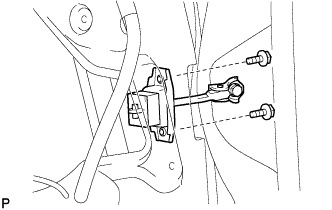
Remove the 2 bolts and the front door check.
-
-
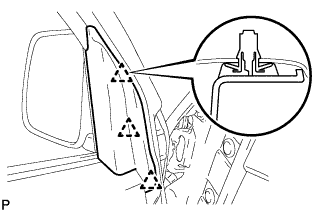
REMOVE FRONT DOOR WEATHER STRIP
-
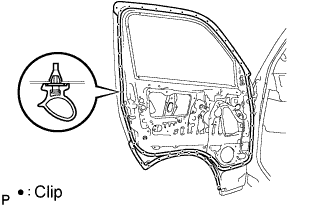
Using a clip remover, disengage the clips and remove the front door weather strip.
-