HEADLIGHT DIMMER SWITCH INSTALLATION

Tech Tips
-
Use the same procedure for RHD and LHD vehicles.
-
The procedure listed below is for LHD vehicles.
-
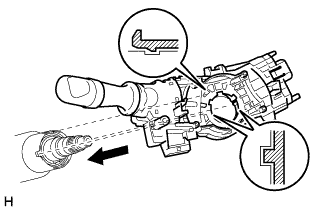
INSTALL HEADLIGHT DIMMER SWITCH ASSEMBLY (for LHD)
-
Install the headlight dimmer switch assembly to the steering column, making sure that the stopper protrusions and cutout parts align.
-
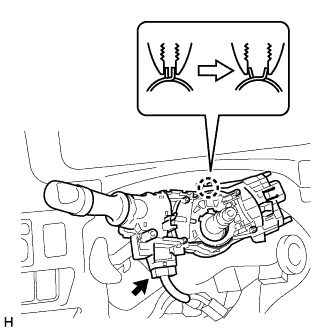
While loosening the band clamp, attach the claw to install the headlight dimmer switch assembly.
-
Connect the connector.
-
-
INSTALL HEADLIGHT DIMMER SWITCH ASSEMBLY (for RHD)
-
w/o Entry and Start System:
-
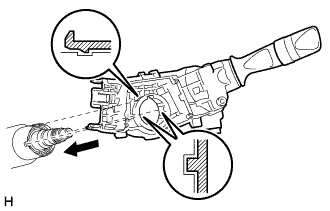
Install the headlight dimmer switch assembly to the steering column, making sure that the stopper protrusions and cutout parts align.
-
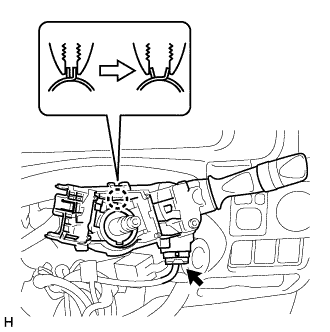
While loosening the band clamp, attach the claw to install the headlight dimmer switch assembly.
-
Connect the connector.
-
-
w/ Entry and Start System:
-

Attach the 3 claws to install the headlight dimmer switch assembly.
-
Connect the connector.
-
-
-
INSTALL WINDSHIELD WIPER SWITCH ASSEMBLY
-
Attach the claw to install the windshield wiper switch assembly.
-
Connect the 2 connectors.
-
-
INSTALL SPIRAL CABLE SUB-ASSEMBLY
-
CONNECT CABLE TO NEGATIVE BATTERY TERMINAL
Note
When disconnecting the cable, some systems need to be initialized after the cable is reconnected Click here.
-
CHECK SRS WARNING LIGHT