COMPRESSOR AND PULLEY (for TR Series Engine) REMOVAL

-
DISCHARGE REFRIGERANT FROM REFRIGERATION SYSTEM
-
Start up the engine.
-
Turn the A/C switch on.
-
Operate the cooler compressor at an engine rpm of approximately 1,000 for 5 to 6 minutes to circulate the refrigerant and collect compressor oil remaining in each component into the cooler compressor as much as possible.
-
Stop the engine.
-
Using SST, let the refrigerant gas out.
- SST
- 07110-58060 ( 07117-58080, 07117-58090, 07117-78050, 07117-88060, 07117-88070, 07117-88080 )
-
-
REMOVE FRONT SEAT ASSEMBLY RH (for Hi-back Seat Type)
-
Perform the same procedure as above on the opposite side. Click here
-
-
REMOVE FRONT SEAT ASSEMBLY RH (for Low-back Seat Type)
-
Perform the same procedure as above on the opposite side. Click here
-
-
REMOVE FRONT DOOR SCUFF PLATE RH
-
REMOVE ENGINE SERVICE HOLE SUB COVER SUB-ASSEMBLY
-
Roll up the carpet, and remove the 5 bolts and engine service hole sub cover.
-
-
REMOVE OIL LEVEL GAUGE SUB-ASSEMBLY
-
REMOVE OIL LEVEL GAUGE GUIDE
-
Remove the bolt and gauge guide.
-
-
REMOVE FAN & GENERATOR V BELT
-
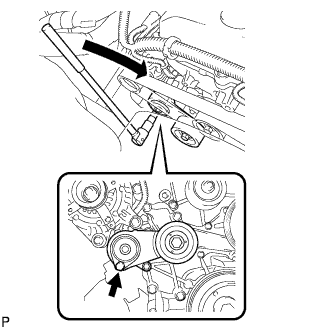
Use the hexagon-shaped part indicated by the arrow in the illustration to move the tensioner pulley downward and decrease the tension in the drive belt. Then remove the drive belt.
Note
When removing the drive belt, do not use the idle pulley's bolt.
Tech Tips
After removing the drive belt, move the tensioner upward to the maximum amount.
-
-
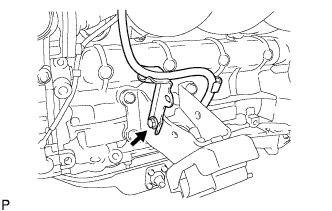
REMOVE COOLER REFRIGERANT SUCTION HOSE NO.1
-
Remove the bolt and disconnect the cooler refrigerant suction hose No.1 from the compressor and pulley.
-
Remove the O-ring from the cooler refrigerant suction hose No.1.
Note
Seal the openings of the disconnected parts using vinyl tape to prevent moisture and foreign matter from entering.
-
-
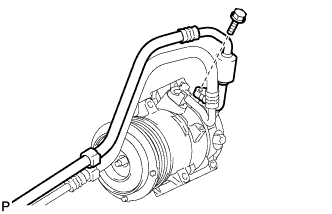
REMOVE COOLER REFRIGERANT DISCHARGE HOSE NO.1
-
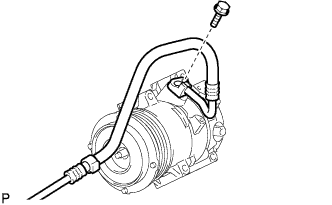
Remove the bolt and disconnect the cooler refrigerant discharge hose No.1 from the compressor and pulley.
-
Remove the O-ring from the cooler refrigerant discharge hose No.1.
Note
Seal the openings of the disconnected parts using vinyl tape to prevent moisture and foreign matter from entering.
-
-
REMOVE COMPRESSOR AND PULLEY
-
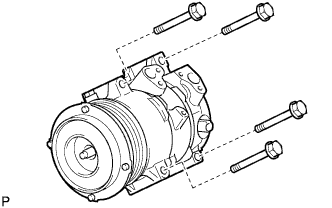
Disconnect the connector.
-
Remove the 4 bolts and compressor and pulley.
-