HEATER SWITCH (w/ Hot Gas Heater) REMOVAL

-
REMOVE NO. 2 INSTRUMENT CLUSTER FINISH PANEL GARNISH
-
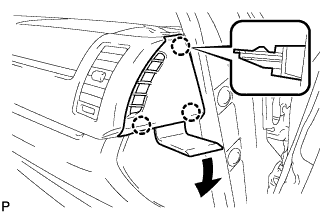
Using a moulding remover, disengage the 3 claws and remove the instrument cluster finish panel No.2 garnish.
-
-
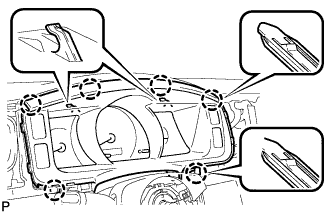
REMOVE CENTER INSTRUMENT CLUSTER FINISH PANEL SUB-ASSEMBLY
-
Using a roof moulding remover, disengage the claws in the order shown in the illustration.

-
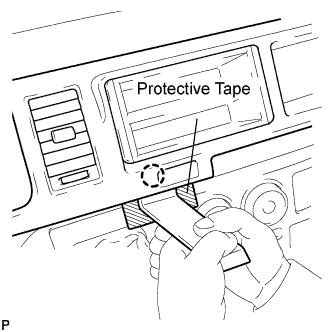
Attach tape to the positions shown in the illustration in order to prevent the instrument cluster finish panel sub-assembly center from being damaged.
-
Using a moulding remover, disengage the claw.
-
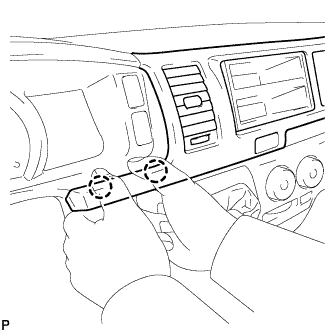
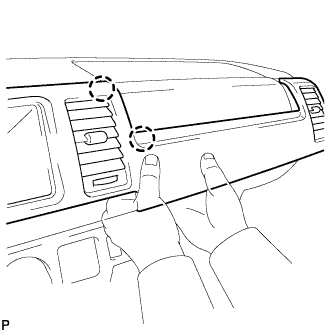
Hold the panel as shown in the illustration and pull it toward the rear of the vehicle to disengage the claws.
-
While supporting the panel with your right hand, pull it toward the rear of the vehicle to disengage the claws.
-
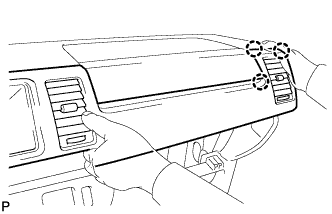
Hold the panel as shown in the illustration and disengage the claws.
-
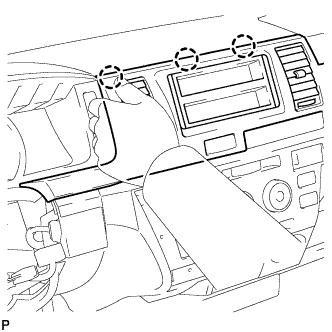
Hold the panel as shown in the illustration and pull it toward the rear of the vehicle to disengage the claws. Remove the instrument cluster finish panel sub-assembly center.
-
-
REMOVE NO. 1 INSTRUMENT CLUSTER FINISH PANEL GARNISH
-
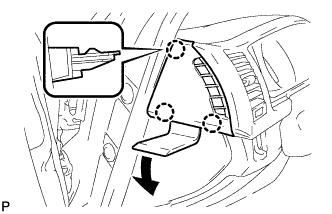
Using a moulding remover, disengage the 3 claws and remove the instrument cluster finish panel No.1 garnish.
-
-
REMOVE INSTRUMENT CLUSTER FINISH PANEL ASSEMBLY
-
Using a moulding remover, disengage the 4 claws and remove the instrument cluster finish panel assembly.
-
-
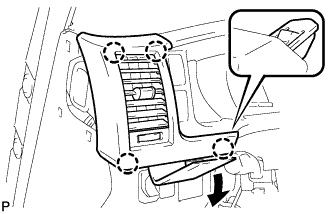
REMOVE NO. 2 INSTRUMENT CLUSTER FINISH PANEL SUB-ASSEMBLY
-
Disengage the 6 claws and remove the instrument cluster finish panel sub-assembly.
-
-
REMOVE HEATER SWITCH ASSEMBLY
-
Disconnect the connector.
-
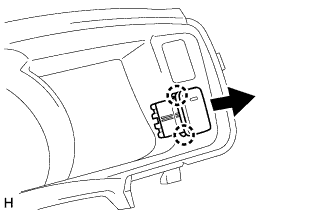
Detach the 2 claws and remove the heater switch assembly.
-