COMPRESSOR AND MAGNETIC CLUTCH (for 1KD-FTV, 2KD-FTV) REMOVAL

-
DISCHARGE REFRIGERANT FROM REFRIGERATION SYSTEM
-
Start up the engine.
-
Turn the A/C switch on.
-
Operate the cooler compressor at an engine rpm of approximately 1,000 for 5 to 6 minutes to circulate the refrigerant and collect compressor oil remaining in each component into the cooler compressor as much as possible.
-
Stop the engine.
-
Using SST, let the refrigerant gas out.
- SST
- 07110-58060 ( 07117-58080, 07117-58090, 07117-78050, 07117-88060, 07117-88070, 07117-88080 )
-
-
REMOVE FRONT DOOR SCUFF PLATE RH
-
REMOVE FRONT SEAT ASSEMBLY RH (for Hi-back Seat Type)
-
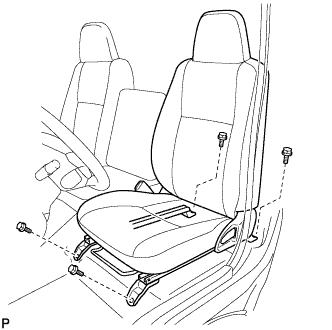
Move the front seat assembly fully forward.
-
Remove the 2 bolts on the rear side of the seat.
-
Move the front seat assembly to the rearmost position.
-
Remove the 2 bolts on the front side of the seat.
-
Move the front seat assembly to the center of the seat slide rail. Set the seatback in the upright position.
-
Disconnect the front seat inner belt assembly connector.
-
Remove the front seat assembly.
-
-
REMOVE FRONT SEAT ASSEMBLY RH (for Low-back Seat Type)
-
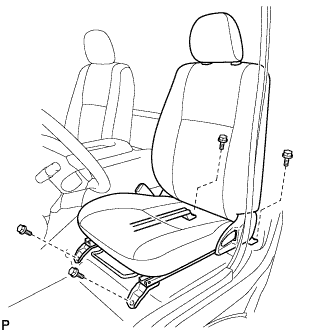
Move the front seat assembly fully forward.
-
Remove the 2 bolts on the rear side of the seat.
-
Move the front seat assembly to the rearmost position.
-
Remove the 2 bolts on the front side of the seat.
-
Move the front seat assembly to the center of the seat slide rail. Set the seatback in the upright position.
-
Disconnect the front seat inner belt assembly connector.
-
Remove the front seat assembly.
-
-
REMOVE ENGINE SERVICE HOLE SUB COVER SUB-ASSEMBLY
-
Roll up the carpet, and remove the engine service hole sub cover assembly.
-
-
REMOVE NO. 1 ENGINE UNDER COVER (w/ Engine Under Cover Assembly)
-
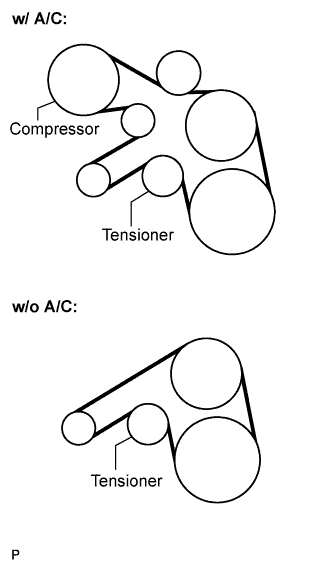
REMOVE FAN & GENERATOR V BELT (for 1KD-FTV)
-
Remove the drive belt by rotating the tensioner pulley clockwise to loosen its tension with the pulley set bolt of the tensioner.
-
-
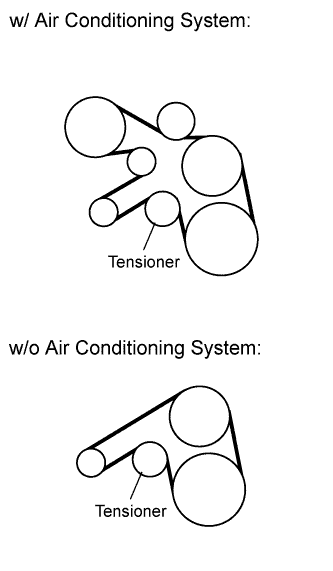
REMOVE FAN & GENERATOR V BELT (for 2KD-FTV)
-
Remove the drive belt by rotating the tensioner pulley in clockwise direction to loosen its tension with the pulley set bolt of the tensioner.
-
-
REMOVE COOLER REFRIGERANT NO. 1 DISCHARGE HOSE
-
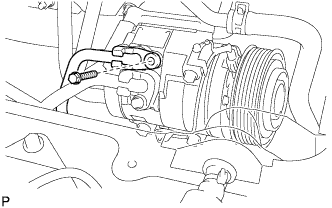
Remove the bolt and disconnect the cooler refrigerant discharge hose from the compressor and magnetic clutch.
-
Remove the O-ring from the cooler refrigerant discharge hose.
Note
Seal the openings of the disconnected parts using vinyl tape to prevent moisture and foreign matter from entering.
-
-
REMOVE COOLER REFRIGERANT NO. 1 SUCTION HOSE
-
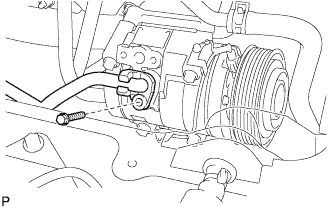
Remove the bolt and disconnect the cooler refrigerant suction hose.
-
Remove the O-ring from the cooler refrigerant suction hose.
Note
Seal the openings of the disconnected parts using vinyl tape to prevent moisture and foreign matter from entering.
-
-
REMOVE COMPRESSOR AND MAGNETIC CLUTCH
-
Disconnect the connector.
-
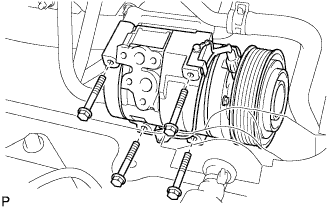
Remove the 4 bolts and compressor and magnetic clutch.
-