BRAKE BOOSTER REMOVAL

-
DRAIN BRAKE FLUID
-
REMOVE BRAKE MASTER CYLINDER
-

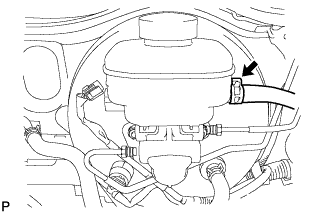
Using SST, disconnect the 2 brake tubes from the master cylinder.
- SST
- 09023-00101
-
Disconnect the warning switch connector.
-
Manual Transmission:
-
Slide the clip and separate the clutch reservoir tube.
-
-
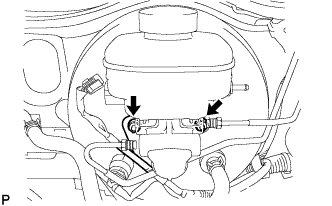
Remove the 2 nuts, and disconnect the bracket.
-
Remove the brake master cylinder from brake booster.
-
-
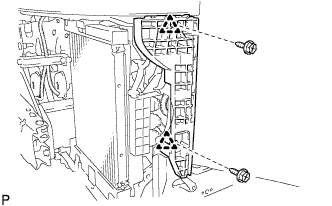
REMOVE RADIATOR GRILLE
-
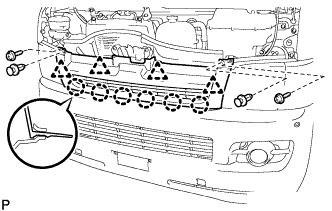
Remove the 2 clips and 2 screws.
-
Release the 6 claws and 4 clips and remove the radiator grille.
-
-
REMOVE STEP PLATE COVER LH (RHD (WIDE BODY TYPE))
-

Remove the 4 clips.
-
Release the claw and remove the step plate cover.
-
-
REMOVE STEP PLATE COVER RH (RHD (WIDE BODY TYPE))
-
REMOVE FRONT BUMPER COVER (RHD (WIDE BODY TYPE))
-
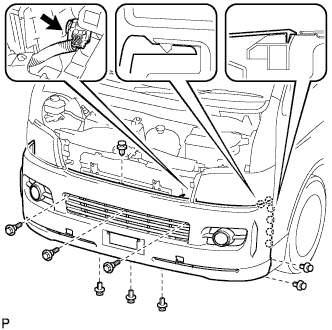
Remove the 8 clips and 3 bolts.
-
Release the 12 claws and remove the bumper.
-
Disconnect the connectors. (w/ fog light)
-
-
REMOVE FRONT BUMPER SIDE SUPPORT LH (RHD (WIDE BODY TYPE))
-
Remove the 2 screws.
-
Release the 2 clamps and remove the front bumper side support.
-
-
REMOVE HEADLIGHT ASSEMBLY RH (RHD (WIDE BODY TYPE))
Remove of the headlight assembly RH is the same as the headlight assembly LH. Click here
-
REMOVE HEADLIGHT ASSEMBLY RH (RHD (NARROW BODY TYPE))
Remove of the headlight assembly RH is the same as the headlight assembly LH. Click here
-
REMOVE WASHER JAR ASSEMBLY (LHD)
-
REMOVE INSTRUMENT PANEL FINISH PANEL LOWER
-
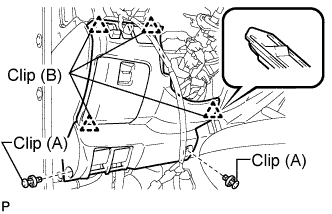
Using a clip remover, remove the 2 clips (A).
-
Disengage the 4 clips (B).
-
Disconnect the connector.
-
Push the positions indicated by the arrows in the illustration to separate the fuel lid lock control cable and bonnet (hood) control cable assembly from the panel.
Remove the instrument panel finish lower.
-
-
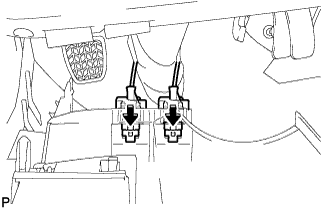
SEPARATE MASTER CYLINDER PUSH ROD CLEVIS
-
Remove the clip and clevis pin and separate the push rod clevis from the brake pedal.
-
-
SEPARATE BRAKE TUBE
-
Manual transmission:
-
Using SST, disconnect the clutch tube from the clutch master cylinder.
- SST
- 09023-00101
-

Disengage the 3 tubes from the clamp.
-
-
Automatic transmission:
-
Disengage the 2 tubes from the clamp.
-
-
-
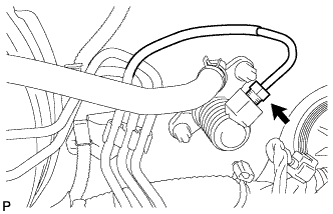
REMOVE BRAKE BOOSTER ASSEMBLY
-
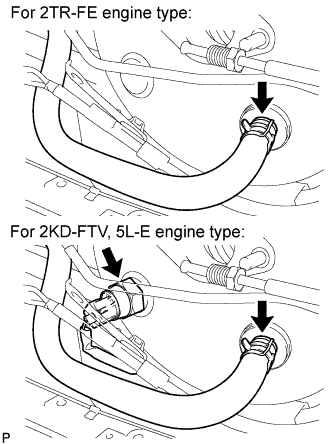
Slide the clip, disconnect the vacuum hose.
-
For 2KD-FTV, 5L-E engine type:
-
Disconnect the vacuum warning switch connector from the brake booster.
-
-
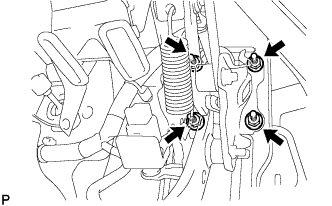
Remove the 4 nuts and brake booster assembly.
-
-
REMOVE BRAKE BOOSTER GASKET
-
REMOVE BRAKE VACUUM CHECK VALVE ASSEMBLY
-
Remove the check valve assembly and grommet.
-
-
REMOVE MASTER CYLINDER PUSH ROD CLEVIS
-
Loosen the lock nut and remove the push rod clevis.
-
-
REMOVE VACUUM WARNING SWITCH ASSEMBLY