SHIFT LEVER ASSEMBLY REMOVAL

-
DISCONNECT CABLE FROM NEGATIVE BATTERY TERMINAL
-
REMOVE INSTRUMENT PANEL FINISH PANEL LOWER
-
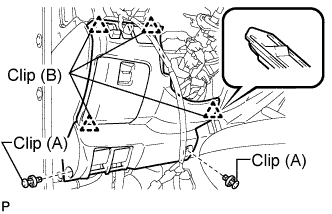
Using a clip remover, remove the 2 clips (A).
-
Disengage the 4 clips (B).
-
Disconnect the connector.
-
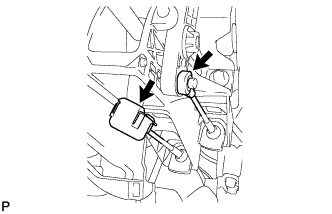
Push the positions indicated by the arrows in the illustration to separate the fuel lid lock control cable and bonnet (hood) control cable assembly from the panel.
Remove the instrument panel finish lower.
-
-
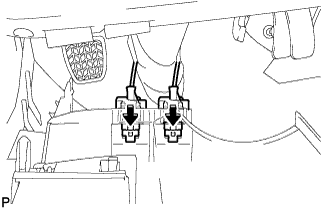
REMOVE INSTRUMENT PANEL UNDER COVER SUB-ASSEMBLY NO.1
-
Using a clip remover, remove the 2 clips
-
Disengage the 3 claws and remove the instrument panel No.1 under cover sub-assembly.
-
-
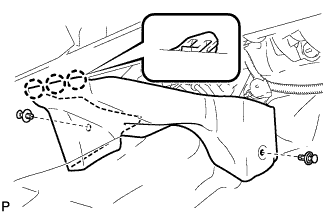
REMOVE PARKING BRAKE HOLE COVER
-
Disengage the 6 claws and remove the parking brake hole cover.
-
-
REMOVE SHIFT LEVER KNOB
-
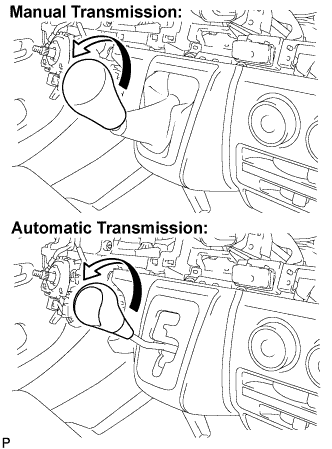
Turn the shift lever knob in the direction indicated by the arrow and remove it.
-
-
REMOVE SHIFTING HOLE COVER ASSEMBLY
-
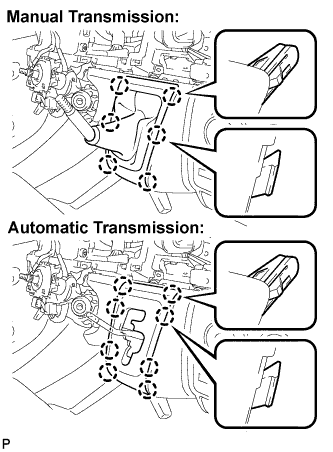
Manual Transmission:
Disengage the 6 claws and remove the shifting hole cover assembly.
-
Automatic Transmission:
Disengage the 8 claws and remove the shifting hole cover assembly.
-
-
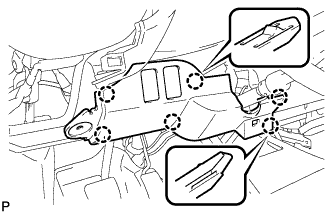
REMOVE INSTRUMENT PANEL FINISH PANEL LOWER CENTER
-
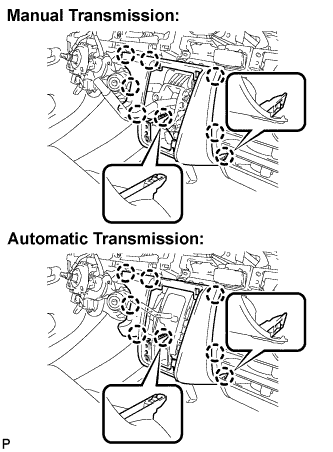
Disengage the 8 claws and remove the instrument panel finish panel lower center.
-
-
SEPARATE TRANSMISSION CONTROL CABLE ASSEMBLY
-
Separate the shift lever from the control cable assembly.
-
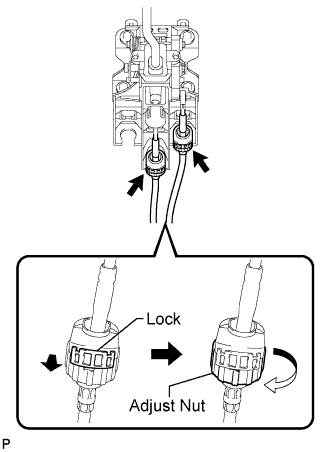
Pull out the control cable assembly locks.
-
Turn the adjust nut clockwise 180°. While holding the adjust nut, remove the control cable assembly.
-
-
REMOVE SHIFT LEVER ASSEMBLY
-
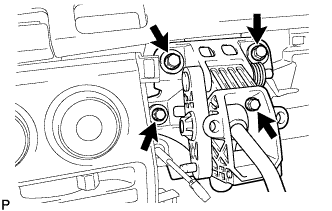
Remove the 4 bolts and shift lever assembly.
-