REAR NO. 1 SEAT ASSEMBLY (for Fold Down Seat Type) REASSEMBLY

-
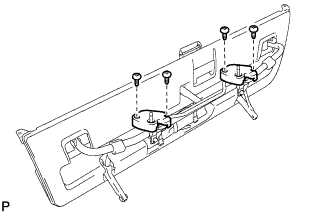
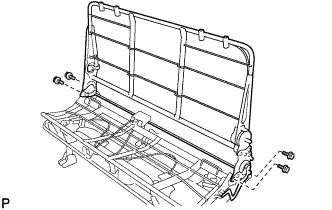
INSTALL NO. 1 SEAT LEG SUB-ASSEMBLY
-
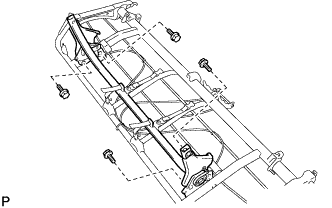
Install the No. 1 seat leg sub-assembly with the 4 bolts.
- Torque:
- 55 N*m { 561 kgf*cm, 41 ft.*lbf }
-
-
INSTALL WARNING REFLECTOR HOLDER ASSEMBLY
-
Install the 4 warning reflector holder assemblies with the 4 screws.
-
-
INSTALL REAR SEAT CUSHION UNDER COVER
-
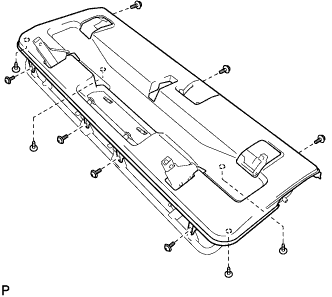
Install the rear seat cushion under cover with the 11 screws.
-
-
INSTALL SEAT TRACK ADJUSTING HANDLE KNOB
-
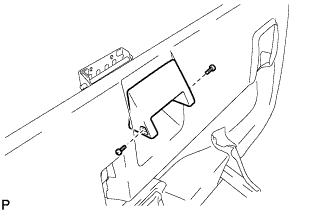
Install the seat track adjusting handle knob with the 2 screws.
-
-
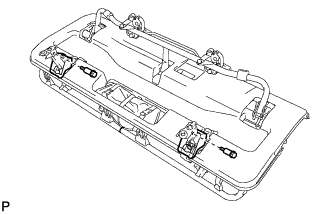
INSTALL NO. 1 SEAT REAR LEG SUB-ASSEMBLY
-
INSTALL REAR SEAT CUSHION HINGE LOWER COVER
-
INSTALL REAR SEAT LEG STOPPER
-
INSTALL NO. 1 SEAT LEG STOPPER HOLDER
-
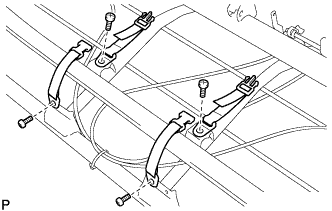
INSTALL REAR NO. 1 SEAT LOCK ASSEMBLY
-
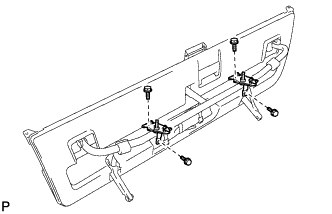
Install the 2 rear No. 1 seat lock assemblies with the 4 bolts.
- Torque:
- 42 N*m { 428 kgf*cm, 31 ft.*lbf }
-
-
INSTALL REAR SEAT INNER BELT ASSEMBLY
Tech Tips
Follow the same procedure as for the fixed seat type.
-
INSTALL REAR SEAT OUTER BELT ASSEMBLY
Tech Tips
Follow the same procedure as for the fixed seat type.
-
INSTALL REAR SEAT LOCK ROD
-
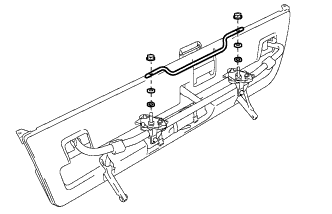
Install the rear seat lock rod with the 2 nuts.
- Torque:
- 8.0 N*m { 82 kgf*cm, 71 in.*lbf }
-
-
INSTALL REAR SEAT BACK LOCK COVER
-
Install the 2 rear seat back lock covers with the 4 screws.
-
-
INSTALL RECLINING ADJUSTER RELEASE HANDLE
-

Install the 2 reclining adjuster release handles with the 2 screws.
-
-
INSTALL NO. 1 SEAT LEG LOWER BRACKET
-
Install the 2 No. 1 seat leg lower brackets with the 2 bolts.
- Torque:
- 29 N*m { 296 kgf*cm, 21 ft.*lbf }
-
-
INSTALL REAR SEAT LEG SIDE COVER
-

Install the 2 rear seat leg side covers with the 2 screws.
-
-
INSTALL NO. 1 SEAT BACK SPRING ASSEMBLY
-
Install the No. 1 seat back spring assembly with the 4 bolts.
- Torque:
- 55 N*m { 561 kgf*cm, 41 ft.*lbf }
-
-
INSTALL REAR SEAT NO. 1 RECLINING COVER LH
-
Install the rear seat No. 1 reclining cover LH with the screw.
-
-
INSTALL REAR SEAT NO. 1 RECLINING COVER RH
Tech Tips
Use the same procedures for the RH side and LH side.
-
INSTALL REAR SEAT CUSHION NO. 1 SHIELD INNER LH
-
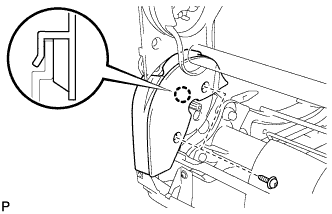
Engage the claw and install the rear seat cushion No. 1 shield inner LH.
-
Install the screw.
-
-
INSTALL REAR SEAT CUSHION NO. 1 SHIELD INNER RH
Tech Tips
Use the same procedures for the RH side and LH side.
-
INSTALL NO. 1 SEAT BACK COVER SUB-ASSEMBLY
-
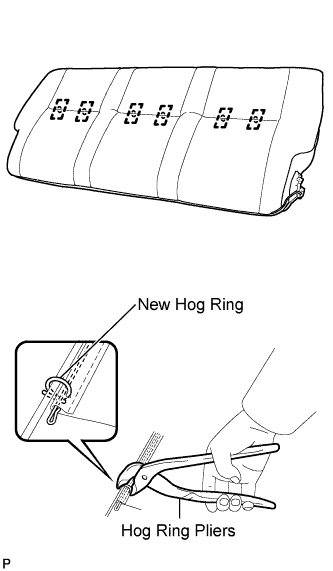
Using hog ring pliers, install the No. 1 seat back cover sub-assembly to the No. 1 seat back pad with 6 new hog rings.
Note
-
Be careful not to damage the cover.
-
When installing the hog rings, take care to minimize wrinkles as much as possible.
-
-
-
INSTALL NO. 1 SEAT BACK COVER WITH PAD SUB-ASSEMBLY
-
Install the No. 1 seat back cover with pad sub-assembly.
-
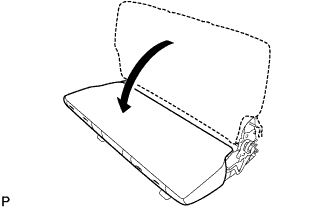
Operate the reclining release handle sub-assembly and fold down the seat back onto the seat cushion.
-
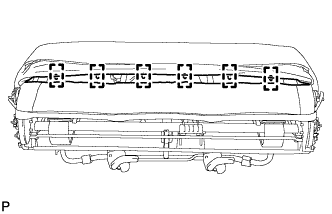
Using hog ring pliers, install the No. 1 seat back cover with pad sub-assembly with 6 new hog rings.
Note
-
Be careful not to damage the cover.
-
When installing the hog rings, take care to minimize wrinkles as much as possible.
-
-

Close the fastener of the No. 1 seat back cover sub-assembly.
-
Operate the reclining release handle sub-assembly and return the seat back to the upright position.
-
-
INSTALL REAR SEAT HEADREST SUPPORT
-
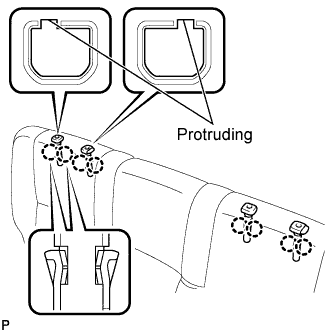
Engage the 8 claws and install the 4 rear seat headrest supports.
-
-
INSTALL REAR SEAT HEADREST ASSEMBLY
-
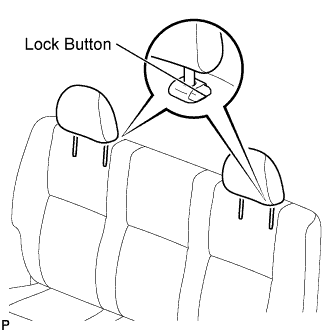
Push the lock button of the rear seat headrest support and install the rear seat headrest.
-
-
INSTALL NO. 1 SEAT CUSHION COVER SUB-ASSEMBLY
-

Using hog ring pliers, install the No. 1 seat cushion cover sub-assembly to the No. 1 seat cushion pad with 14 new hog rings.
Note
-
Be careful not to damage the cover.
-
When installing the hog rings, take care to minimize wrinkles as much as possible.
-
-
-
INSTALL NO. 1 SEAT CUSHION COVER WITH PAD SUB-ASSEMBLY
-
INSTALL REAR SEAT NO. 2 RECLINING COVER LH
-

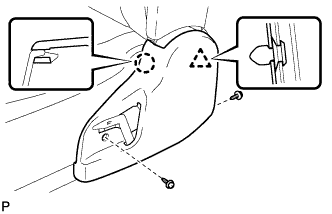
Engage the 6 claws and install the rear seat No. 2 reclining cover LH.
-
-
INSTALL REAR SEAT NO. 2 RECLINING COVER RH
Tech Tips
Use the same procedures for the RH side and LH side.
-
INSTALL REAR SEAT BACK COVER LH
-
Install the rear seat back cover LH.
-
-
INSTALL REAR SEAT BACK COVER RH
Tech Tips
Use the same procedures for the RH side and LH side.
-
INSTALL RECLINING ADJUSTER COVER LH
-
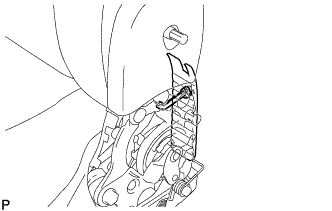
Engage the claw and clip and install the reclining adjuster cover LH.
-
Install the 2 screws.
-
-
INSTALL RECLINING ADJUSTER COVER RH
Tech Tips
Use the same procedures for the RH side and LH side.
-
INSTALL NO. 1 RECLINING ADJUSTER RELEASE HANDLE LH
-
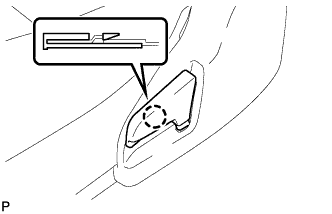
Engage the claw and install the No. 1 reclining adjuster release handle LH.
-
-
INSTALL NO. 1 RECLINING ADJUSTER RELEASE HANDLE RH
Tech Tips
Use the same procedures for the RH side and LH side.
-
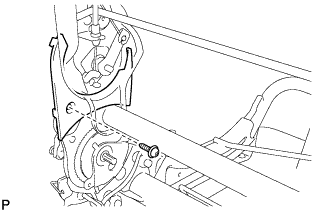
INSTALL RECLINING RELEASE HANDLE SUB-ASSEMBLY
-

Install the reclining release handle sub-assembly and the snap ring.
-