CLUTCH PEDAL (for 1KD-FTV) REMOVAL

-
DISCONNECT CABLE FROM NEGATIVE BATTERY TERMINAL
-
REMOVE LOWER INSTRUMENT PANEL FINISH PANEL
-
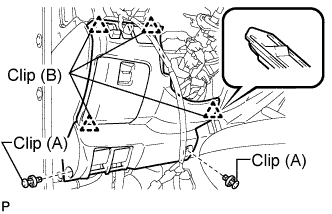
Using a clip remover, remove the 2 clips (A).
-
Disengage the 4 clips (B).
-
Disconnect the connector.
-
Push the positions indicated by the arrows in the illustration to separate the fuel lid lock control cable and bonnet (hood) control cable assembly from the panel.
Remove the instrument panel finish lower.
-
-
REMOVE NO. 1 INSTRUMENT PANEL UNDER COVER SUB-ASSEMBLY
-
Using a clip remover, remove the 2 clips
-
Disengage the 3 claws and remove the instrument panel No.1 under cover sub-assembly.
-
-
REMOVE PARKING BRAKE HOLE COVER
-
Disengage the 6 claws and remove the parking brake hole cover.
-
-
REMOVE SHIFT LEVER KNOB
-
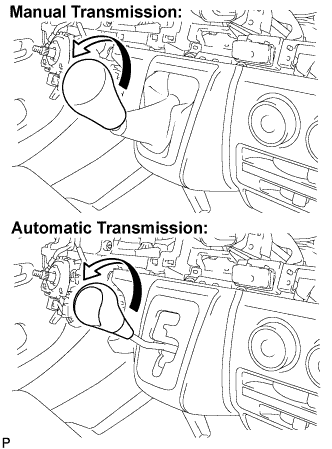
Turn the shift lever knob in the direction indicated by the arrow and remove it.
-
-
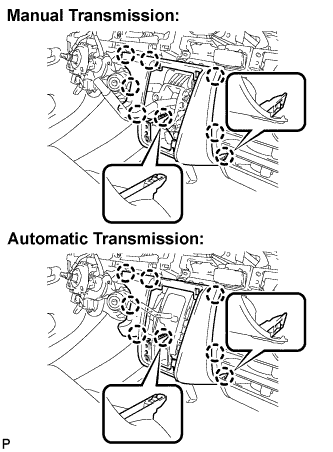
REMOVE SHIFTING HOLE COVER ASSEMBLY
-
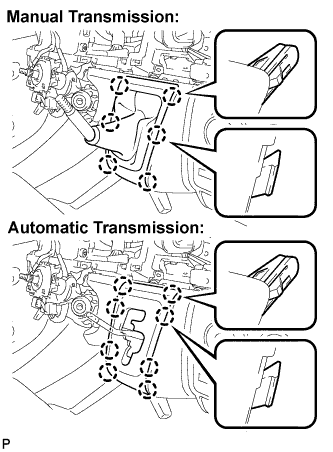
Manual Transmission:
Disengage the 6 claws and remove the shifting hole cover assembly.
-
Automatic Transmission:
Disengage the 8 claws and remove the shifting hole cover assembly.
-
-
REMOVE LOWER CENTER INSTRUMENT PANEL FINISH PANEL
-
Disengage the 8 claws and remove the instrument panel finish panel lower center.
-
-
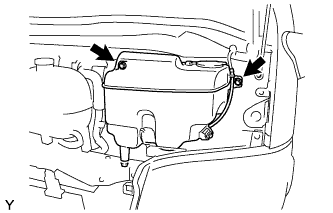
REMOVE WINDSHIELD WASHER MOTOR AND PUMP ASSEMBLY (for LHD)
-
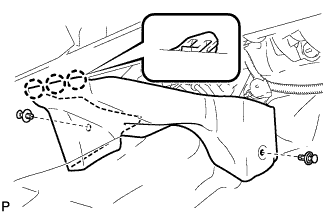
Remove the 2 bolts and windshield washer motor and pump.
-
-
REMOVE NO. 1 AIR DUCT
-
Remove the clip.
-
Release the 2 claws and remove the air duct No.1.
-
-
DISCONNECT CLUTCH MASTER CYLINDER ASSEMBLY
-
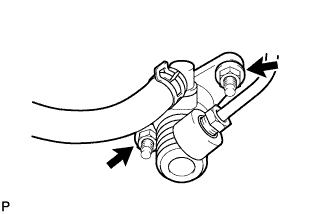
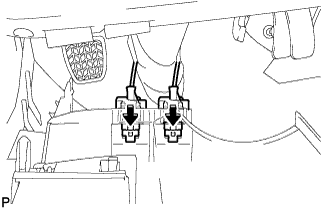
Remove the 2 nuts and disconnect the clutch master cylinder from the clutch pedal support sub-assembly.
-
-
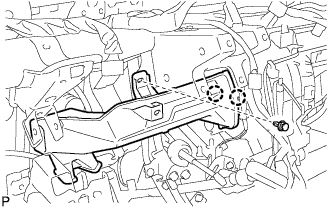
REMOVE CLUTCH PEDAL SUPPORT SUB-ASSEMBLY
-
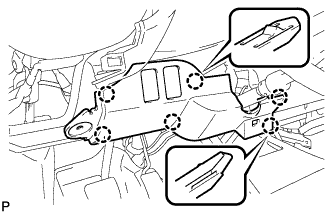
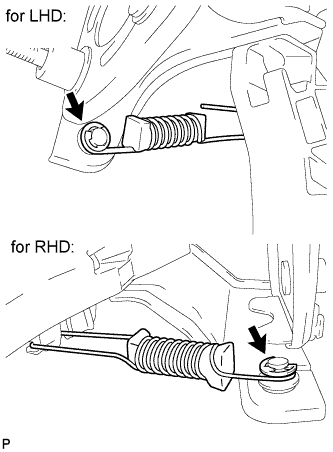
Disconnect the clutch switch connector and detach the wire harness clamp.
-
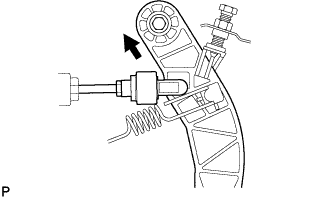
Push the push rod clevis upward and move it toward the right side of the vehicle.
-
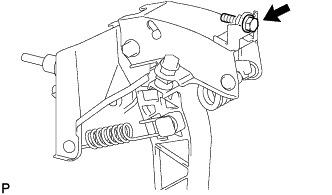
Remove the bolt and clutch pedal support sub-assembly.
-
-
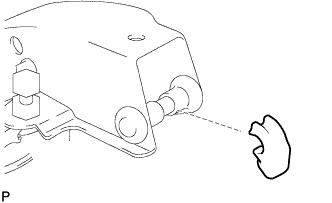
REMOVE CLUTCH SWITCH ASSEMBLY
-
Disconnect the switch connector.
-
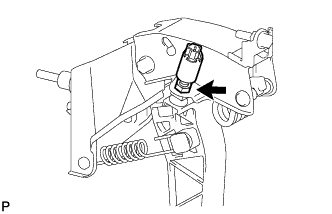
Remove the clutch switch assembly.
-
-
REMOVE CLUTCH PEDAL SPRING
-
Using a screwdriver, remove the E-ring.
-
Remove the clutch pedal spring.
-
-
REMOVE TURNOVER SPRING SEAT COMPRESSION SPRING
-

Mount the clutch pedal in a soft jaw vise.
-
While the clutch pedal is fully depressed, remove the turnover spring seat compression spring.
-
-
REMOVE CLUTCH PEDAL SUB-ASSEMBLY
-

Put matchmarks on the clutch pedal support sub-assembly.
-
Remove the bolt, nut, washer and clutch pedal sub-assembly from the clutch pedal support sub-assembly.
Tech Tips
Hold the nut and loosen the bolt.
-
-
REMOVE CLUTCH PEDAL SHAFT COLLAR
-
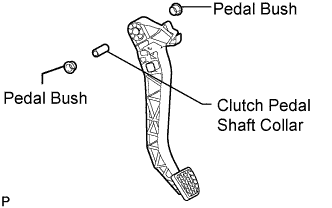
Remove the 2 pedal bushes and clutch pedal shaft collar from the clutch pedal sub-assembly.
-
-
REMOVE CLUTCH PEDAL NO. 1 CUSHION
-
Remove the clutch pedal No. 1 cushion.
-
-
REMOVE CLUTCH PEDAL PAD
-
Remove the clutch pedal pad from the clutch pedal sub-assembly.
-
-
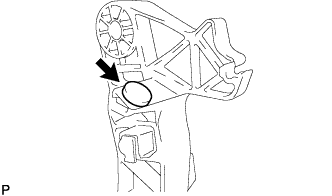
REMOVE CLUTCH PEDAL SPRING HOLDER
-
Remove the clutch pedal spring holder from the clutch pedal support.
-