STARTER (for 2.7 kW Type) REASSEMBLY

-
INSTALL STARTER ARMATURE ASSEMBLY
-
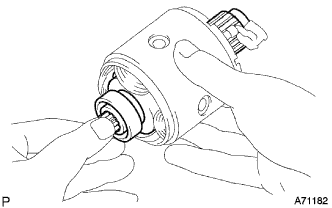
Install the starter armature to the starter yoke.
-
-
INSTALL STARTER BRUSH HOLDER ASSEMBLY
-
Place the brush holder assembly on the starter yoke assembly.
-
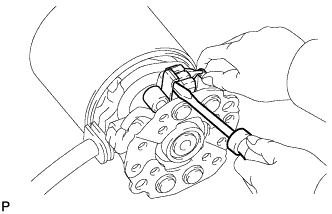
Using a screwdriver, hold the brush spring back.
-
Connect the brush into the brush holder.
-
Connect the 4 brushes.
Note
Check that the positive (+) lead wires are not grounded.
-
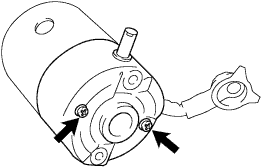
Install the commutator end frame with the 2 screws.
- Torque:
- 3.6 N*m { 37 kgf*cm, 32 in.*lbf }
-
-
INSTALL MAGNET STARTER SWITCH ASSEMBLY
-
Apply grease to the steel ball, and return spring.
-
Install the steel ball into the magnet starter switch hole.
-
Insert the return spring into the magnet starter switch hole.
-
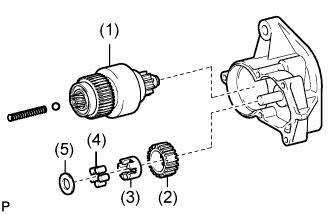
Place the following parts in position on the starter housing.
(1) Starter clutch sub-assembly (2) Starter idler pinion (3) Retainer (4) Clutch roller (5) Plate washer -
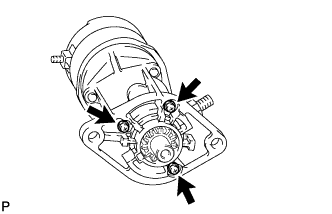
Install the starter housing to the magnet magnet switch assembly with the 3 screws.
- Torque:
- 9.3 N*m { 95 kgf*cm, 82 in.*lbf }
-
-
INSTALL STARTER YOKE ASSEMBLY
-
Install the felt washer to the starter armature.
-
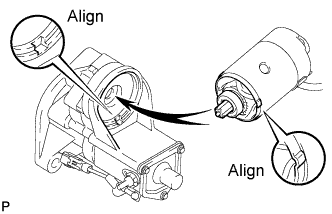
Install the starter yoke to the starter switch.
Tech Tips
Align the claw of the starter yoke with the groove of the starter switch.
-
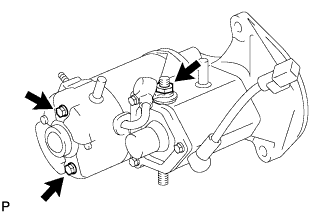
Tighten the 2 through bolts.
- Torque:
- 8.5 N*m { 87 kgf*cm, 75 in.*lbf }
-
Connect the terminal C wire with the nut.
- Torque:
- 24 N*m { 245 kgf*cm, 18 ft.*lbf }
-