GLOW PLUG (w/o DPF) REMOVAL

-
REMOVE FRONT SEAT ASSEMBLY RH (for Hi-back Seat Type)
-
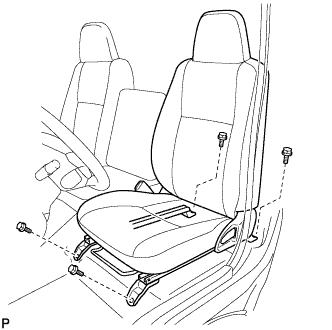
Move the front seat assembly fully forward.
-
Remove the 2 bolts on the rear side of the seat.
-
Move the front seat assembly to the rearmost position.
-
Remove the 2 bolts on the front side of the seat.
-
Move the front seat assembly to the center of the seat slide rail. Set the seatback in the upright position.
-
Disconnect the front seat inner belt assembly connector.
-
Remove the front seat assembly.
-
-
REMOVE FRONT SEAT ASSEMBLY RH (for Low-back Seat Type)
-
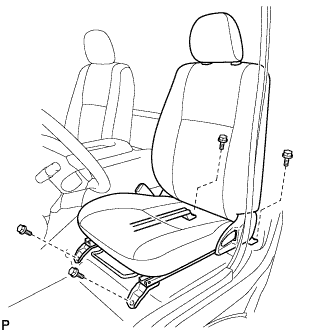
Move the front seat assembly fully forward.
-
Remove the 2 bolts on the rear side of the seat.
-
Move the front seat assembly to the rearmost position.
-
Remove the 2 bolts on the front side of the seat.
-
Move the front seat assembly to the center of the seat slide rail. Set the seatback in the upright position.
-
Disconnect the front seat inner belt assembly connector.
-
Remove the front seat assembly.
-
-
REMOVE FRONT DOOR SCUFF PLATE RH
Tech Tips
Use the same procedure as for the LH side Click here.
-
REMOVE ENGINE SERVICE HOLE SUB COVER ASSEMBLY
-
Roll up the carpet, and remove the engine service hole sub cover assembly.
-
-
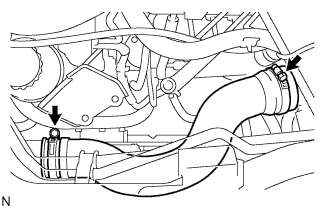
DISCONNECT VANE PUMP OIL RESERVOIR ASSEMBLY
-
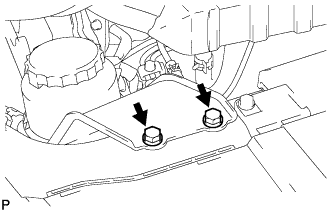
Remove the 2 bolts and vane pump oil reservoir assembly.
Note
Suspend the vane pump oil reservoir assembly with wire to prevent power steering fluid from spilling out.
-
-
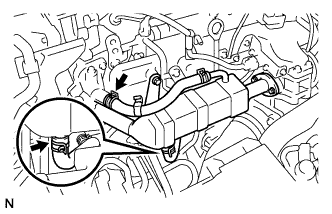
DISCONNECT OIL RETURN HOSE
-
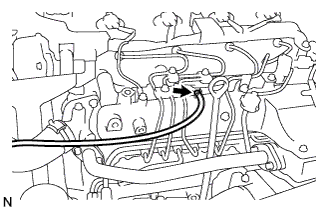
Loosen the clip.
-
Disconnect the oil return hose from the intake manifold.
-
-
DRAIN ENGINE COOLANT
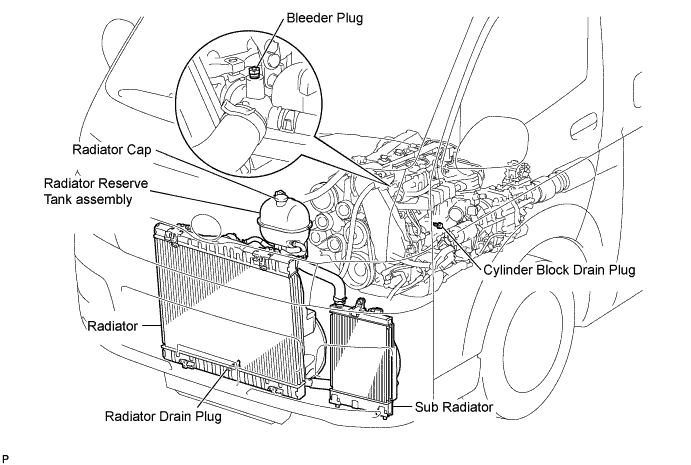
CAUTION:
To avoid the danger of being burned, do not remove the radiator reserve tank cap while the engine and radiator are still hot. Thermal expansion will cause hot engine coolant and steam to blow out from the radiator.
-
Loosen the radiator drain plug (on the radiator).
-
Remove the radiator cap.
-
Loosen the engine drain plug (on the engine oil cooler cover), and drain the coolant.
-
Tighten the engine drain plug (on the radiator).
-
Tighten the engine drain plug (on the engine oil cooler cover).
- Torque:
- 8.0 N*m { 82 kgf*cm, 71 in.*lbf }
-
-
REMOVE EGR COOLER ASSEMBLY
-
Loosen the clip and disconnect the No. 4 water by-pass hose.
-
Loosen the clip and disconnect the No. 2 water by-pass hose.
-
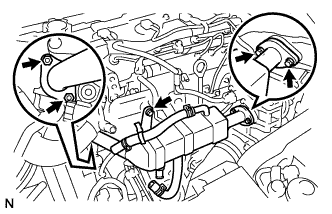
Remove the 3 bolts and 2 nuts and remove the EGR cooler assembly.
-
-
REMOVE NO. 4 AIR HOSE
-
Loosen the 2 clamps.
-
Remove the No. 4 air hose .
-
-
REMOVE INJECTION PIPE SUB-ASSEMBLY
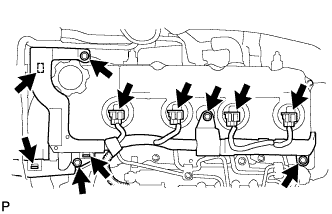
-
Disconnect the fuel injector connector and harness clamps.
-
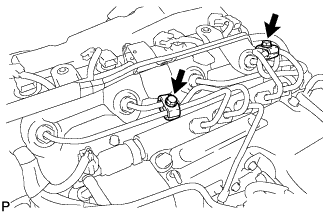
Remove the 3 bolts.
-
Remove the 2 bolts and remove the 2 No. 2 injection pipe clamps.
-
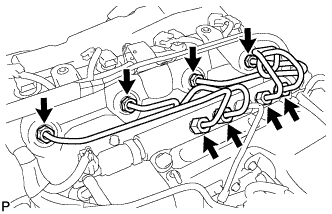
Using SST, remove the 4 injection pipes.
- SST
- 09023-12701
-
-
REMOVE OIL LEVEL GAGE GUIDE
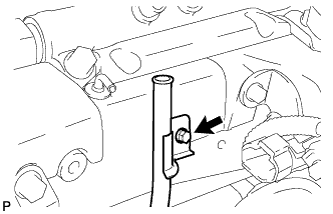
-
Remove the oil level gauge.
-
Remove the bolt and remove the oil level gauge guide.
-
-
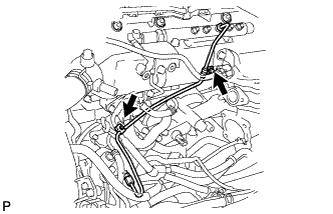
REMOVE FUEL INLET PIPE SUB-ASSEMBLY
-
Remove the 2 clamp bolts.
-
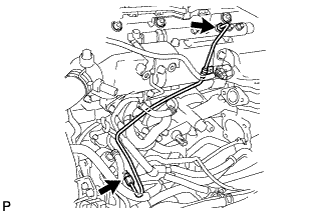
Using SST, loosen the 2 union nuts and remove the fuel inlet pipe sub-assembly.
- SST
- 09023-12701
-
-
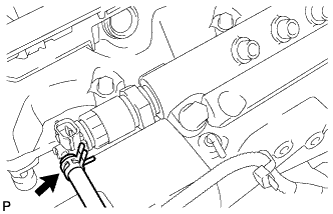
REMOVE COMMON RAIL
-
Disconnect the 2 connectors from the common rail.
-
Disconnect the fuel hose.
-
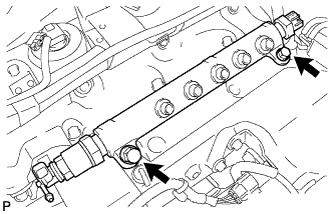
Remove the 2 bolts and remove the common rail.
-
-
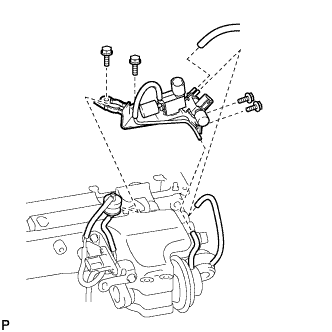
REMOVE MANIFOLD STAY
-
Separate the 3 vacuum hoses and gas filter.
-
Remove the 4 bolts and remove the manifold stay.
-
-
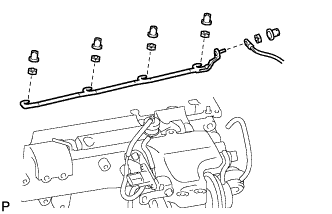
REMOVE NO. 1 GLOW PLUG CONNECTOR
-
Remove the screw grommet and nut and separate the wire harness from the No. 1 glow plug connector.
-
Remove the 4 screw grommets and 4 nuts and remove the No.1 glow plug connector.
-
-
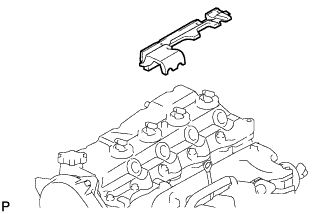
REMOVE NO. 2 INTAKE MANIFOLD INSULATOR
-
Remove the No. 2 intake manifold Insulator.
-
-
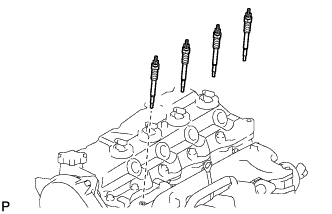
REMOVE GLOW PLUG
-
Remove the 4 glow plugs.
-