ENGINE OIL COOLER REMOVAL

Note
-
When replacing the injectors (including shuffling the injectors between the cylinders), common rail or cylinder head, it is necessary to replace the injection pipes with new ones.
-
When replacing the fuel supply pump, common rail, cylinder block, cylinder head, cylinder head gasket or timing gear case, it is necessary to replace the fuel inlet pipe with a new one.
-
After removing the injection pipes, clean them with a brush and compressed air.
-
DRAIN ENGINE COOLANT

CAUTION:
To avoid the danger of being burned, do not remove the reservoir cap while the engine and radiator are still hot. Thermal expansion will cause hot engine coolant and steam to blow out from the radiator.
-
Loosen the radiator drain plug.
-
Remove the reservoir cap.
-
Loosen the cylinder block drain plug (on the engine oil cooler cover), and drain the coolant.
-
Tighten the radiator drain plug.
-
Tighten the cylinder block drain plug (on the engine oil cooler cover).
- Torque:
- 8.0 N*m { 82 kgf*cm, 71 in.*lbf }
-
-
DRAIN ENGINE OIL
-
Remove the oil filler cap.
-
Remove the oil pan drain plug and gasket, and then drain the engine oil into a container.
-
Wipe the oil pan and oil pan drain plug.
-
Install a new gasket and the oil pan drain plug.
- Torque:
- 34 N*m { 347 kgf*cm, 25 ft.*lbf }
-
-
REMOVE EGR COOLER WITH NO. 2 EGR VALVE ASSEMBLY (w/ DPF)
-
REMOVE EGR COOLER ASSEMBLY (w/o DPF)
-
REMOVE STARTER ASSEMBLY (w/ DPF)
-
for 2.2 kW Type: Click here
-
for 2.7 kW Type: Click here
-
-
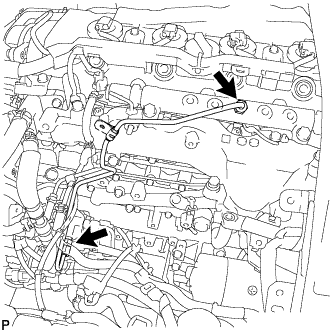
REMOVE NO. 3 NOZZLE LEAKAGE PIPE (w/ DPF)
-
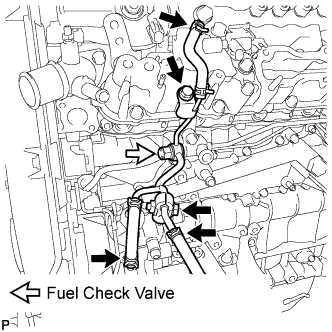
Disconnect the 3 fuel hoses.
-
Remove the bolt and No. 2 injection pipe clamp from the No. 3 nozzle leakage pipe and No. 3 fuel pipe.
-
Remove the fuel check valve and gasket.
-
Remove the bolt and No. 3 nozzle leakage pipe.
-
-
REMOVE NO. 2 EXHAUST MANIFOLD HEAT INSULATOR (w/ DPF)
-
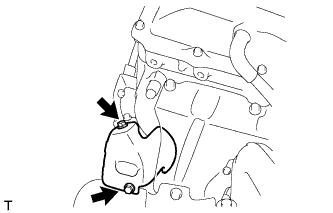
Remove the 2 bolts and No. 2 exhaust manifold heat insulator.
-
-
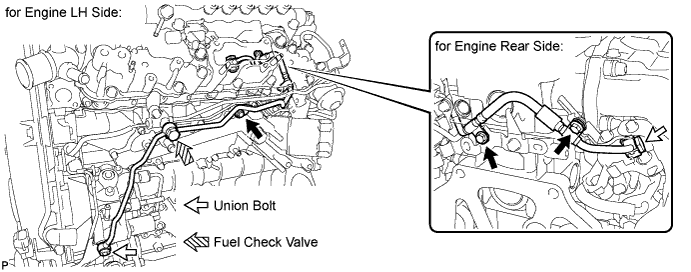
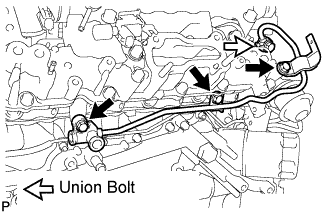
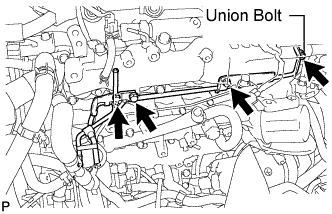
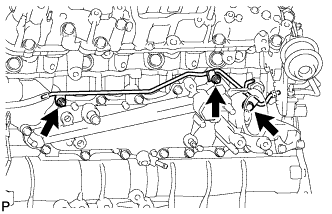
REMOVE NO. 3 FUEL PIPE (w/ DPF)
Tech Tips
It is not necessary to completely remove the No. 3 fuel pipe from the vehicle.
-
for Engine LH Side:
-
Using a 6 mm hexagon wrench, remove the union bolt and gasket.
-
Remove the fuel check valve and gasket.
-
Remove the bolt.
-
-
for Engine Rear Side:
-
Remove the union bolt and gasket.
-
Remove the 2 bolts.
-
-
-
REMOVE FUEL INLET PIPE SUB-ASSEMBLY (w/o DPF)
-
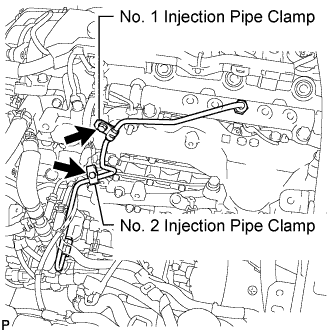
Remove the bolt and No. 2 injection pipe clamp.
-
Remove the bolt and detach the No. 1 injection pipe clamp.
Note
If a No. 1 injection pipe clamp is removed from the fuel inlet pipe, replace the No. 1 injection pipe clamp with a new one.
-
Using a 17 mm union nut wrench, loosen the union nuts and remove the fuel inlet pipe.
-
-
REMOVE VACUUM SWITCHING VALVE BRACKET (w/o DPF)
-
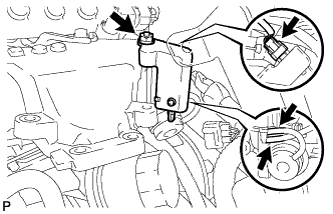
Disconnect the vacuum switching valve connector and 2 vacuum hoses.
-
Remove the bolt and vacuum switching valve bracket.
-
-
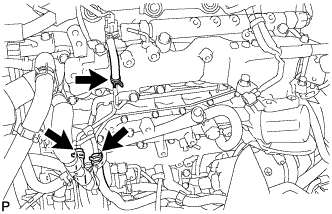
REMOVE NO. 2 NOZZLE LEAKAGE PIPE ASSEMBLY (w/ DPF)
-
Remove the union bolt and gasket.
-
Remove the 3 bolts and No. 2 nozzle leakage pipe.
-
-
REMOVE NO. 2 NOZZLE LEAKAGE PIPE ASSEMBLY (w/o DPF)
-
Disconnect the 3 fuel hoses.
-
Remove the union bolt, 3 bolts, No. 2 nozzle leakage pipe and gasket.
-
-
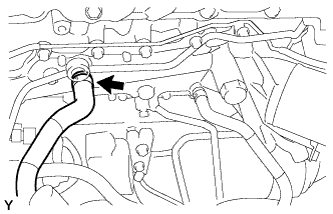
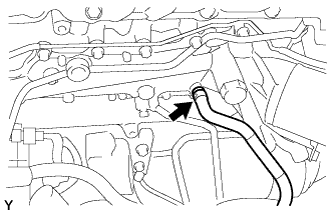
REMOVE NO. 4 WATER BY-PASS HOSE (w/ DPF)
-
REMOVE NO. 2 WATER BY-PASS HOSE (w/ DPF)
-
REMOVE OIL FILTER SUB-ASSEMBLY
-
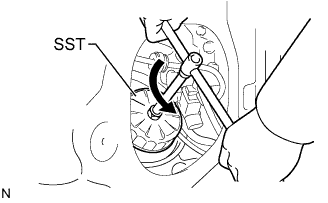
Using SST, remove the oil filter.
- SST
- 09228-07501
Tech Tips
-
Position the drain oil container to collect the oil from the oil filter.
-
Insert cloth, etc. between the oil filter and oil cooler cover to prevent engine oil from dripping out.
-
When engine oil starts coming out of the oil filter, briefly stop loosening the oil filter to prevent engine oil from flowing out from the oil cooler cover.
-
-
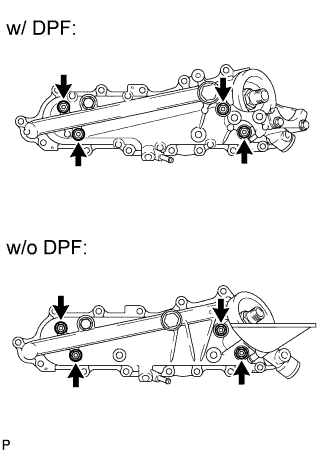
REMOVE OIL COOLER COVER SUB-ASSEMBLY
-
w/ DPF:
-
Disconnect the oil pressure sensor connector.
-
Remove the drain cock plug.
-
Disconnect the 2 vinyl tubes.
-
Remove the 2 nuts and bolt and disconnect the No. 2 vacuum transmitting pipe from the oil cooler cover.
-
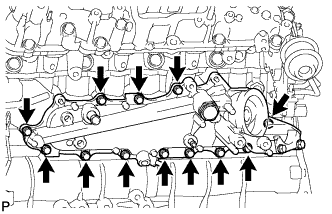
Remove the 12 bolts and oil cooler cover.
-
-
w/o DPF:
-
Disconnect the oil pressure switch connector.
-
Disconnect the 2 vinyl tubes.
-

Remove the 2 nuts and disconnect the No. 2 vacuum transmitting pipe from the oil cooler cover.
-
Remove the 13 bolts and oil cooler cover.
-
-
-
REMOVE OIL COOLER ASSEMBLY
-
Loosen the 4 nuts.
-
Partially tap out the oil cooler by tapping each nut head with a plastic-faced hammer.
-
Remove the 4 nuts, oil cooler and 2 gaskets.
-
-
REMOVE OIL FILTER RECEIVER (w/ DPF)
-
Remove the 2 bolts and oil filter receiver from the oil cooler cover.
-