ENGINE OIL COOLER REMOVAL

-
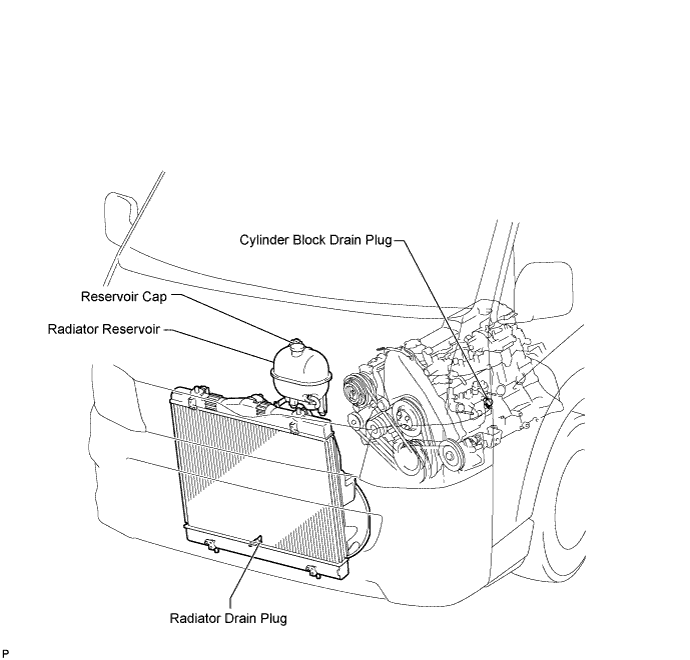
DRAIN ENGINE COOLANT
CAUTION:
To avoid the danger of being burned, do not remove the reservoir cap while the engine and radiator are still hot. Thermal expansion will cause hot engine coolant and steam to blow out from the radiator.
-
Loosen the radiator drain plug.
-
Remove the reservoir cap.
-
Loosen the cylinder block drain plug and drain the coolant.
-
Tighten the radiator drain plug.
-
Tighten the cylinder block drain plug.
- Torque:
- 13 N*m { 130 kgf*cm, 9 ft.*lbf }
-
-
DRAIN ENGINE OIL
-
REMOVE FRONT SEAT ASSEMBLY RH
-
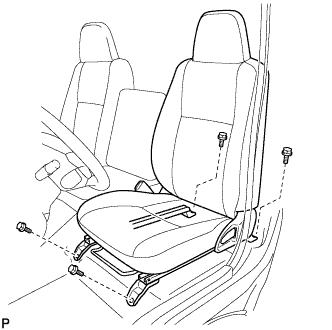
Move the front seat assembly fully forward.
-
Remove the 2 bolts on the rear side of the seat.
-
Move the front seat assembly to the rearmost position.
-
Remove the 2 bolts on the front side of the seat.
-
Move the front seat assembly to the center of the seat slide rail. Set the seatback in the upright position.
-
Disconnect the front seat inner belt assembly connector.
-
Remove the front seat assembly.
-
-
REMOVE FRONT DOOR SCUFF PLATE RH
-
REMOVE ENGINE SERVICE HOLE SUB COVER SUB-ASSEMBLY
-
Turn back the carpet, and remove the engine service hole cover sub-assembly.
-
-
REMOVE INTAKE AIR CONNECTOR SUB-ASSEMBLY
-
Disconnect the ventilation hose.
-
Disconnect the turbo pressure sensor connector.
-
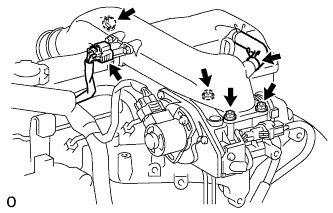
Remove the bolt, 3 nuts, intake air connector and gasket.
-
-
REMOVE INTAKE AIR CONNECTOR BRACKET
-
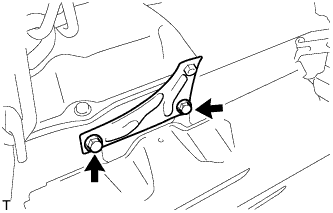
Remove the 2 bolts and intake air connector bracket.
-
-
REMOVE OIL LEVEL GAGE SUB-ASSEMBLY
-
REMOVE OIL LEVEL GAGE GUIDE
-
Remove the 2 bolts, oil level gage and oil level gage guide.
-
-
REMOVE VANE PUMP V BELT
-
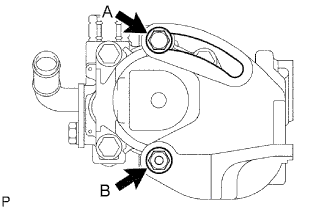
Loosen the bolt A and nut B, and remove the V belt.
-
-
REMOVE V (COOLER COMPRESSOR TO CRANKSHAFT PULLEY) BELT NO.1 (w/ Air Conditioning System)
-
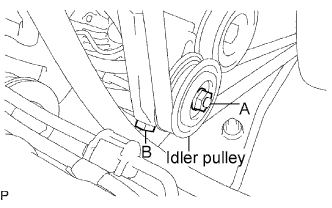
Loosen the nut A and bolt B, and remove the V belt.
-
-
REMOVE FAN & GENERATOR V BELT (w/o Air Conditioning)
-

Loosen the bolts A and B, and remove the V belt.
-
-
REMOVE FAN & GENERATOR V BELT (w/ Air Conditioning System)
-
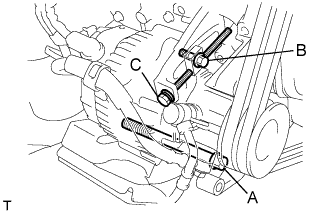
Loosen the bolts A and B.
-
Loosen the adjusting bolt C, and remove the V belt.
-
-
SEPARATE COMPRESSOR AND MAGNETIC CLUTCH (w/ Air Conditioning System)
-
REMOVE COMPRESSOR MOUNTING BRACKET (w/ Air Conditioning System)
-
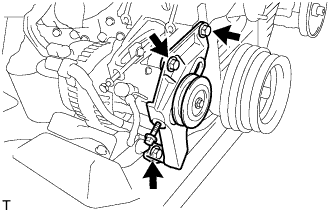
Remove the 3 bolts and compressor mounting bracket.
-
Remove the bolt and spacer.
-
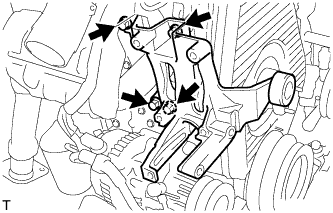
Remove the 4 bolts and compressor mounting bracket.
-
-
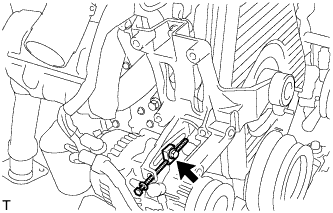
REMOVE GENERATOR W/ VACUUM PUMP ASSEMBLY
-
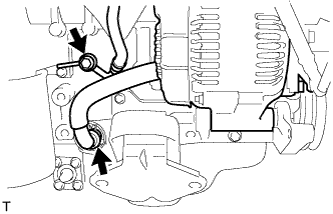
Remove the bolt and disconnect the hose.
-
Remove the clip and disconnect the hose.
-
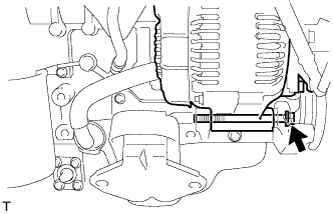
Remove the bolt and generator w/ vacuum pump assembly.
-
-
REMOVE EXHAUST PIPE ASSEMBLY FRONT
-
REMOVE EXHAUST MANIFOLD HEAT INSULATOR NO.1
-
Remove the 3 bolts and exhaust manifold heat insulator No.1.
-
-
REMOVE EXHAUST MANIFOLD
-
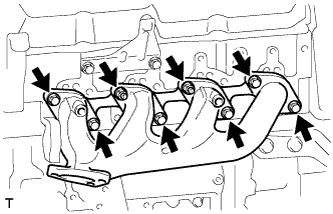
Remove the 6 bolts, 2 nuts and exhaust manifold.
-
Remove the exhaust manifold gasket from the cylinder head.
-
-
REMOVE OIL FILTER SUB-ASSEMBLY
-
Using SST, remove the oil filter.
- SST
- 09228-44011
-
-
REMOVE VACUUM PUMP OIL INLET HOSE
-
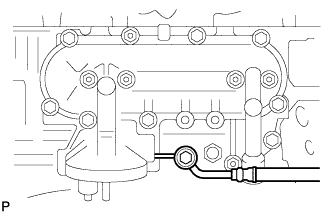
Remove the union bolt and 2 gaskets, and disconnect the vacuum pump oil inlet hose from the cylinder block.
-
-
REMOVE OIL FILTER BRACKET SUB-ASSEMBLY
-
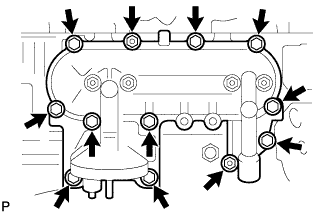
Remove the 10 bolts, 2 nuts, oil filter bracket, and gasket.
-
-
REMOVE OIL COOLER ASSEMBLY
-
Remove the 4 nuts, oil cooler, and 2 gaskets.
-