SUB RADIATOR REMOVAL

-
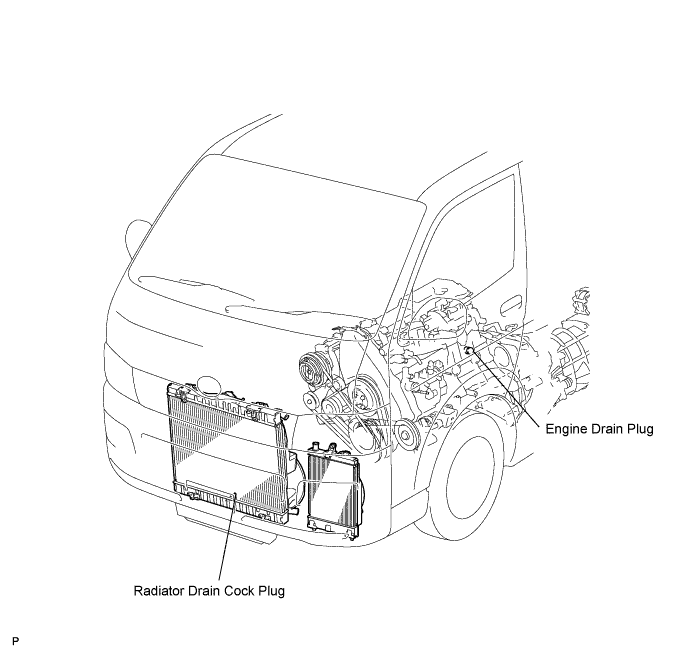
DRAIN ENGINE COOLANT
CAUTION:
Do not remove the radiator cap while the engine and radiator are still hot. Pressurized, hot engine coolant and steam may be released and cause serious burns.
-
Loosen the radiator drain cock plug and engine drain plug, then drain the coolant.
-
Remove the radiator cap.
-
-
REMOVE RADIATOR GRILLE
-
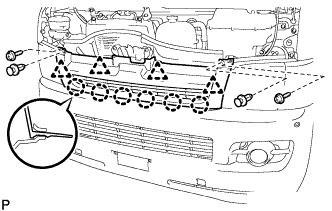
Remove the 2 clips and 2 screws.
-
Release the 6 claws and 4 clips and remove the radiator grille.
-
-
REMOVE AIR INLET DUCT NO.1
-
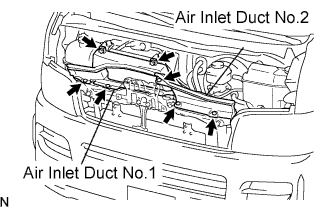
Remove the 3 clips and the air inlet duct No.2.
-
Remove the 2 bolts, 2 clips and the air inlet duct No.1.
-
-
REMOVE STEP PLATE COVER LH
-
REMOVE STEP PLATE COVER RH
Tech Tips
Use the same procedures as for the LH side.
-
REMOVE FRONT BUMPER
-
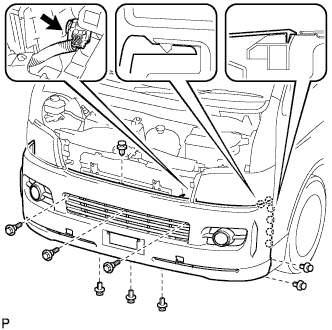
Remove the 8 clips and 3 bolts.
-
Release the 12 claws and remove the bumper.
-
Disconnect the connectors. (w/ fog light)
-
-
REMOVE HOOD LOCK SUPPORT BRACE SUB-ASSEMBLY
-
REMOVE FRONT BUMPER REINFORCEMENT
-
REMOVE HOOD LOCK ASSEMBLY
-
REMOVE RADIATOR SUPPORT UPPER
-
REMOVE RADIATOR RESERVE TANK ASSEMBLY
-
REMOVE WINDSHIELD WASHER MOTOR AND PUMP ASSEMBLY
-
REMOVE HIGH PITCHED HORN ASSEMBLY
-
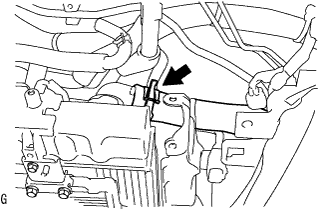
REMOVE FAN SHROUD NO.2
-
Remove the bolt and fan shroud No.2.
-
-
REMOVE SUB RADIATOR ASSEMBLY
-
Disconnect the water hose from the radiator assembly.
-
Disconnect the sub radiator assembly lower hose
-
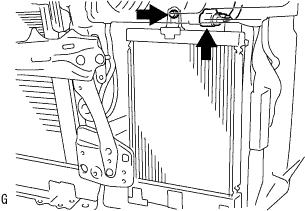
Disconnect the connector from the sub radiator fan motor.
-
Remove the bolts and sub radiator assembly.
-