RADIATOR REMOVAL

-
REMOVE ENGINE UNDER COVER NO. 1 (w/ Engine Under Cover No. 1)
-
DISCHARGE REFRIGERANT FROM REFRIGERATION SYSTEM (w/ Air Conditioning System)
-
Start up the engine.
-
Turn the A/C switch on.
-
Operate the cooler compressor at an engine rpm of approximately 1,000 for 5 to 6 minutes to circulate the refrigerant and collect compressor oil remaining in each component into the cooler compressor as much as possible.
-
Stop the engine.
-
Using SST, let the refrigerant gas out.
- SST
- 07110-58060 ( 07117-58080, 07117-58090, 07117-78050, 07117-88060, 07117-88070, 07117-88080 )
-
-
DRAIN ENGINE COOLANT

CAUTION:
To avoid the danger of being burned, do not remove the reservoir cap while the engine and radiator are still hot. Thermal expansion will cause hot engine coolant and steam to blow out from the radiator.
-
Loosen the radiator drain plug.
-
Remove the reservoir cap.
-
Loosen the cylinder block drain plug (on the engine oil cooler cover), and drain the coolant.
-
Tighten the radiator drain plug.
-
Tighten the cylinder block drain plug (on the engine oil cooler cover).
- Torque:
- 8.0 N*m { 82 kgf*cm, 71 in.*lbf }
-
-
REMOVE FRONT BUMPER
-
for Standard Body Click here
-
for Wide Body Click here
-
-
REMOVE NO. 1 AIR INLET DUCT
-
Remove the 5 clips, 2 bolts, No. 1 air inlet duct and No. 2 air inlet duct.
-
-
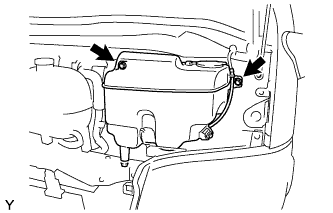
REMOVE WINDSHIELD WASHER MOTOR AND PUMP ASSEMBLY
-
Remove the 2 bolts and windshield washer motor and pump.
-
-
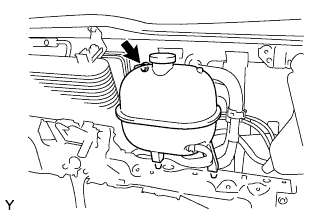
REMOVE RADIATOR RESERVOIR
-
Remove the bolt and radiator reservoir.
-
-
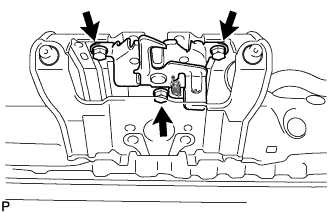
REMOVE HOOD LOCK SUPPORT BRACE SUB-ASSEMBLY
-
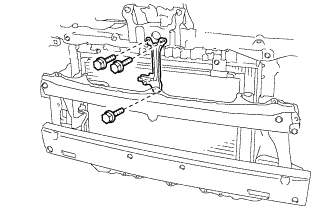
Remove the 3 bolts and hood lock support brace sub-assembly.
-
-
REMOVE HOOD LOCK ASSEMBLY
-
Remove the 3 bolts and hood lock.
-
Disconnect the hood lock control cable from the hood lock.
-
-
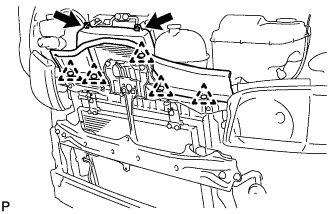
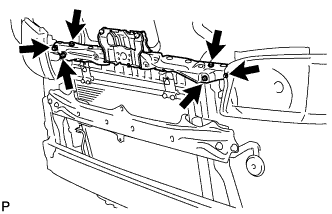
REMOVE RADIATOR SUPPORT UPPER
-
Remove the 6 bolts and radiator support upper.
-
-
REMOVE NO. 1 RADIATOR AIR GUIDE (for Wide Body)
-
Remove the 2 bolts and No. 1 radiator air guide.
-
-
REMOVE NO. 2 RADIATOR AIR GUIDE (for Wide Body)
-
Remove the 2 bolts and No. 2 radiator air guide.
-
-
REMOVE INTERCOOLER ASSEMBLY
-
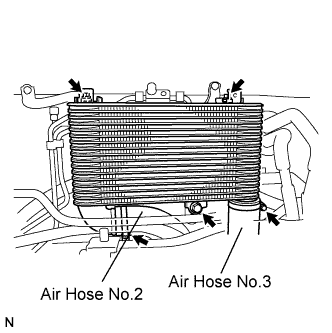
Loosen the clamp, and disconnect the air hose No.2.
-
Loosen the clamp, and disconnect the air hose No.3.
-
Remove the 3 bolts and the intercooler assembly.
-
-
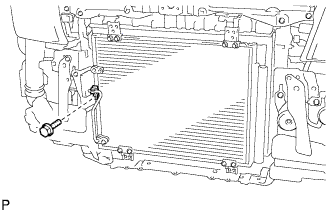
DISCONNECT COOLER REFRIGERANT DISCHARGE PIPE A (w/ Air Conditioning System)
-
Remove the bolt and disconnect the cooler refrigerant discharge pipe A from the cooler condenser assembly.
-
Remove the O-ring from the cooler refrigerant discharge pipe A.
Note
Seal the openings of the disconnected parts using vinyl tape to prevent moisture and foreign matter from entering.
-
-
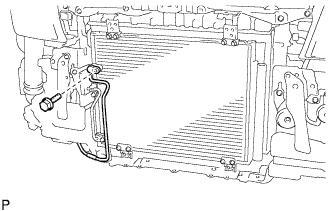
DISCONNECT COOLER REFRIGERANT LIQUID PIPE A (w/ Air Conditioning System)
-
Remove the bolt and clamp.
-
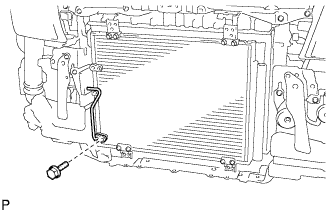
Remove the bolt and disconnect the cooler refrigerant liquid pipe A from the cooler condenser assembly.
-
Remove the O-ring from the cooler refrigerant liquid pipe A.
Note
Seal the openings of the disconnected parts using vinyl tape to prevent moisture and foreign matter from entering.
-
-
REMOVE W/ RECEIVER CONDENSER ASSEMBLY (w/ Air Conditioning System)
-
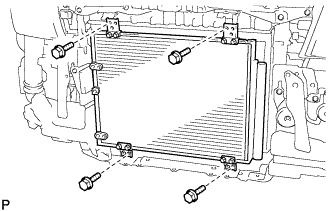
Remove the 4 bolts and w/ receiver condenser assembly.
-
-
DISCONNECT OIL COOLER TUBE (for Automatic Transmission)
-
Disconnect the 2 oil cooler tubes from the radiator.
-
-
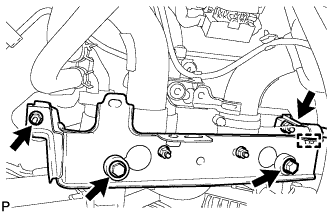
REMOVE FAN BRACKET SUB-ASSEMBLY
-
Disconnect the clamp.
-
Remove the 2 bolts, 2 nuts and fan bracket.
-
-
REMOVE FAN SHROUD
-
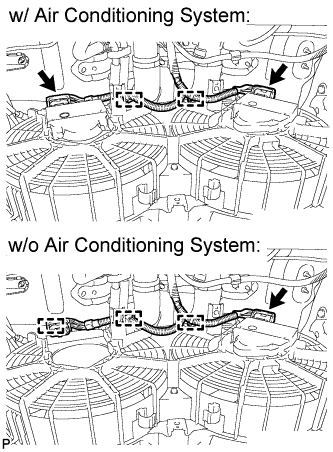
w/ Air Conditioning System:
Detach the 2 clamps and disconnect the 2 connectors.
-
w/o Air Conditioning System:
Detach the 3 clamps and disconnect the connector.
-
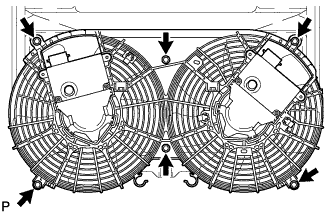
Remove the 6 bolts and fan shroud from the underside of the vehicle.
-
-
REMOVE NO. 2 FAN SHROUD
-
Remove the bolt of the No. 2 radiator lower tank pipe.
-
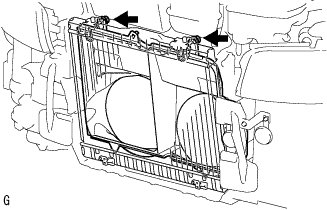
Remove the 2 bolts and No. 2 fan shroud from the underside of the vehicle.
Tech Tips
Do not damage the radiator when removing the No. 2 fan shroud.
-
-
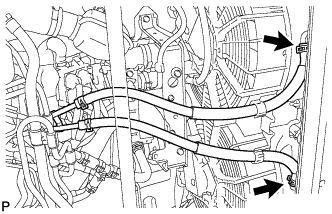
REMOVE RADIATOR ASSEMBLY
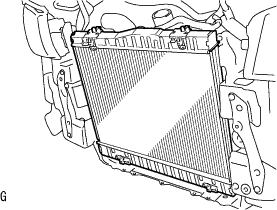
-
Disconnect the No. 2 radiator hose and No. 3 radiator hose.
-
Remove the radiator from the vehicle.
-
Remove the 4 grommets from the radiator.
-