RADIATOR REMOVAL

-
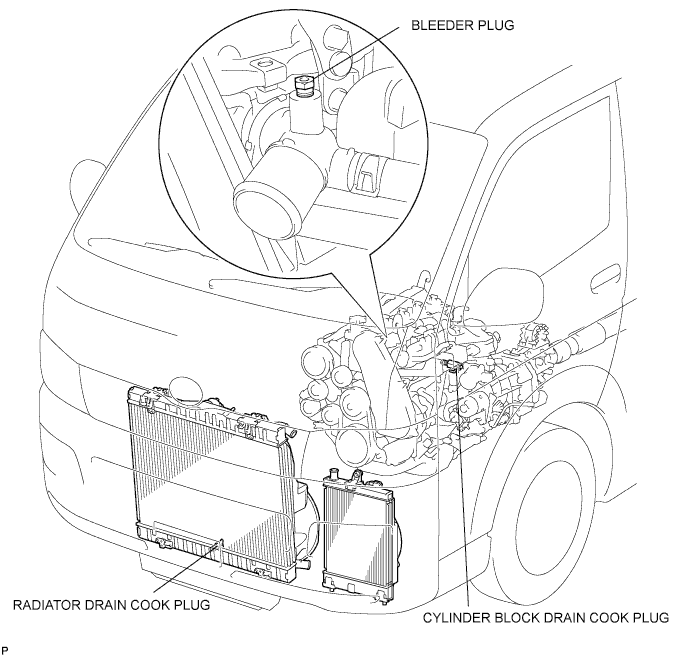
DRAIN ENGINE COOLANT
CAUTION:
Do not remove the radiator cap while the engine and radiator are still hot. Pressurized, hot engine coolant and steam may be released and cause serious burns.
-
Remove the radiator cap.
-
Loosen the radiator drain cock plug and a cylinder block drain cock plug. Then drain the coolant.
-
-
DISCHARGE REFRIGERANT FROM REFRIGERATION SYSTEM (w/ Air Conditioning System)
-
Start up the engine.
-
Turn the A/C switch on.
-
Operate the cooler compressor at an engine rpm of approximately 1,000 for 5 to 6 minutes to circulate the refrigerant and collect compressor oil remaining in each component into the cooler compressor as much as possible.
-
Stop the engine.
-
Using SST, let the refrigerant gas out.
- SST
- 07110-58060 ( 07117-58080, 07117-58090, 07117-78050, 07117-88060, 07117-88070, 07117-88080 )
-
-
REMOVE RADIATOR GRILLE
-
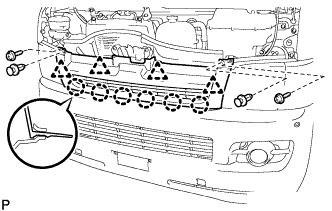
Remove the 2 clips and 2 screws.
-
Release the 6 claws and 4 clips and remove the radiator grille.
-
-
REMOVE AIR INLET DUCT NO.1
-
Remove the 7 clips, 2 bolts, air inlet duct No.1 and air inlet duct No.2.
-
-
REMOVE RADIATOR RESERVE TANK ASSEMBLY
-
Remove the bolt and radiator reserve tank assembly.
-
-
REMOVE WINDSHIELD WASHER MOTOR AND PUMP ASSEMBLY
-
Remove the 2 bolts and windshield washer motor and pump assembly.
-
-
REMOVE STEP PLATE COVER LH
-

Remove the 4 clips.
-
Release the claw and remove the step plate cover.
-
-
REMOVE STEP PLATE COVER RH
Tech Tips
Use the same procedures as for the LH side.
-
REMOVE FRONT BUMPER
-
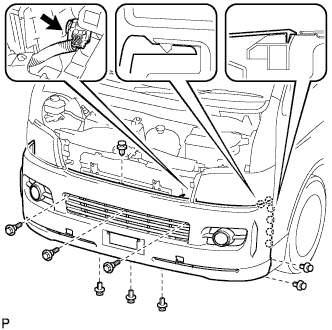
Remove the 8 clips and 3 bolts.
-
Release the 12 claws and remove the bumper.
-
Disconnect the connectors. (w/ fog light)
-
-
REMOVE HOOD LOCK SUPPORT BRACE SUB-ASSEMBLY
-
Remove the 3 bolts and hood lock support brace sub-assembly.
-
-
REMOVE FRONT FLOOR CROSS MEMBER REINFORCEMENT SUB-ASSEMBLY RH
-
Remove the 5bolt and front floor cross member reinforcement sub-assembly.
-
-
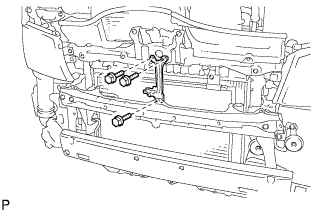
REMOVE FRONT BUMPER REINFORCEMENT
-
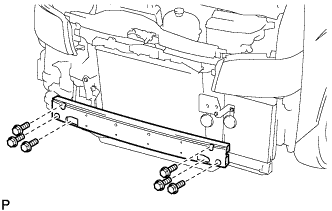
Remove the 6 bolts and front bumper reinforcement.
-
-
DISCONNECT COOLER REFRIGERANT DISCHARGE PIPE A (w/ Air Conditioning System)
-
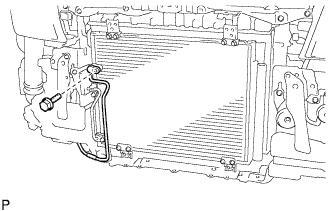
Remove the bolt and disconnect the cooler refrigerant discharge pipe A from the cooler condenser assembly.
-
Remove the O-ring from the cooler refrigerant discharge pipe A.
Note
Seal the openings of the disconnected parts using vinyl tape to prevent moisture and foreign matter from entering.
-
-
DISCONNECT COOLER REFRIGERANT LIQUID PIPE A (w/ Air Conditioning System)
-
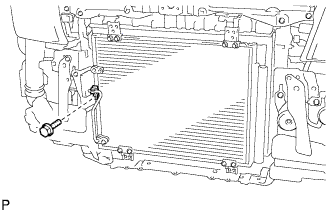
Remove the bolt and clamp.
-
Remove the bolt and disconnect the cooler refrigerant liquid pipe A from the cooler condenser assembly.
-
Remove the O-ring from the cooler refrigerant liquid pipe A.
Note
Seal the openings of the disconnected parts using vinyl tape to prevent moisture and foreign matter from entering.
-
-
REMOVE W/RECEIVER CONDENSER ASSEMBLY (w/ Air Conditioning System)
-
Remove the 4 bolts and w/ receiver condenser assembly.
-
-
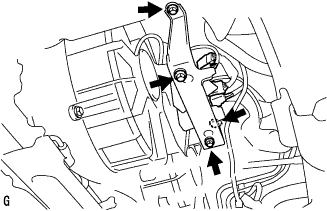
REMOVE HOOD LOCK ASSEMBLY
-

Remove the 2 bolts and hood lock assembly.
-
Remove the hood lock assembly from the hood lock control cable assembly.
-
-
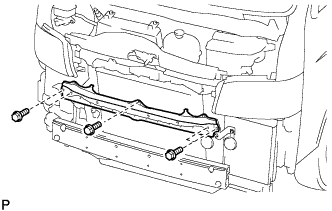
REMOVE RADIATOR SUPPORT UPPER
-
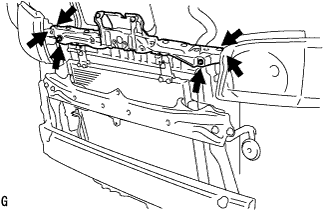
Remove the 6 bolts and radiator support upper.
-
-
REMOVE INTERCOOLER ASSEMBLY
-
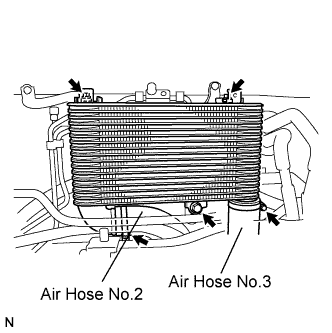
Loosen the clamp, and disconnect the air hose No.2.
-
Loosen the clamp, and disconnect the air hose No.3.
-
Remove the 3 bolts and the intercooler assembly.
-
-
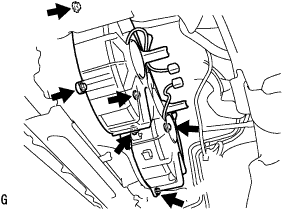
REMOVE COOLING FAN ECU
-
Disconnect the 4 connectors from the cooling fan ECU.
-
Remove the 2 bolts, 2 nuts, and cooling fan ECU.
-
-
DISCONNECT OIL TUBE (for Automatic Transmission)
-
Disconnect the 2 oil tubes from the radiator assembly.
-
-
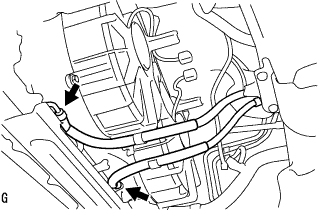
REMOVE FAN SHROUD
-
Disconnect the 4 radiator hoses.
-
Disconnect the 2 reserve tank hoses.
-
Remove the 6 bolts. Remove the fan shroud from the underside of the vehicle.
Note
Disconnect the radiator hose No.3 and radiator hose inlet.
-
-
REMOVE FAN SHROUD NO.2
-
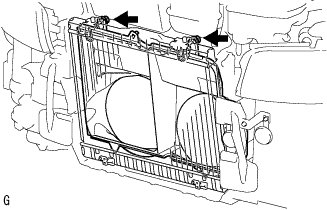
Remove the 2 bolts. Remove the fan shroud No.2 from the underside of the vehicle.
Tech Tips
Do not damage the radiator assembly when removing the fan shroud No.2.
-
-
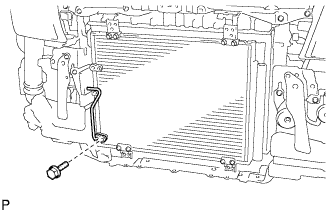
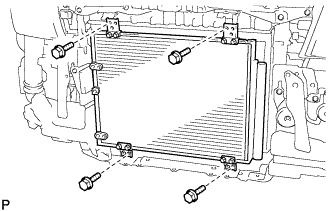
REMOVE RADIATOR ASSEMBLY
-
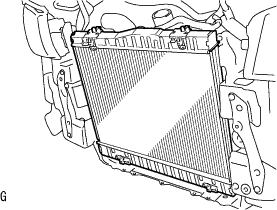
Remove the radiator assembly.
-