THERMOSTAT REMOVAL

-
REMOVE ENGINE UNDER COVER NO.1
-
DRAIN ENGINE COOLANT
CAUTION:
Do not remove the radiator cap while the engine and radiator are still hot. Pressurized, hot engine coolant and steam may be released and cause serious burns.
-
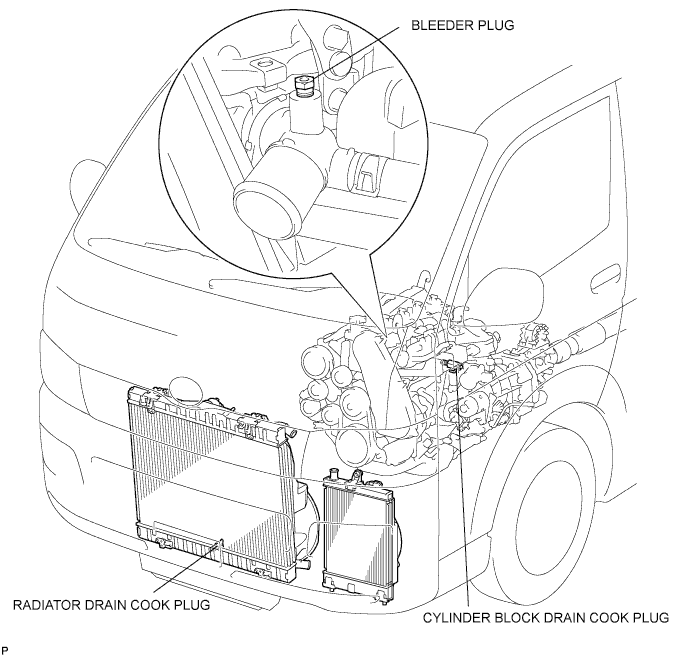
Remove the radiator cap.
-
Loosen the radiator drain cock plug and a cylinder block drain cock plug. Then drain the coolant.
-
-
DISCONNECT BATTERY NEGATIVE CABLE
-
REMOVE FRONT SEAT ASSEMBLY RH (for Hi-back Seat Type)
Tech Tips
Perform the same procedure as RH side on the LH side.
-
REMOVE FRONT SEAT ASSEMBLY RH (for Low-back Seat Type)
Tech Tips
Perform the same procedure as RH side on the LH side.
-
REMOVE FRONT DOOR SCUFF PLATE RH
-
REMOVE ENGINE SERVICE HOLE SUB COVER SUB-ASSEMBLY
-
Roll up the carpet, and remove the engine service hole sub cover assembly.
-
-
REMOVE FENDER APRON MUDGUARD SEAL RH
-
REMOVE FAN & GENERATOR V BELT
-
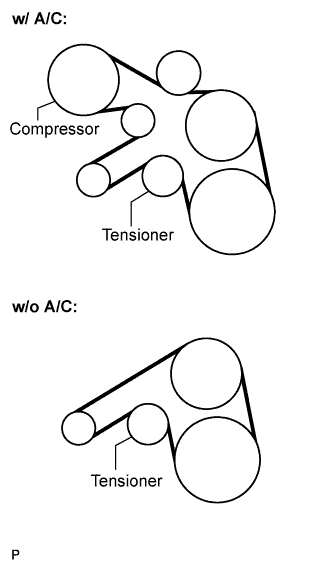
Remove the drive belt by rotating the tensioner pulley in clockwise direction to loosen its tension with the pulley set bolt of the tensioner.
-
-
SEPARATE COMPRESSOR AND MAGNETIC CLUTCH (w/ Air Conditioning System)
-
Disconnect the connector.
-
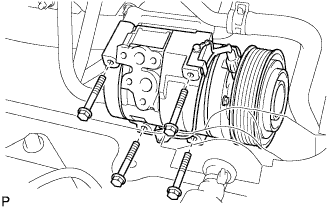
Remove the 4 bolts and compressor and magnetic clutch.
-
-
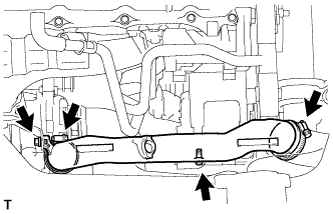
REMOVE AIR TUBE ASSEMBLY
-
Remove the 2 clamps, 2 bolts and air tube assembly.
-
-
REMOVE AIR CLEANER HOSE ASSEMBLY
-
Remove the bolt and air cleaner hose assembly.
-
-
REMOVE COMPRESSOR OUTLET ELBOW
-
Remove the 2 bolts and 2 clamps, then remove the compressor outlet elbow.
-
-
REMOVE VENTILATION PIPE
-
Remove the bolt and ventilation pipe.
-
-
DISCONNECT ENGINE WIRE
-
Disconnect the engine wire from the bracket.
-
-
REMOVE WATER INLET
-
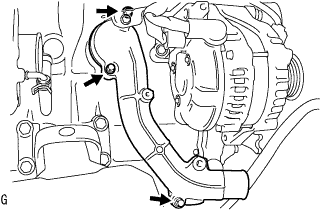
Remove the 3 bolts and water inlet.
-
-
REMOVE THERMOSTAT
-
Remove thermostat and gasket.
-