SUB RADIATOR REMOVAL

-
DISCONNECT CABLE FROM NEGATIVE BATTERY TERMINAL
-
DRAIN ENGINE COOLANT
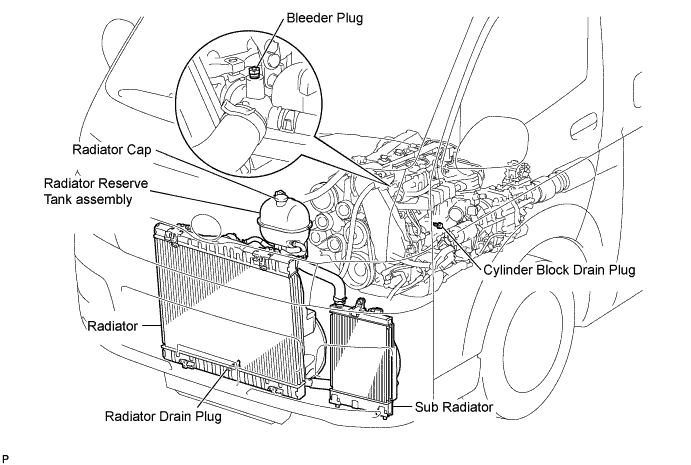
CAUTION:
To avoid the danger of being burned, do not remove the radiator reserve tank cap while the engine and radiator are still hot. Thermal expansion will cause hot engine coolant and steam to blow out from the radiator.
-
Loosen the radiator drain plug (on the radiator).
-
Remove the radiator cap.
-
Loosen the engine drain plug (on the engine oil cooler cover), and drain the coolant.
-
Tighten the engine drain plug (on the radiator).
-
Tighten the engine drain plug (on the engine oil cooler cover).
- Torque:
- 8.0 N*m { 82 kgf*cm, 71 in.*lbf }
-
-
REMOVE RADIATOR GRILLE
-
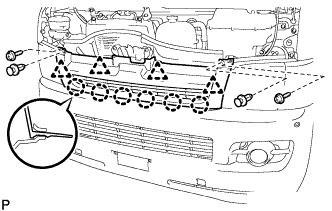
Remove the 2 clips and 2 screws.
-
Release the 6 claws and 4 clips and remove the radiator grille.
-
-
REMOVE NO. 2 AIR INLET DUCT
-
Remove the 3 clips and No. 2 air inlet duct.
-
-
REMOVE NO. 1 AIR INLET DUCT
-
Remove the 2 clips and 2 bolts, and then remove the No. 1 air inlet duct.
-
-
SEPARATE WINDSHIELD WASHER MOTOR AND PUMP ASSEMBLY
-
Remove the 2 bolts, and then separate the windshield washer motor and pump assembly.
Tech Tips
Secure the windshield washer motor and pump together with the 2 hoses to the vehicle side with rope.
-
-
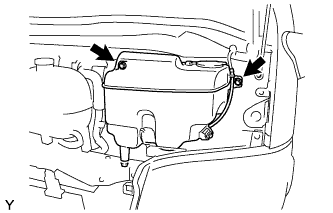
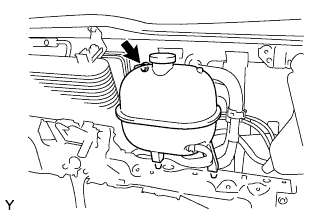
SEPARATE RADIATOR RESERVE TANK ASSEMBLY
-
Remove the bolt, and then separate the radiator reserve tank assembly.
Tech Tips
Secure the radiator reserve tank together with the 2 hoses to the vehicle side with rope.
-
-
REMOVE STEP PLATE COVER LH
-

Remove the 4 clips.
-
Release the claw and remove the step plate cover.
-
-
REMOVE STEP PLATE COVER RH
Tech Tips
Use the same procedures as for the LH side.
-
REMOVE FRONT BUMPER
-
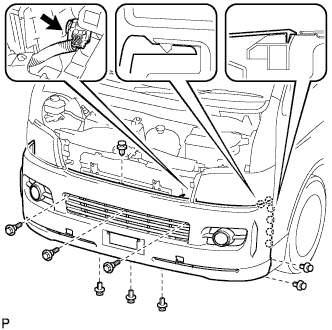
Remove the 8 clips and 3 bolts.
-
Release the 12 claws and remove the bumper.
-
Disconnect the connectors. (w/ fog light)
-
-
REMOVE NO. 2 RADIATOR AIR GUIDE (for Wide Body)
-
Remove the 2 bolts, and then separate the No. 2 radiator air guide.
-
-
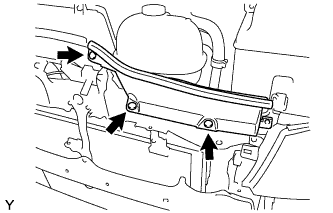
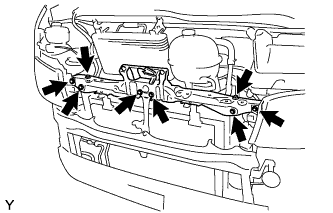
REMOVE RADIATOR SUPPORT UPPER
-
Separate the hood lock control cable from the hood lock.
-
Remove the 6 bolts and 2 screws, and then remove the radiator support upper.
-
-
REMOVE HIGH PITCHED HORN ASSEMBLY (for Narrow Body)
-
Disconnect the connector.
-
Remove the bolt and the high pitched horn assembly.
-
-
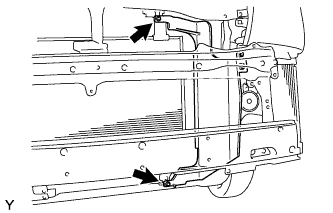
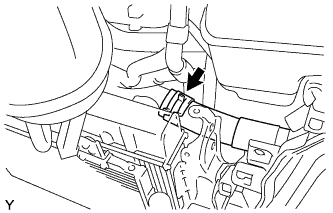
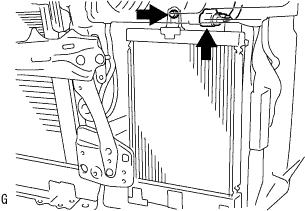
DISCONNECT NO. 5 RADIATOR HOSE
-
Disconnect the No. 5 radiator hose from the radiator as shown in the illustration.
-
-
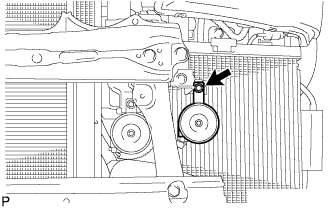
DISCONNECT NO. 6 RADIATOR HOSE
-
Disconnect the No. 6 radiator hose from the sub radiator as shown in the illustration.
-
-
REMOVE SUB RADIATOR ASSEMBLY
-
Disconnect the connector from the sub radiator fan motor.
-
Remove the bolt and sub radiator assembly.
-
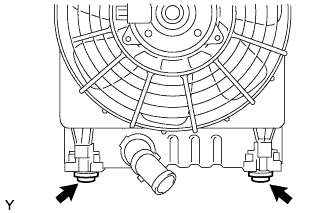
Remove the 2 grommets.
-
-
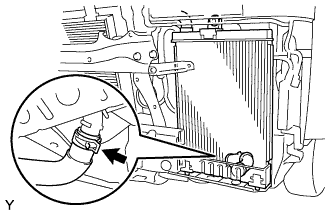
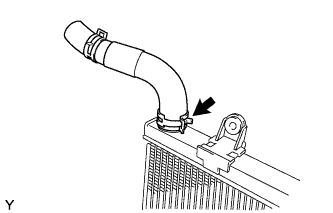
REMOVE NO. 5 RADIATOR HOSE
-
Remove the No. 5 radiator hose from the sub radiator as shown in the illustration.
-
-
REMOVE NO. 2 W/ MOTOR FAN ASSEMBLY
-
Remove the bolt and w/ motor fan assembly No.2 from the sub radiator assembly.
-