CANISTER INSPECTION

-
INSPECT CHARCOAL CANISTER ASSEMBLY
-
Check the appearance.
-
Visually check the charcoal canister assembly for cracks or damage.
If necessary, replace the charcoal canister assembly.
-
-
Check the charcoal canister filter.
-
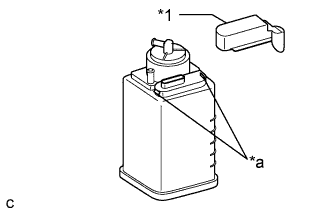
Text in Illustration *1 Charcoal Canister Filter *a Claw Detach the 2 claws and remove the charcoal canister filter.
-
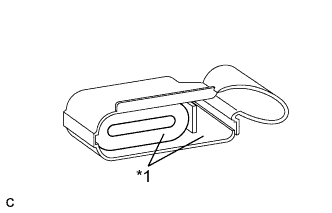
Text in Illustration *1 Charcoal Canister Filter Visually check that the charcoal canister filter is not excessively damaged or dirty.
If necessary, replace the charcoal canister assembly.
-
-
Check the charcoal canister operation.
-

Text in Illustration *a Port A *b Port B *c Port C 
Air Blow air (4.7 kPa (0.05 kgf/cm2, 0.7 psi)) into port A, then check that the air flows from ports B and C.
If the ventilation is not as specified, replace the charcoal canister assembly.
-
-
Clean the filter in canister.
-
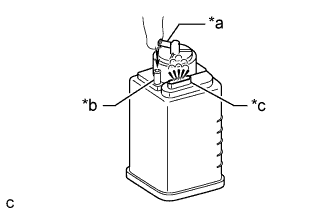
Text in Illustration *a Port A *b Port B *c Port C Air Clean the filter by blowing (19.6 kpa (0.2 kgf/cm2, 2.8 psi)) compressed air into port B while holding port A closed.
Note
-
Do not attempt to wash the charcoal canister assembly.
-
No activated carbon should come out.
-
-
-
Install the charcoal canister filter.
-