CRANKSHAFT POSITION SENSOR (w/ DPF) INSTALLATION

-
INSTALL CRANKSHAFT POSITION SENSOR
-
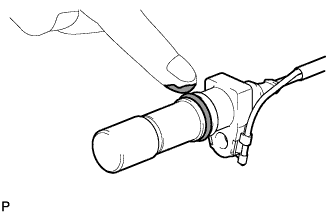
Apply a light coat of engine oil to the O-ring of the crankshaft position sensor.
-
TYPE A:

Text in Illustration *1 Clamp *2 Protrusion *3 Wire Harness Clamp (A) *4 Wire Harness Clamp (B) *5 Wire Harness Clamp (C) - -
-
Install the wire harness clamp (A) to the crankshaft position sensor connector.
-
Install the crankshaft position sensor with the bolt.
- Torque:
- 8.5 N*m { 87 kgf*cm, 75 in.*lbf }
Note
Make sure that the O-ring is not damaged or does not jump out of position during installation.
-
Install a new clamp.
Note
-
Make sure that no portion of the clamp remains in the clamp installation hole. If there is any portion of the clamp remaining, remove it.
-
Make sure the crankshaft position sensor wire harness is installed in the position shown in the illustration.
-
-
Attach the crankshaft position sensor connector to the No. 1 vacuum transmitting pipe.
-
Connect the crankshaft position sensor connector.
-
Attach the 2 wire harness clamps (B, C).
-
-
TYPE B:
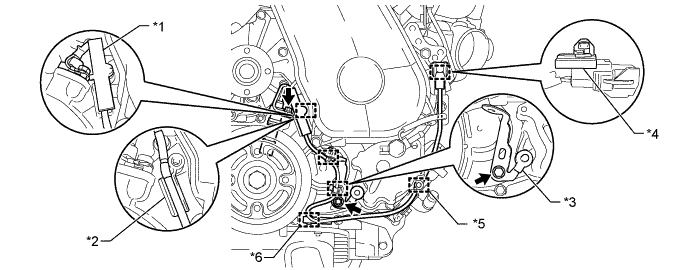
Text in Illustration *1 Clamp *2 Protrusion *3 Bracket (Clamp) *4 Wire Harness Clamp (A) *5 Wire Harness Clamp (B) *6 Wire Harness Clamp (C)
-
Install the wire harness clamp (A) to the crankshaft position sensor connector.
-
Install the crankshaft position sensor with the bolt.
- Torque:
- 8.5 N*m { 87 kgf*cm, 75 in.*lbf }
Note
Make sure that the O-ring is not damaged or does not jump out of position during installation.
-
Install the bracket (clamp) with the bolt.
- Torque:
- 13 N*m { 132 kgf*cm, 9.5 ft.*lbf }
-
Install a new clamp.
Note
-
Make sure that no portion of the clamp remains in the clamp installation hole. If there is any portion of the clamp remaining, remove it.
-
Make sure the crankshaft position sensor wire harness is installed in the position shown in the illustration.
-
-
Attach the crankshaft position sensor connector to the No. 1 vacuum transmitting pipe.
-
Connect the crankshaft position sensor connector.
-
Attach the 2 wire harness clamps (B, C).
-
Attach the 2 wire harness clamps to the bracket (clamp).
-
-
-
TEMPORARILY INSTALL FAN PULLEY
-
Temporarily install the fan pulley with the 4 nuts.
-
-
INSTALL FAN AND GENERATOR V BELT
-
Rotate the V-ribbed belt tensioner pulley clockwise, and then install the fan and generator V belt.
Note
Make sure that the fan and generator V belt is set properly on each pulley.
-
Check that the indicator mark of the V-ribbed belt tensioner Click here.
-
-
TIGHTEN FAN PULLEY
-
Tighten the 4 nuts and install the fan pulley.
- Torque:
- 23 N*m { 235 kgf*cm, 17 ft.*lbf }
-
-
CONNECT VANE PUMP OIL RESERVOIR ASSEMBLY
-
Connect the vane pump oil reservoir with the 2 bolts.
- Torque:
- 8.0 N*m { 82 kgf*cm, 71 in.*lbf }
-