CRANKSHAFT POSITION SENSOR REMOVAL

-
DISCONNECT CABLE FROM NEGATIVE BATTERY TERMINAL
Note
When disconnecting the cable, some systems need to be initialized after the cable is reconnected Click here.
-
REMOVE FRONT SEAT ASSEMBLY RH
-
REMOVE FRONT DOOR SCUFF PLATE RH
-
REMOVE ENGINE SERVICE HOLE SUB COVER SUB-ASSEMBLY
-
Roll up the carpet, and remove the 5 bolts and engine service hole sub cover sub-assembly.
-
-
REMOVE ENGINE OIL LEVEL DIPSTICK GUIDE
-
Remove the bolt, engine oil level dipstick guide and O-ring.
-
-
REMOVE FAN AND GENERATOR V BELT
-
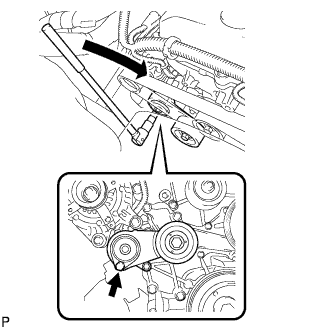
Use the hexagon-shaped part indicated by the arrow in the illustration to move the tensioner pulley downward and decrease the tension in the fan and generator V belt. Then remove the fan and generator V belt.
Note
When removing the fan and generator V belt, do not use the bolt of the idle pulley.
Tech Tips
After removing the fan and generator V belt, move the tensioner upward to the maximum amount.
-
-
DISCONNECT COOLER COMPRESSOR ASSEMBLY
-
Disconnect the compressor and magnetic clutch connector.
-
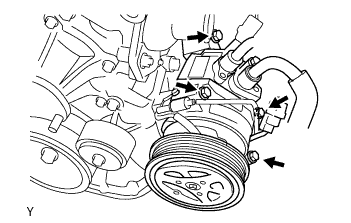
Remove the 4 bolts and disconnect the compressor and magnetic clutch from the engine.
Tech Tips
Disconnect the compressor and magnetic clutch with the No. 1 cooler refrigerant suction hose and No. 1 cooler refrigerant discharge hose stuck by suspended from the rope.
-
Support the compressor and magnetic clutch securely.
-
-
REMOVE NO. 1 COMPRESSOR MOUNTING BRACKET
-
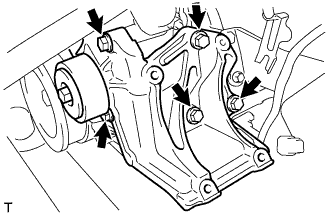
Remove the 5 bolts and No. 1 compressor mounting bracket.
-
-
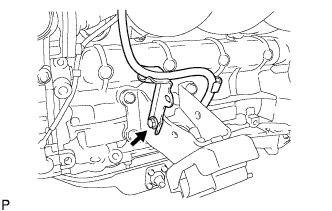
REMOVE CRANKSHAFT POSITION SENSOR
-
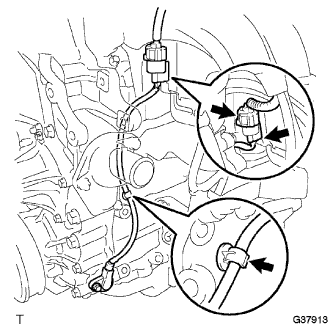
Disconnect the crankshaft position sensor connector and detach the 2 wire harness clamps.
-
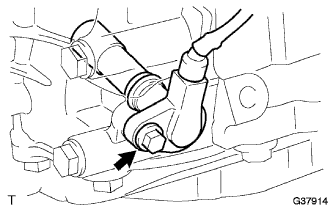
Remove the bolt and crankshaft position sensor.
-