REAR DOOR ADJUSTMENT

Tech Tips
-
Installation is in the reverse order of the removal. But, the installation is indicated only when it has a point.
-
In the RH side, work in the same procedure as in the LH side.
-
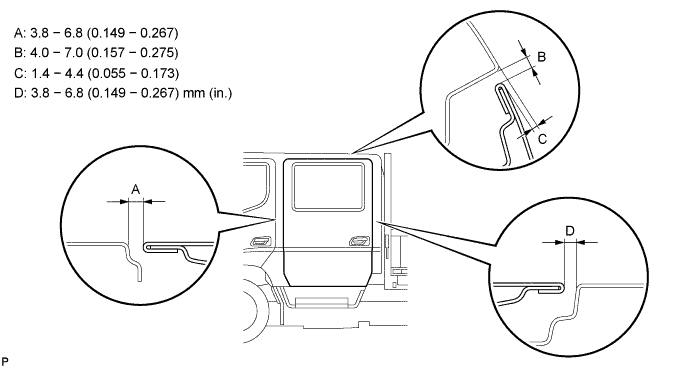
INSPECT REAR DOOR PANEL SUB-ASSEMBLY LH
-
Check that the value is within the standard value.
-
-
REMOVE REAR DOOR WINDOW REGULATOR HANDLE ASSEMBLY (W/O POWER WINDOW))
-
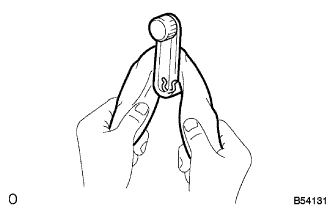
Pull off the snap ring with a shop rag and remove the regulator handle and plate.
-
-
REMOVE REAR ARMREST ASSEMBLY LH
-
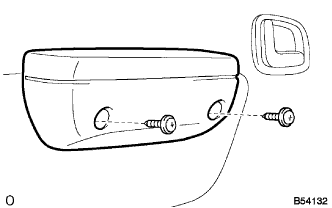
Remove the 2 screws and rear armrest.
-
-
REMOVE REAR DOOR INSIDE HANDLE SUB-ASSEMBLY LH
-
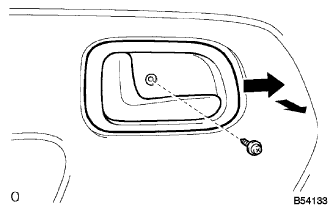
Remove the screw and slide the bezel forward.
-
Disconnect the handle from the link, and remove the handle.
-
-
REMOVE REAR DOOR TRIM BOARD SUB-ASSEMBLY LH
-
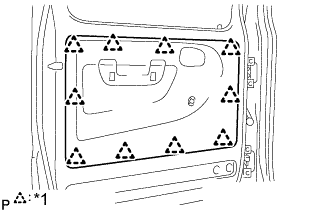
Text in Illustration *1 Clips Using a screwdriver, remove the rear door trim board.
Tech Tips
Tape the screwdriver tip before use.
-
-
REMOVE REAR DOOR SERVICE HOLE COVER LH (W/O ASHTRAY) (See page 75-13)
-
REMOVE REAR DOOR SERVICE HOLE COVER LH (W/ ASHTRAY) (See page 75-13)
-
ADJUST REAR DOOR PANEL SUB-ASSEMBLY LH
-
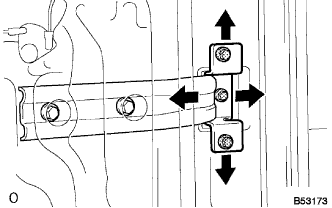
Adjust the door by loosening the body side hinge bolts.
- Torque:
- 23.5 N*m { 240 kgf*cm, 17.3 ft.*lbf }
-

Adjust the door by loosening the door side hinge bolts.
- Torque:
- 18 N*m { 185 kgf*cm, 13.2 ft.*lbf }
-
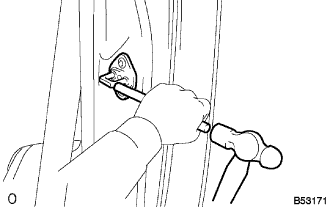
Adjust the striker position by slightly loosening the striker mounting screws, and hitting the striker with a plastic hammer.
-
Tighten the striker mounting screws again.
- Torque:
- 23 N*m { 235 kgf*cm, 17 ft.*lbf }
-