FRONT DOOR DISASSEMBLY

Tech Tips
-
Installation is in the reverse order of removal. But, the installation is indicated only when it has a point.
-
In the RH side, work in the same procedure as in the LH side.
-
See the component drawing of front door Click here.
-
REMOVE DOOR PULL HANDLE
-
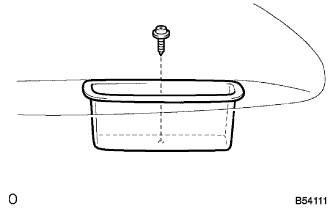
Remove the screw and door pull handle.
-
-
REMOVE FRONT DOOR WINDOW REGULATOR HANDLE ASSEMBLY (W/O POWER WINDOW)
-
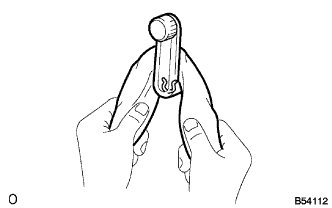
Pull off the snap ring with a shop rag and remove the regulator handle and plate.
-
-
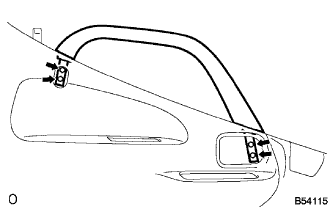
REMOVE FRONT ARMREST BASE PANEL UPPER LH (W/ POWER WINDOW)
-
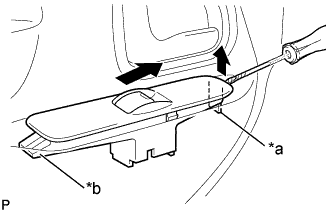
Text in Illustration *a Clip *b Claw Using a screwdriver, remove the panel upper.
Tech Tips
Tape the screwdriver tip before use.
-
Disconnect the connector.
-
-
REMOVE FRONT DOOR INSIDE HANDLE SUB-ASSEMBLY LH
-
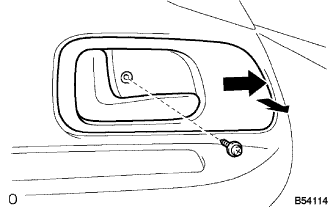
Remove the screw, and slide the bezel forward.
-
Disconnect the handle from the two links, and remove the handle.
-
-
REMOVE DOOR ASSIST GRIP COVER LH
-
REMOVE DOOR ASSIST GRIP ASSEMBLY LH
-
Remove 4 bolts and assist grip.
-
-
REMOVE FRONT DOOR TRIM BOARD SUB-ASSEMBLY LH
-
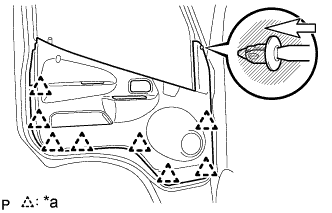
Text in Illustration *a Clips Remove the clip as shown in the illustration.
-
Using a screwdriver, remove the door trim board them disconnect the connector.
Tech Tips
Tape the screwdriver tip before use.
-
-
REMOVE FRONT DOOR GLASS WEATHERSTRIP INNER LH
-
REMOVE FRONT DOOR TRIM BRACKET NO. 1
-
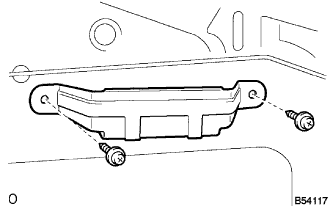
Remove 2 screws and door trim bracket.
-
-
REMOVE FRONT DOOR FRONT LOWER FRAME COVER UPPER LH
-
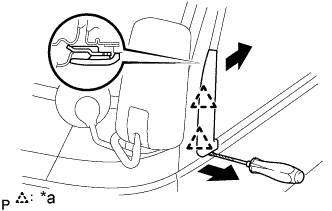
Text in Illustration *a Clips Using a screwdriver, remove the front door front lower frame cover upper.
Tech Tips
Tape the screwdriver tip before use.
-
-
REMOVE FRONT DOOR SERVICE HOLE COVER LH
-
REMOVE FRONT NO. 1 SPEAKER ASSEMBLY (W/ SPEAKER)
-
Disconnect the connector.
-
Remove the 3 bolts and speaker.
-
-
REMOVE FRONT DOOR GLASS WEATHERSTRIP ASSEMBLY OUTER LH
-
REMOVE FRONT DOOR GLASS SUB-ASSEMBLY LH
Tech Tips
Insert a shop rag inside the door panel to panel to prevent scratching the glass.
-
Open the door grass.
-
Remove the 2 bolts and door glass.
-
-
REMOVE FRONT DOOR GLASS RUN LH
-
REMOVE FRONT DOOR WINDOW REGULATOR SUB-ASSEMBLY LH (W/O POWER WINDOW)
-
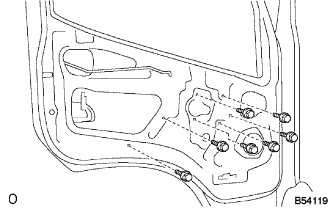
Remove the 7 bolts and regulator.
-
-
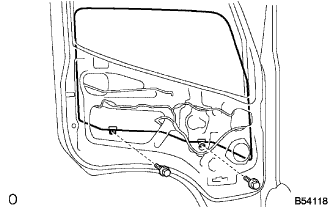
REMOVE FRONT DOOR WINDOW REGULATOR SUB-ASSEMBLY LH (W/ POWER WINDOW)
-
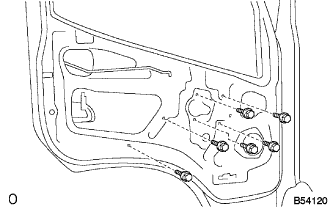
Disconnect the connector.
-
Remove the 6 bolts and regulator.
-
-
REMOVE POWER WINDOW REGULATOR MOTOR ASSEMBLY LH (W/ POWER WINDOW)
-
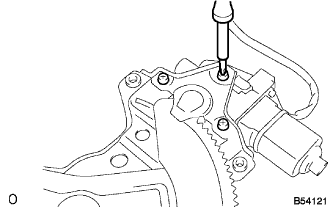
Remove the 3 screws and motor assembly.
-
-
APPLICATION BODY GREASE
-
Apply MP grease to the sliding and rotating parts of the regulator.
-
-
REMOVE FRONT DOOR HANDLE ASSEMBLY OUTSIDE LH
-
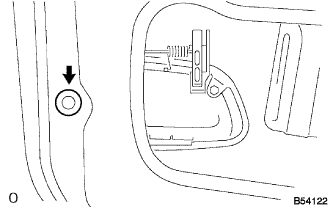
Remove the seal.
-
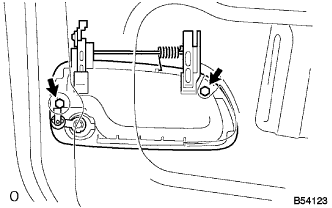
Remove 2 bolts.
-
Disconnect the handle from the 2 links, and remove the handle.
-
-
REMOVE FRONT DOOR LOCK ASSEMBLY LH
-
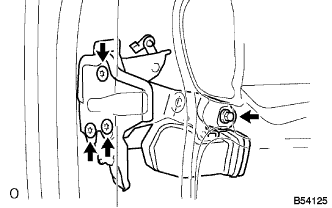
Remove the 3 screws and bolt.
-
Disconnect the connector. (w/ power door lock, w/ wireless door lock)
-
Remove the front door lock control knob.
-
Disconnect the door lock assembly from the link, and remove the door lock assembly.
-
-
REMOVE FRONT DOOR FRAME SUB-ASSEMBLY REAR LOWER LH
-
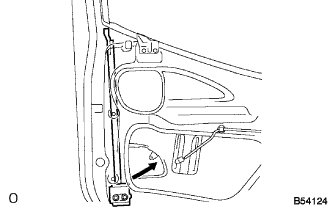
Remove 2 bolts and front door frame.
-
-
REMOVE FRONT DOOR LOCK ACTUATOR ASSEMBLY LH (W/ POWER DOOR LOCK)
-
Remove the 2 screws and front door lock actuator assembly.
-