FRONT WIPER MOTOR INSTALLATION

-
INSTALL FRONT WIPER MOTOR & BRACKET ASSEMBLY
-
Install the front wiper motor & bracket assembly with the 4 bolts.
- Torque:
- 5.5 N*m { 56 kgf*cm, 48 in.*lbf }
-
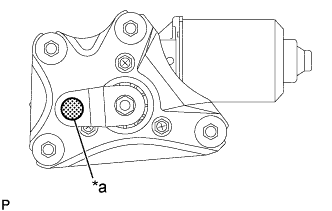
Text in Illustration *a Apply MP Grease Apply MP grease to the crank pivot of the front wiper motor and bracket assembly.
-
Return the boot.
-
-
INSTALL FRONT PANEL COVER SUB-ASSEMBLY
-
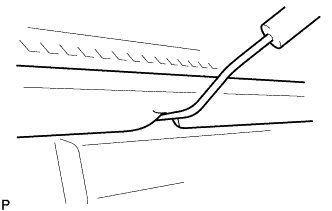
Using a clip remover, pull back the windshield moulding.
-
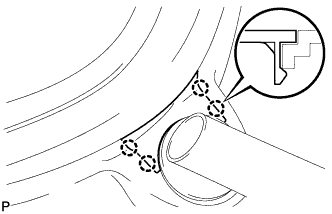
Engage the 8 clips and Install the front panel cover sub-assembly.
-
-
INSTALL OUTER MIRROR COVER RH
Tech Tips
Use the same procedure as for the LH side.
-
INSTALL OUTER MIRROR COVER LH
-
Engage the pin.
-
Engage the 2 claws and 2 clips and install the outer mirror cover.
-
-
INSTALL OUTER MIRROR BEZEL (for RH Side)
Tech Tips
Use the same procedure as for the LH side.
-
INSTALL OUTER MIRROR BEZEL (for LH Side)
-
Engage the 4 claws and install the outer mirror bezel.
-
-
INSTALL OUTER MIRROR GROMMET (for RH Side)
Tech Tips
Use the same procedure as for the LH side.
-
INSTALL OUTER MIRROR GROMMET (for LH Side)
-

Slide the outer mirror grommet, in the direction indicated by the arrow in the illustration, to install it.
-
-
INSTALL FRONT VALANCE PANEL RH
Tech Tips
Use the same procedure as for the LH side.
-
INSTALL FRONT VALANCE PANEL LH
-
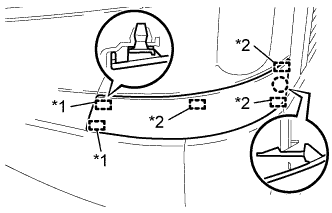
Text in Illustration *1 Pin *2 Guide Engage the claw and 3 guides.
-
Engage the 2 pins and install the front valance panel.
-
-
INSTALL FRONT WASHER NOZZLE HOLDER
Tech Tips
Use the same procedure as for the LH side.
-
INSTALL FRONT WIPER ARM RH
-
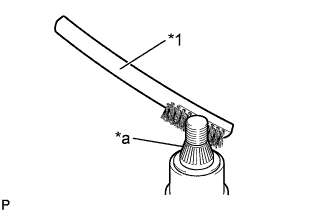
Text in Illustration *1 Wire Brush *a Wiper Pivot Serration Clean the wiper pivot serrations with a wire brush.
-

Install the front wiper arm RH to the position shown in the illustration with the nut.
Installation Position Area Measurement A 40 to 60 mm
(1.575 to 2.362 in.)
- Torque:
- 25 N*m { 255 kgf*cm, 18 ft.*lbf }
Note
Installation should be performed in the automatic stop position.
-
Operate the wiper, check that the windshield moulding and the wiper blade do not interfere with each other.
-
-
INSTALL FRONT WIPER ARM LH
-
Text in Illustration *1 Wire Brush *a Wiper Pivot Serration Clean the wiper pivot serrations with a wire brush.
-
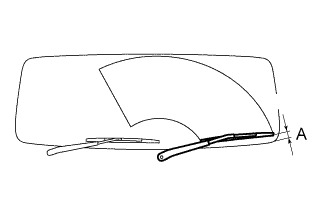
Install the front wiper arm LH to the position shown in the illustration with the nut.
Installation Position Area Measurement A 30 to 50 mm
(1.181 to 1.969 in.)
- Torque:
- 25 N*m { 255 kgf*cm, 18 ft.*lbf }
Note
Installation should be performed in the automatic stop position.
-
Operate the wiper, check that the windshield moulding and the wiper blade do not interfere with each other.
-
-
INSTALL FRONT WIPER ARM HEAD CAP
Tech Tips
Use the same procedure for both sides.
-
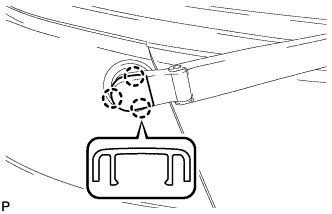
Engage the 3 claws and install the front wiper arm head cap.
-